A roof insurance claim gets stressful fast, especially when water starts showing up in the living room two hours after a Southwest Florida storm rolls through. The good news is that the process is manageable if you move in the right order, document everything, and avoid the people who promise a “free roof” before anybody has even looked at your policy.
What you’ll need before you start
Before you file anything, gather the basics in one place: your declarations page, the storm date, photos, notes about leaks or ceiling stains, and contact details for a licensed local roofer. That small bit of prep saves a lot of scrambling later.
If you already noticed active leaking, write down where it showed up and when. “Drip over the sofa at 8:30 p.m. after Tuesday’s storm” is far more useful than “roof leaked at some point.” Keep a folder on your phone or computer for every photo, receipt, estimate, and email from the start.
Step 1: Make the home safe and stop more damage
Your first job is protecting the house without erasing the evidence. Insurance expects you to take reasonable steps to prevent more loss, not sit back and let water ruin drywall, flooring, and furniture.
Tarp exposed areas if water is getting in
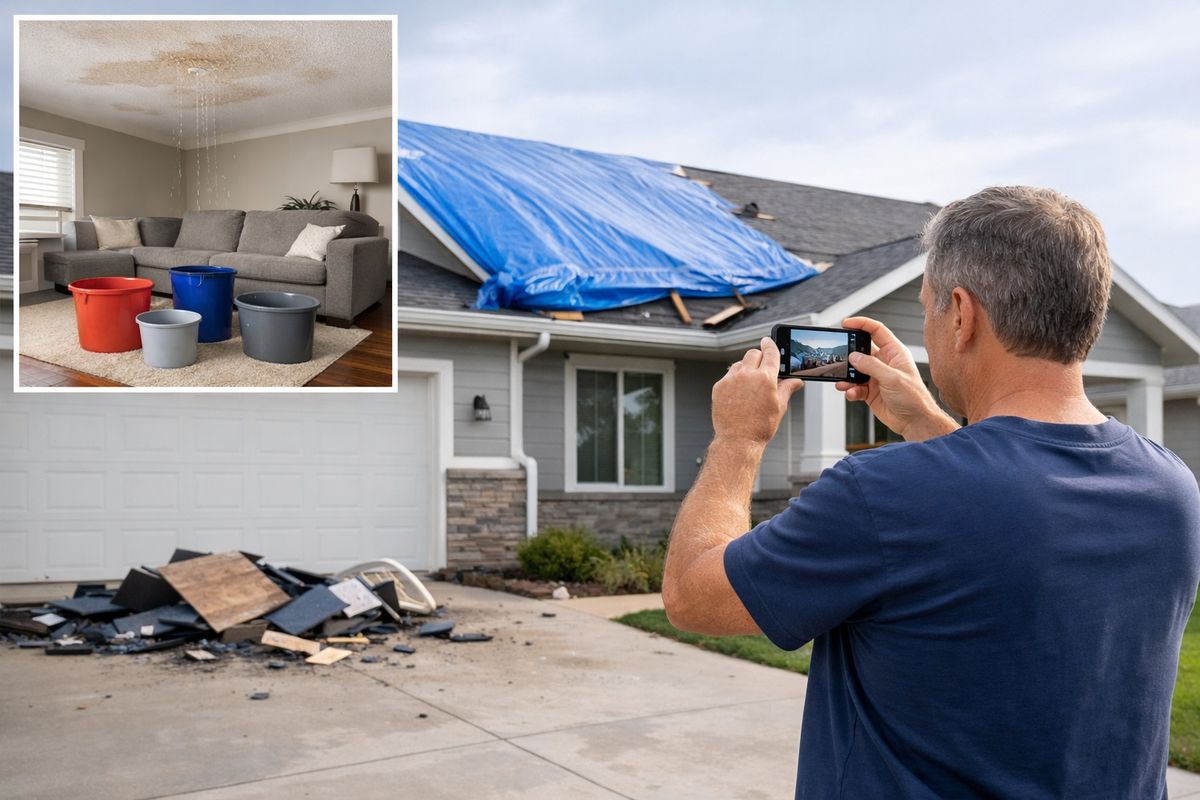
If water is entering, use buckets, move belongings out of the drip path, and place a tarp over exposed sections if it can be done safely from the ground or by an emergency service. Temporary mitigation means temporary. Do not start full roof repairs before the claim is reviewed unless you have no other safe option.
If the leak is active and you need quick guidance on containing it inside the house, this breakdown of
what to do when water starts coming through helps you avoid making the mess worse.
Take photos and video before anything changes
Take clear, time-stamped photos of the roof from the ground, plus gutters, soffit, fascia, screens, attic spots, ceiling stains, and any debris in the yard. Get wide shots first, then closer ones. A clean set of photos is one of the strongest parts of a roof insurance claim, especially now that
stricter documentation requirements are becoming more common.
Save receipts for emergency expenses
Save every receipt for tarps, emergency dry-out, ceiling protection, or service calls. Those costs may be reimbursable if your policy covers reasonable mitigation. Even a $40 tarp receipt matters if it shows you acted quickly and responsibly.
Step 2: Check whether the damage looks claim-worthy
Not every roofing problem belongs in an insurance file. Insurance usually covers sudden storm damage, not a roof simply reaching the end of its life.
Look for signs of wind, hail, or storm-related roof damage
Look for missing shingles, lifted tabs, cracked or displaced tiles, dented metal vents, granules collecting in gutters, fresh leaks after a named storm, or branches that hit the roof. If the damage appeared right after a storm, that timing matters. If you need a clearer picture of the early warning signs, this guide to
what to inspect after a storm hits your roof is worth a quick read.
Know what insurance usually does not cover
Most policies do not cover old age, neglect, slow seepage, prior damage, or bad installation. That line matters a lot in Florida, where carriers often push back on older roofs. A worn roof is not a claim by itself, and
normal wear and tear is one of the most common denial reasons.
ACV means actual cash value, which pays replacement cost minus depreciation. RCV means replacement cost value, which pays based on what replacement costs today, subject to your deductible and policy terms. Same roof, very different payout.
Pay attention to roof age and your deductible
If your roof is 15 to 20 years old, expect extra scrutiny. Many Florida carriers use age thresholds in that range, and older roofs are more likely to be depreciated or denied. Also check your deductible before filing. A hurricane deductible can be a percentage of dwelling coverage, not a flat number, so the out-of-pocket amount can be much higher than expected. With deductibles having
risen 22% in 2025, this is not a minor detail.
Step 3: Get an inspection from a trustworthy local roofing contractor
A pre-claim inspection can save you from opening a weak claim and getting nowhere. It also gives you a documented baseline before the adjuster arrives.
Choose a licensed and insured Southwest Florida roofer
Check for an active license, insurance, a real local address, and recent reviews in places like Fort Myers, Cape Coral, or Punta Gorda. Local matters. Follow-up matters too, especially if code questions or supplemental paperwork come up later. If you want a sharper filter for choosing the right company, this article on
spotting a roofer you can actually trust helps.
Ask for a storm damage inspection and written findings
Ask for photos, marked damage areas, and a written opinion on repair versus replacement. If the contractor uses digital measurement reports, even better. Those reports are widely accepted and can help reduce estimate disputes, with
over 95% of major carriers accepting digital measurements.
Watch for claim scams and high-pressure sales tactics
Be wary of anybody offering to waive your deductible, asking you to sign over benefits right away, or promising insurance will buy you a new roof before the inspection happens. A good contractor documents damage and explains options. A bad one tries to script the whole claim for you.
Step 4: Review your homeowners policy before you file
Ten minutes with your policy can save you from a nasty surprise.
Check covered perils, exclusions, and claim deadlines
Look for wind, hail, hurricane damage, falling debris, and resulting interior leaks. Then look just as carefully at exclusions and deadlines. Some policies are stricter than you would expect, and some carriers expect claims within a limited time after the storm. Filing promptly matters because
waiting too long can weaken the connection between the storm and the damage.
Find your settlement type: RCV vs. ACV
If your policy is RCV, the payout is based on current replacement cost. If it is ACV, depreciation comes off the top. On an older roof, that difference can feel like trying to fill a bathtub with the drain open. Always check this before you assume insurance will cover most of the work.
Understand your deductible and code upgrade coverage
Check whether you have a hurricane deductible, a separate wind deductible, and ordinance or law coverage for code-required upgrades. In Florida, code can affect underlayment, fastening, decking, and more. That can be the difference between a modest repair and a much larger project.
Step 5: File the roof insurance claim with strong documentation
Now file the claim in a way that tells a clean, factual story from day one.
Report the claim promptly
Use the carrier’s phone line, app, or portal. Have your policy number, date of loss, cause of damage, leak notes, and mitigation steps ready. Keep it simple: storm date, visible damage, interior leak, temporary protection installed.
Submit photos, inspection notes, and a simple damage timeline
Send your photos, contractor findings, and a short timeline. For example: storm on Tuesday evening, ceiling leak noticed that night, photos taken Wednesday morning, tarp installed Wednesday afternoon. Short and clear beats long and emotional every time.
Keep a claim file with every email, estimate, and receipt
Store your claim number, adjuster name, inspection date, receipts, and every email in one folder. This part feels boring, but honestly, it is what keeps the process from turning into a second job. If you already want a ballpark on the numbers you may be comparing later, it helps to review
typical repair pricing in Southwest Florida.
Step 6: Prepare for the adjuster inspection
This visit can shape the outcome, so do not wing it.
Have your roofer present if possible
If possible, have your contractor there during the inspection. A roofer can point out lifted shingles, flashing damage, bruising, underlayment issues, or soft decking that may not stand out from the driveway. That extra set of trained eyes often helps keep damage from being overlooked.
Share evidence without overselling the damage
Hand over your photos, written findings, and timeline calmly. Stick to facts. Where the leak showed up, when you noticed it, what you did to protect the house. The trick is being organized, not dramatic.
Ask what happens next and when to expect a decision
Before the adjuster leaves, ask what documents are still needed, whether another inspection is likely, and when you should expect a decision. Many claims move quickly, with a decision in 1 to 10 days, but timelines vary after major storms.
Step 7: Review the settlement offer and decide on repair or replacement
Do not glance at the number and move on. Read the estimate.
Compare the scope of work line by line
Check measurements, tear-off, underlayment, flashing, drip edge, permit fees, dump fees, and code items. Digital measurements are common now, but the estimate still has to match your actual roof.
Know when a supplement or dispute makes sense
If something is missing, ask for a revised scope, supplement, or reinspection. Missing flashing, code items, decking damage, or permit costs can change the payout a lot. Sometimes the first estimate is just incomplete, not final.
Choose repair or replacement based on age, damage, and cost
If your roof is older, has widespread wind damage, or has been leaking in multiple areas, replacement is often the smarter long-game move. Patchwork can look cheaper today and cost more six months from now. For direct repair options and local scheduling, use
https://sancarlosroofing.com/roof-repair.
Troubleshooting common roof insurance claim problems
Problems happen. The key is having a next move instead of freezing up.
Your claim was denied because of wear and tear
Read the denial letter line by line and compare it to the contractor’s report. If your roofer documented storm-created damage and the insurer labeled it age alone, gather stronger photos, storm-date evidence, and a more detailed written opinion. If needed, ask for a reinspection or talk with a public adjuster.
The payout seems too low
Low payouts often come from depreciation, missing line items, or excluded code upgrades. Ask for clarification in writing and compare the insurer’s scope to your roofer’s scope, item by item.
The insurer approved repair, but your roofer recommends replacement
Focus on documentation, not opinions. If repair will violate code, fail to address widespread damage, or leave you with an unmatchable roof system, get that in writing and submit it back for review.
A contractor wants you to sign right away
Slow down. Read the contract, check cancellation terms, and avoid open-ended agreements. Fast is fine after a storm. Rushed is not.
What to expect after approval and what to do this week
After approval, you may receive an initial payment first and a later payment once work starts or finishes, especially on RCV policies. Then comes scheduling, materials, permits, final invoices, and claim closeout.
This week, pull out your policy and book a local inspection if your roof took a hit in the last storm. That one move makes every next step easier.
Frequently Asked Questions
How long do you have to file a roof insurance claim?
It depends on your policy and carrier, but sooner is better. Waiting can weaken proof that the storm caused the damage and may push you past a filing deadline.
Can you file a claim for an old roof?
Yes, if a covered storm caused sudden damage. No, if the problem is just age, wear, or long-term deterioration.
Should you call a roofer or the insurance company first?
A licensed local roofer first is often the better move. A pre-claim inspection helps you understand whether the damage is claim-worthy before you open a file.
Can your insurance company force you to use a specific contractor?
No. Your insurer may suggest companies, but you can choose your own roofing contractor.
What if the adjuster misses damage?
Ask for a reinspection or supplement and submit better documentation, including photos, written findings, and missing line items from your contractor’s estimate.