Blog

  • Roof Inspections for Insurance Claims: What Matters

    Roof Inspections for Insurance Claims: What Matters

    A roof problem rarely starts with a dramatic hole in the ceiling. More often, it starts with a small brown stain after a hard Southwest Florida storm, a few tiles that look slightly off, or a leak that shows up at 2 a.m. A roof inspection for insurance claim purposes turns that uncertainty into usable proof, and that matters a lot more than a quick look from the driveway.

    A roof inspection for an insurance claim is a detailed check of your roof’s condition, damage, age clues, and repair needs, documented in a way your insurer can actually use. It is not just about spotting what looks bad. It is about showing what happened, where it happened, how serious it is, and whether the problem points to repair, replacement, or something the carrier may try to call pre-existing.

    In this guide, you’ll get the full picture:

    • what this inspection is really for
    • when to schedule it
    • what insurers look for
    • what a solid report should include
    • how to prepare your claim file
    • how to sort out repair versus replacement
    • how to avoid the contractor mistakes that make claims harder

    What a Roof Inspection for an Insurance Claim Actually Does

    When a storm rolls through Cape Coral or Fort Myers and leaves water spots on the ceiling by breakfast, the first question is usually simple: is this just a repair, or is this an insurance claim? The inspection is what helps answer that.

    A claim-focused roof inspection documents damage in a way that connects the dots. It records visible issues, possible hidden issues, signs of storm impact, the roof’s condition before failure, and the practical scope of work needed to fix the problem. That can include photos, measurements, notes on materials, and an opinion about whether the damage fits a covered event.

    A casual glance from the yard is not enough. A roof can look mostly normal from below and still have lifted flashing, bruised shingles, underlayment failure, or water intrusion around penetrations.

    Why this inspection matters more than a standard roof check

    A routine maintenance inspection is mostly about prevention. It looks for aging sealant, loose fasteners, drainage trouble, cracked tiles, and the normal wear that comes with sun, heat, and time.

    An insurance-focused inspection is different. It is built around evidence. The inspection has to show likely cause of loss, the affected areas, the extent of damage, and whether the roof can be reasonably repaired or needs broader work. Documentation quality matters just as much as what gets found, because nearly 40% of roofing claims get delayed or denied over weak evidence or measurement mistakes.

    How insurers use the inspection to approve, limit, or deny a claim

    Insurance companies use the inspection to decide three things: is the damage covered, how much of the roof is affected, and what the payout should be.

    That sounds straightforward, but here’s the catch. Carriers are not only looking at the storm itself. Your roof’s age, material, maintenance history, prior repairs, and overall condition matter too. A missing shingle after a wind event may support a claim. A brittle, patchy roof with long-term deterioration may give the insurer room to argue wear and tear instead.

    In 2026, carriers are checking roofs more closely because storms are more frequent and replacement costs are higher. Inspections are being compared against aerial imagery, digital measurements, and prior records. If your roof is older, that scrutiny gets even sharper.

    When You Should Get a Roof Inspection for an Insurance Claim

    Timing matters more than most homeowners expect. If damage is fresh, visible, and tied closely to a recent event, your claim is easier to support.

    Wait too long, and the story gets muddy. Water keeps moving. Wind-damaged sections shift more. Temporary repairs cover the original problem. Then the insurer starts asking whether the issue came from the storm or from neglect.

    After storms, leaks, fallen branches, or visible roof changes

    The obvious triggers are major wind, hail, tropical storms, and debris impact. But the less dramatic signs count too: water stains, drips in the attic, missing shingles, dented metal, lifted flashing, sagging spots, or granules collecting in gutters.

    In Southwest Florida, this is especially common after a fast-moving summer storm that looks minor at first. The sky clears, palm fronds are scattered across the yard, and by evening you notice a damp spot over the hallway. That is enough reason to act.

    If you are dealing with storm-related concerns, it helps to understand what gets checked after severe weather, because some of the most valuable claim evidence is easy to miss from the ground.

    Before the adjuster visit, if possible

    Getting an independent inspection before the adjuster arrives can make the whole process less confusing. You get photos early, measurements early, and a clearer sense of whether the problem is isolated or widespread.

    That does not mean picking a fight with the insurer. It means not walking into the claim process blind. A licensed contractor can flag missing flashing, damaged valleys, or interior signs of moisture that would be easy to overlook during a rushed visit. A strong file with date-stamped photos and videos also helps preserve evidence while the claim is still fresh.

    When not to wait and “see if it gets worse”

    This is one of the biggest mistakes homeowners make.

    Roof damage does get worse. But from an insurance standpoint, waiting creates problems. The visible signs of the original event may fade. New rain can spread the damage into ceilings, insulation, and framing. Then the carrier may argue that part of the loss came from failure to protect the property after discovery.

    Most policies also expect prompt notice. Delays can weaken a claim even when the original event was covered.

    What Insurance Companies Look for During a Roof Inspection

    Insurers are not judging your roof like a neighbor would. They are looking for coverage triggers, exclusions, and cost drivers.

    Storm damage versus wear and tear

    This is where many claims get stuck. Storm damage has patterns. Wind can crease shingles, lift tabs, displace flashing, or break tiles. Hail can leave impact marks, bruising, dents, and chipped surfaces. A branch strike can create a clear point of damage.

    Wear and tear looks different. Think brittleness, curling, old granule loss, faded patch jobs, and slow deterioration from years of heat and UV exposure. Southwest Florida roofs take a beating from sun and storms, so both conditions often exist at the same time. The inspection has to separate them clearly.

    Roof age, material, and expected lifespan

    Age matters because insurers use it as context for both coverage and value. Roof age and condition are common underwriting factors, and older roofs get more scrutiny during claims.

    As a simple rule, asphalt shingles often last 20 to 30 years. Metal and tile can last much longer, sometimes up to 50 years with proper care. But lifespan on paper is not the same as lifespan in coastal Florida. Salt air, heat, wind, and repeated storm exposure can age a roof faster than the brochure suggests.

    Signs of maintenance issues or prior repairs

    Insurers also look for clogged drainage, failed flashing, soft decking, repeated patching, loose vents, and poor workmanship. If a roof has multiple older repairs scattered across different slopes, that can raise questions about long-term condition.

    Here’s the thing: a carrier does not have to ignore neglect just because a storm happened. If unrepaired issues were already present, the inspection may become a debate over what was new and what was not.

    Hidden damage that does not show up from the yard

    Some of the most expensive roof damage is not obvious from below. Underlayment damage, moisture intrusion, attic leaks, rotted decking, and subtle uplift around fasteners can all exist without dramatic exterior signs.

    That is why a real inspection often includes close-up photos, attic review, and sometimes drone documentation for steep or hard-to-see areas. A thorough local inspection report should go beyond curb appeal and get into the parts that actually affect claim value.

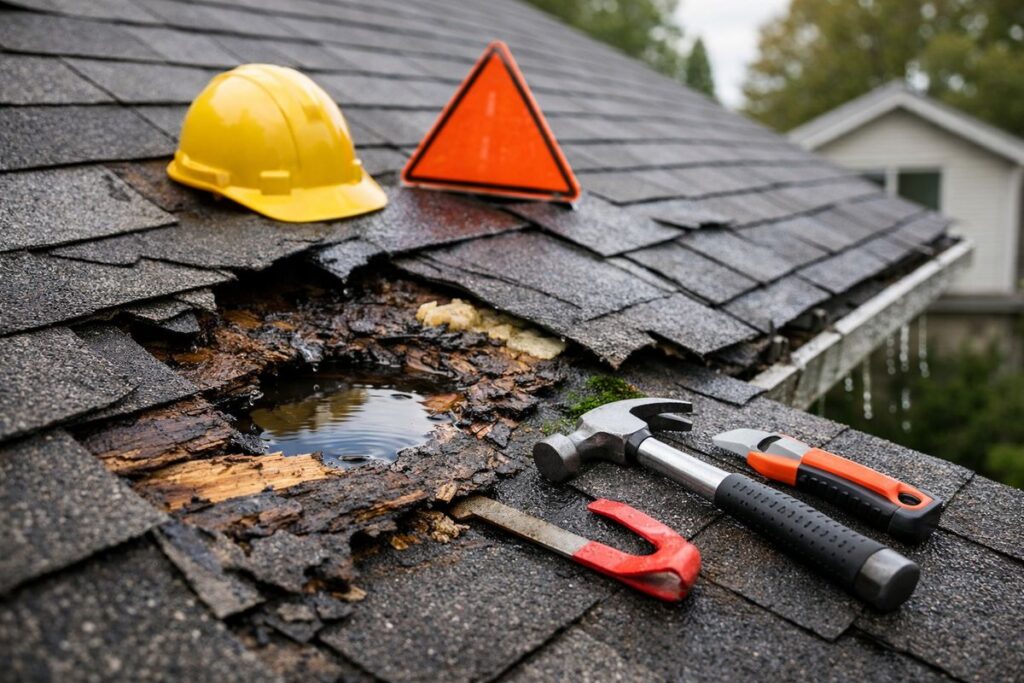
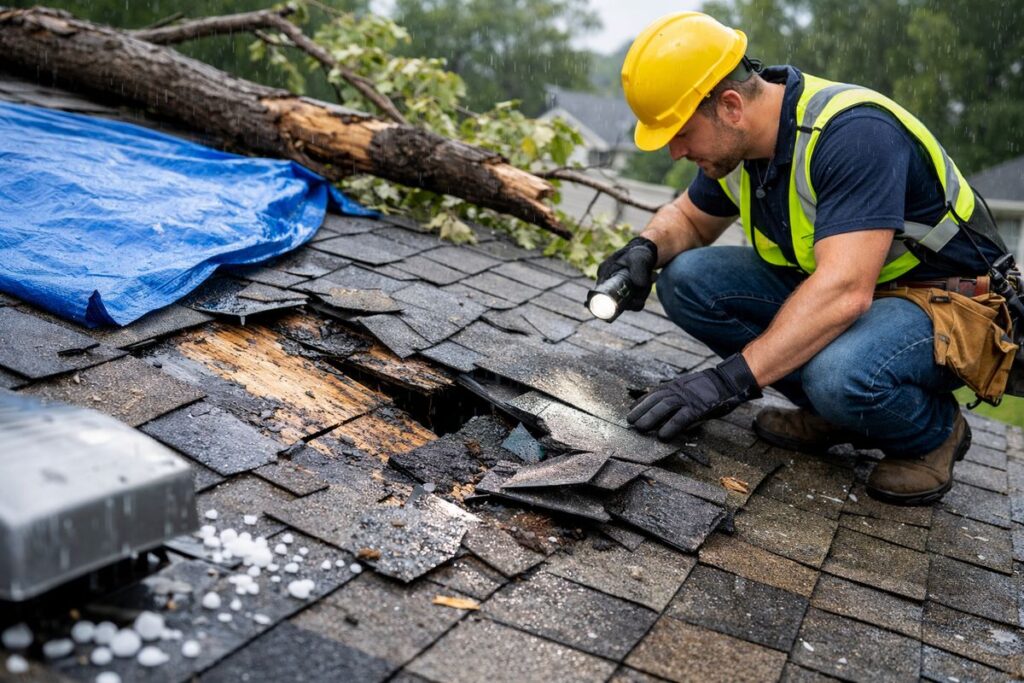
    A close-up inspection scene showing a roofer examining a weathered roof surface with brittle shingles, scattered granules in a gutter, a dented metal flashing edge, and an attic opening nearby with sunlight revealing stains on the underside of the decking

    What a Professional Roof Inspection Should Include

    A rushed sales visit is not the same thing as a professional inspection. If somebody glances up for five minutes and immediately says you need a full roof, slow down.

    Exterior inspection points

    A proper exterior inspection checks the roofing material itself, along with ridges, hips, valleys, flashing, vents, pipe boots, seals, penetrations, drainage paths, gutters, edges, and impact zones. Measurements matter too.

    That last part gets overlooked all the time. Missing ridges, valleys, starter rows, or waste factors can produce low estimates and long supplement battles later. Objective aerial reports can help because claim cycles can shorten when measurement disputes are reduced.

    Interior and attic checks

    Interior evidence helps connect roof damage to actual water intrusion. Ceiling stains, damp insulation, mold, soft spots, and daylight through decking all tell part of the story.

    An attic check is especially useful when the roof surface looks borderline. A small breach on top can create a much clearer pattern underneath. That makes cause and urgency easier to explain.

    Photos, videos, and date-stamped documentation

    Documentation is everything. Wide shots show location. Close-ups show severity. Drone images help with steep sections or large footprints. Short video clips can capture active dripping or lifted materials moving in the wind.

    More is usually better here, as long as it is organized. Good documentation gives the insurer less room to say the evidence is incomplete or too vague.

    A written report with repair or replacement findings

    The written report should identify probable cause of damage, affected roof sections, measurements, material type, age estimate if known, urgency, and whether spot repair is realistic. It should also explain when replacement makes more sense than patching.

    If you are comparing inspection options, it helps to know what affects the price of a proper evaluation, because the cheapest option is often just the shortest one.

    How to Prepare for Your Roof Inspection and Claim

    A little prep saves a lot of back-and-forth later. Think of it like packing for a trip. If your documents are scattered everywhere, the process gets annoying fast.

    Gather the paperwork that helps your claim

    Pull together your policy, prior repair receipts, maintenance records, permits, warranty information, old inspection reports, and any before-photos of the roof or home exterior. Keep it all in one digital folder so you are not hunting through texts and kitchen drawers later.

    That paper trail matters because insurers often want history, not just current damage.

    Document the damage before temporary repairs

    Take photos first. Then do what you need to do to stop further damage, such as tarping or emergency patching. Insurers generally expect you to protect the property after a loss, and temporary repairs can help prevent extra water intrusion.

    Save every receipt. Emergency mitigation costs can matter during settlement.

    Review your policy before you file

    Look for your deductible, any separate wind or hail deductible, filing deadlines, roof exclusions, endorsements, and whether your roof is covered at actual cash value or replacement cost value.

    If you want a broader look at the process around paperwork and timing, this guide to making sense of the claim inspection side fills in the gaps.

    Understanding Repair vs. Replacement in an Insurance Claim

    This is the part most homeowners really care about. Can your roof be fixed, or are you headed toward replacement?

    When a repair may be enough

    A repair may be enough when the damage is isolated, the leak is limited, matching materials are available, and the surrounding roof system is still in solid shape. If one section took a hit but the rest of the roof remains sound, targeted repairs can be reasonable.

    The trick is not confusing a cheap repair with a good repair. If damage is spread across multiple areas, patching one visible problem may just buy a little time.

    When replacement becomes the stronger case

    Replacement becomes easier to support when damage is widespread, multiple slopes are affected, materials are brittle or discontinued, code upgrades are triggered, or hidden water damage has spread below the surface.

    This comes up a lot on older Southwest Florida roofs. Years of heat, humidity, and storm exposure can leave the system too fragile for a reliable spot fix. If repairs would be piecemeal and short-lived, replacement is often the more honest answer. For a deeper breakdown, this article on choosing between patching and starting over helps sort out the decision.

    ACV vs. RCV and why payout can look lower than expected

    Actual cash value, or ACV, means the insurer pays the current depreciated value of the roof. Replacement cost value, or RCV, means the policy is designed to pay what it costs to replace the roof, subject to your deductible and policy terms.

    Older roofs can produce a nasty surprise under ACV coverage. ACV policies can reduce payouts by 30% to 60% on aging roofs. So even when damage is covered, the check may be much smaller than expected.

    Working With the Adjuster Without Getting Lost in the Process

    The adjuster visit is where the paper claim meets the actual roof.

    What happens during the adjuster inspection

    The adjuster is usually checking cause, scope, condition, and estimated cost. Photos get taken, measurements get reviewed, and roof age and prior condition may come up. Digital tools and aerial imagery are common now, but those tools still need to match what is really on your roof.

    If an aerial report misses a valley or a damaged slope, the estimate can come in low.

    Why having your roofing contractor present can help

    Having your contractor there can be useful for one simple reason: fewer missed details. A contractor can point out damage locations, explain why a repair may fail, and flag code-related items that affect scope.

    This does not need to be combative. It is just practical. The cleaner the conversation, the fewer surprises later.

    Supplements, measurement disputes, and low initial estimates

    A supplement is added documentation used to correct a claim scope that missed something. Common examples include omitted flashing, starter rows, valleys, ridge materials, waste factor, or code-required items.

    This is not rare. About 12% of roof claims needed serious negotiation for a fair result. Good photos, clean measurements, and a written scope make those conversations a lot easier.

    How to Choose a Trustworthy Local Roofing Contractor for Claim Help

    After a storm, roofing ads show up fast. Some are helpful. Some are trouble in a polo shirt.

    Green flags to look for

    Look for proper licensing, insurance, a real local presence, photo-heavy inspection reports, clear explanations, and experience with storm damage documentation. Southwest Florida roof types matter here too. Tile, metal, low-slope sections, and coastal weather patterns all create different failure points.

    A contractor should be able to explain findings in plain English, not hide behind jargon.

    Red flags that should make you pause

    Be careful with high-pressure door knocking, promises of a “free roof,” vague contracts, no local address, or refusal to separate inspection findings from sales talk. Be especially skeptical of anybody claiming your insurer must pay for a full replacement before the inspection is even done.

    If you are weighing offers, this guide on spotting a contractor worth trusting is worth reading before signing anything.

    Questions worth asking before you hire

    Ask direct questions. What damage did you find? Can you show photos? Do you recommend repair or replacement, and why? Will you document code-related items? Can you meet the adjuster? What happens if the insurer under-scopes the job?

    Good contractors answer clearly. Bad ones get slippery.

    Common Reasons Roof Claims Get Delayed or Denied

    Most denied or delayed claims do not fall apart over one dramatic mistake. Usually it is a stack of smaller problems.

    Not enough evidence

    Weak photos, missing dates, vague notes, and poor measurements can drag out a claim or sink it. Better documentation can also support supplements and shorten processing.

    Damage blamed on age, neglect, or old repairs

    If your roof shows deferred maintenance, prior leaks, or scattered patch jobs, the insurer may lean hard on pre-existing condition arguments. A strong inspection report helps separate old wear from new storm damage.

    Filing too late or misunderstanding coverage

    High deductibles, exclusions, and ACV policies surprise homeowners all the time. So do filing deadlines. Not every expensive roof problem is covered just because it is serious.

    What to Do If the Insurance Decision Does Not Match the Damage

    A denial or low approval is frustrating, but frantic moves usually make things messier.

    Ask for the reason in writing

    Get the denial or partial approval tied to a specific policy reason. Vague answers are hard to respond to. Written reasons give you something concrete to review and challenge.

    Get a second inspection or stronger documentation

    A second opinion makes sense when the first scope missed slopes, flashing, attic evidence, code items, or full measurements. Updated photos, weather records, and cleaner reports can change the conversation.

    Try one organized next move instead of ten frantic ones

    Start with one simple action: schedule an independent inspection and build one claim folder with photos, receipts, policy documents, and every email tied to the loss. That one habit makes the rest of the process feel a lot less chaotic.

    Frequently Asked Questions

    How long does a roof inspection for an insurance claim usually take?

    Most inspections take between 45 minutes and a couple of hours, depending on roof size, pitch, material, and whether attic access is included. The written report usually takes longer than the site visit.

    Should you get your own roof inspection before filing a claim?

    Yes, if possible. An independent inspection helps you document damage early, understand likely repair scope, and avoid relying only on the insurer’s first look.

    Can you make temporary repairs before the insurance inspection?

    Yes, but document everything first. Take photos and videos before tarping or patching, then save receipts for emergency work.

    Will insurance cover a full roof replacement?

    Sometimes, but not automatically. Coverage depends on cause of damage, how much of the roof is affected, policy terms, age, depreciation, and whether repair is considered reasonable.

    What if no damage is visible from the ground?

    That does not mean the roof is fine. Hidden issues such as lifted flashing, underlayment damage, attic leaks, and soft decking often need a closer inspection to show up.

    Does an older roof automatically mean your claim will be denied?

    No. An older roof gets more scrutiny, but age alone does not erase coverage. The real issue is whether the inspection can show covered damage clearly and separate it from normal aging.

  • Storm Damage Roof Inspection: What Homeowners Need

    Storm Damage Roof Inspection: What Homeowners Need

    After a hard Cape Coral afternoon storm, the yard can tell the story before your ceiling does. If you spot shingles, tile pieces, bent gutters, or a fresh water stain inside, a storm damage roof inspection is not optional, and acting fast can protect both your home and your insurance claim.

    A storm damage roof inspection is a focused check of your roof after wind, hail, heavy rain, hurricanes, or debris impact. The goal is simple: find visible and hidden damage, document it clearly, and figure out if your roof needs a repair or a full replacement.

    Start With Safety and Speed After a Storm

    Storm damage gets worse while you wait. Water finds tiny openings, underlayment stays wet, and a small problem turns into drywall damage, insulation damage, and mold risk faster than most homeowners expect.

    Here’s what you’ll get from this guide:

    • What damage looks like from the ground
    • What hidden signs show up inside
    • How insurance views storm damage
    • What a real inspection should include
    • What to do before cleanup
    • How to choose a trustworthy roofer
    • When repair makes sense
    • When replacement is smarter

    What a storm damage roof inspection actually is

    This inspection is not a casual glance from the driveway. It is a targeted evaluation of the roof surface, flashing, vents, drainage points, and usually the attic or interior spaces to check for storm-related damage that your eyes cannot fully catch from below.

    That matters because ground-level checks only reveal part of the picture. According to the NRCA, about 30% of damage can be identified from the ground, which means most meaningful findings come from a closer professional review.

    Why timing matters more than most homeowners realize

    Once it is safe, document what you see right away and try to get a professional inspection scheduled within about 7 days. That timeline helps connect the damage to a specific storm, before cleanup, sun exposure, and another round of rain muddy the evidence.

    The catch is that many policies now have short reporting windows, often 30 to 60 days after the event. In a tougher claims environment, insurers are tightening inspection and documentation requirements, especially on older roofs, so delay works against you twice: more damage, weaker proof.

    Know What Storm Damage Looks Like From the Ground

    A safe walk around your home can tell you a lot. Not everything, but enough to know if you need to move quickly.

    Common signs of wind, rain, and debris damage

    Look for missing shingles, lifted edges, exposed underlayment, bent flashing, dented gutters, fallen branches, and pieces of roofing material in the yard or driveway. In Southwest Florida, strong wind and driving rain are often the main culprits, especially after summer storms and hurricane bands that hit one side of the house harder than the other.

    Also check the edges of the roofline and the area around downspouts. If you see fresh granules washing out of asphalt shingles, shiny patches, or debris piled in valleys, that can point to storm stress that is easy to miss from the street.

    Signs of hidden damage inside your home

    Sometimes the first warning shows up indoors. Ceiling stains, bubbling drywall, peeling paint, damp attic insulation, musty smells, or drips during the next rain all suggest the roof system has been breached.

    Hidden damage is the part that gets expensive. Research on post-storm failures found underlayment damage appears far more often than homeowners can see from outside, which is why an attic check matters so much.

    Roof-type differences that affect what damage looks like

    Asphalt shingles often show missing tabs, creases, lifted edges, or granule loss. Tile roofs can crack, slip, or break at the corners, sometimes from impact that looks minor from below. Metal roofs may not lose pieces at all, but loosened fasteners, seam issues, and flashing movement can still let water in.

    That difference matters when you are weighing a repair versus a full redo. The same storm can leave one roof with a simple fix and another with system-wide problems hiding underneath.

    Understand the Difference Between Storm Damage and Normal Wear

    This is where many claims get messy. Insurance usually covers sudden damage, not an old roof finally showing its age.

    What insurance usually counts as storm damage

    Covered storm damage is usually tied to a specific event: wind uplift, hail impact, falling branches, flying debris, or storm-driven rain entering through damage caused by the storm. Good evidence includes photos, the storm date, and local weather records that help link the damage to that event.

    A strong inspection report does a lot of the heavy lifting here. It gives the carrier more than a phone call and a few blurry pictures, which honestly is not enough anymore.

    What often gets labeled as wear and tear

    Wear and tear usually means long-term deterioration, brittle materials, older cracks, neglected maintenance, repeated patch jobs, and damage that did not happen suddenly. An aging roof can still suffer real storm damage, but the inspection has to separate new impact from old decline.

    That distinction becomes even more important on roofs older than 10 to 15 years, because insurers tend to scrutinize those claims harder and may ask for more detail before approving payment or continued coverage.

    What a Professional Roof Inspection Should Include

    A real inspection should feel thorough, not rushed. If somebody walks around for ten minutes and jumps straight to a sales pitch, that is not an inspection.

    Exterior inspection points

    The outside review should cover shingles or tiles, ridge caps, flashing, vents, skylights, sealant, gutters, soffits, fascia, and drainage paths. The inspector should also note impact marks, lifted materials, damaged valleys, and spots likely to leak next even if they have not leaked yet.

    Flashing deserves extra attention because it is one of the most common entry points for water after severe weather. Areas around vents, skylights, and roof transitions often fail before the main field of the roof does.

    Interior and attic inspection points

    A careful inspection also checks attic insulation, decking, underlayment condition, moisture intrusion, mold risk, and any daylight coming through roof boards. A proper insurance-focused inspection should not stop at the exterior if there are signs that water traveled deeper into the system.

    This is the part many homeowners skip, and it is often where the most expensive damage lives.

    Photos, notes, and the inspection report you should expect

    You should expect wide shots, close-ups, timestamps, marked problem areas, roof material details, age estimates, and clear repair recommendations. If the roof has multiple slopes or elevations, the report should describe damage by section rather than lumping everything together.

    If you want a deeper look at what carriers usually want to see, it helps to understand which claim documents carry the most weight. Good paperwork can make the adjuster visit cleaner and less argumentative.

    What To Do Right After You Spot Possible Roof Damage

    This part needs to happen in order. Not perfectly, just calmly and quickly.

    Take photos before cleanup or temporary repairs

    Photograph the yard, the roofline from the ground, downed branches, damaged gutters, wet ceilings, attic staining, and any debris that clearly came from the roof. Short videos help too, especially when you narrate the date and show the location.

    Try to get both wide context shots and close detail shots. That combination shows not just what was damaged, but where it happened and how it connects to the storm.

    Prevent more damage without making things worse

    Move furniture and valuables away from active leaks. Put buckets or plastic bins under drips. If water is entering fast, arrange emergency tarping through a qualified roofer.

    Do not climb on the roof and do not attempt a DIY patch. Wet surfaces, loose tile, and wind-damaged shingles are a bad combination, and even a well-meant temporary fix can make later repairs harder.

    Gather the paperwork that makes claims smoother

    Pull together your policy information, prior repair receipts, maintenance records, roof age if you know it, and the storm date. NOAA or National Weather Service records can also help back up the timing if your claim gets questioned.

    If your home already has an active leak, it is smart to review how quickly a leak should be checked so a small breach does not turn into interior damage while you wait.

    How the Inspection Connects to Your Insurance Claim

    The inspection is not separate from the claim. It is the backbone of it.

    When to call your insurance company

    Once you have initial photos and have taken emergency steps to prevent further damage, open the claim. Do not wait for the leak to prove itself.

    Some policies have short notice deadlines, and carriers are asking for more proof than they used to. Reporting promptly keeps your timeline cleaner and reduces the chance that the insurer argues the damage worsened because nothing was done.

    How an inspection report strengthens your claim

    A detailed report helps prove storm-related damage, supports the scope of repair, and pushes back on the common argument that the roof was already worn out. In 2026, claims face closer scrutiny, so clear photos, notes, and material details matter more than ever.

    It also helps you compare what the adjuster says with what the roofer found. That side-by-side view can expose missing line items or overlooked sections of damage.

    What to expect from the adjuster visit

    The adjuster is there for the insurance carrier, not as your independent roof expert. Expect a site visit focused on cause, scope, and what the policy covers.

    Having your inspection report ready keeps the conversation grounded. If you are sorting through estimates and trying to avoid storm-chaser pressure, spend a little time vetting local inspectors the right way before signing anything.

    Repair or Replacement: How Inspection Findings Guide the Decision

    This is usually the question sitting underneath everything else. Can your roof be fixed, or is it time to replace it?

    When a repair usually makes sense

    Repairs usually make sense when damage is isolated, the rest of the roof is in solid shape, and the roof still has good remaining life. A few missing shingles, one flashing issue, a limited leak area, or a small tile impact zone can often be handled without replacing the whole system.

    On a newer roof, targeted repair is often the smarter financial move.

    When replacement becomes the better call

    Replacement usually becomes the better call when damage is widespread, multiple roof sections are affected, leaks keep showing up, or the underlayment and decking are failing along with the surface material. If repairs would touch a large portion of the roof or still leave you with a patched-up aging system, replacement is often the more practical answer.

    In Southwest Florida, storm exposure tends to stack up season after season. One event may be the tipping point, not the whole story.

    Why roof age matters in Southwest Florida

    Sun, humidity, salt air near the coast, and repeated storm seasons wear roofs down faster than many homeowners expect. Asphalt shingles often last about 20 to 30 years, while tile and metal can last much longer with proper upkeep, but climate shortens the real-world lifespan.

    Age also affects insurance scrutiny. A 17-year-old roof with storm damage is still eligible for a legitimate claim, but it will usually need cleaner documentation than a 5-year-old roof.

    How To Choose a Trustworthy Local Roofing Contractor

    After a storm, the wrong contractor can create a second problem.

    Green flags to look for before you hire

    Look for local licensing, general liability coverage, workers’ compensation, clear written estimates, recent nearby jobs, and reviews that sound like real homeowner experiences, not generic praise. A good contractor explains findings in plain English and gives you enough detail to make a decision without feeling cornered.

    Red flags that should make you walk away

    Walk away from door-knocking pressure, vague pricing, no local address, demands to sign before the adjuster visit, and promises that sound too perfect. A trustworthy roofer does not rush you into signing on the spot.

    That is especially true when somebody offers a no-questions-asked inspection after a storm. It helps to know what free inspection offers really mean before you agree to anything.

    Questions worth asking during the estimate

    Ask what damage was found, what looks storm-related versus older wear, whether repair or replacement is recommended and why, what temporary steps are needed now, and what the written report will include.

    If the answers stay vague, move on.

    A Simple Storm Damage Roof Inspection Checklist You Can Use Today

    A storm checklist should be quick enough to use the same day, while the details are still fresh.

    Your 10-minute homeowner checklist

    Walk the perimeter of your home. Look for debris, missing material, gutter dents, and broken branches. Check ceilings, walls, and the attic for stains or damp insulation. Take photos, note the storm date, protect active leaks, review your policy, and schedule a professional inspection.

    That simple walkaround is not the whole inspection. It is your starting line.

    When to stop watching and book the inspection immediately

    Book immediately if you have active leaking, sagging areas, missing shingles or tiles, fresh ceiling stains, a fallen tree impact, or any sign of structural movement. Those are not “keep an eye on it” issues.

    Do one thing today: take a safe ground-level walk around your home and snap a few photos before the next Southwest Florida storm rolls in.

    Frequently Asked Questions

    How soon should you get a storm damage roof inspection?

    As soon as it is safe to document the damage, with a professional inspection ideally within about 7 days. Faster is better because evidence is clearer and claim deadlines can be short.

    Can you inspect your roof yourself after a storm?

    You can do a ground-level check and inspect the attic or ceilings inside, but you should stay off the roof. Wet surfaces, loose materials, and hidden damage make roof climbing risky.

    Will insurance pay for a storm damage roof inspection?

    Sometimes the inspection cost is part of the broader claim process, and sometimes it is your upfront expense. What matters most is getting a report detailed enough to support the claim if coverage is available.

    What if your roof is old but the storm clearly damaged it?

    An older roof can still have covered storm damage. The report simply needs to separate sudden storm-related damage from long-term wear, which is one reason documentation matters so much.

    Is a leak the only sign you need an inspection?

    No. Missing shingles, cracked tiles, dented gutters, lifted flashing, granules in gutters, ceiling stains, and fallen debris can all justify an inspection even before a major leak appears.

    How long does a professional roof inspection usually take?

    For a typical single-family home, many inspections take around 45 to 60 minutes, though complex roofs or attic reviews can take longer. The useful part is not just the visit, but the quality of the report you get afterward.

  • How Soon to Schedule a Roof Inspection After a Leak

    How Soon to Schedule a Roof Inspection After a Leak

    A roof leak rarely stays small for long, especially in Southwest Florida where a hard afternoon storm can turn one ceiling spot into soaked insulation and soft drywall by dinner. If you’re wondering how fast to schedule a roof leak inspection, the short answer is simple: do it right away, and use the steps below to make that call count.

    What this guide helps you decide

    The real question is not whether you should get a roof leak inspection. It’s how quickly you need one after you notice water. In almost every case, the safest answer is the same day or as close to it as possible.

    Here’s the thing: the drip you can see is often only the symptom. Water may already be moving through decking, underlayment, flashing, insulation, or wall cavities before it shows up as a stain in your hallway. That is why waiting to “see if it happens again” is a bad bet, especially during Florida’s rainy stretches.

    What you’ll need before you schedule anything

    Getting a few details together before you call makes the inspection more useful and cuts down on back-and-forth. Think of it like showing up to urgent care with your symptoms written down instead of trying to remember everything on the spot.

    1. Grab your phone, a notepad, and any insurance paperwork you already have.
    2. Pull together the details below before you book the visit.
    3. Keep everything in one folder so you can share it quickly if needed.

    The date and time you first noticed the leak

    Write down when you first saw the stain, drip, or damp spot. If it happened during a 3 a.m. thunderstorm in Fort Myers, note that. If you noticed a musty smell two days later, note that too.

    That timing helps connect the leak to a specific storm event, roof failure, or recent repair. It can also matter if the inspection later supports a claim.

    Photos and video of the interior damage

    Take clear photos of everything you can safely reach. Include ceiling stains, bubbling paint, wet drywall, drips in the attic, water near vents, and any puddling on floors.

    Video helps if water is actively dripping or running down a wall. Try to capture the area from a few angles so the damage is easier to understand later.

    Notes about the last storm or roofing work

    Jot down anything that may point to the cause. Heavy wind, pounding rain, flying debris, a repair from six months ago, or a roof that’s already past 15 years old all matter.

    Older homes deserve extra attention. Nearly 60% of owner-occupied homes were built before 1980, which helps explain why aging roof systems fail in familiar spots like vents, valleys, and flashing.

    Your insurance policy and past claim records

    Have your policy number, carrier name, and any prior roof claim records handy. You do not need to become an insurance expert before making the call. You just want the basics ready if the inspection shows storm damage rather than simple wear.

    If that part feels fuzzy, it helps to understand what matters during a claim-related inspection before you move deeper into repair decisions.

    Step 1: Act the same day you notice the leak

    This is the move that saves the most money and stress. Do not wait a week, and do not assume a stopped drip means the problem is gone.

    1. Protect the inside of your home.
    2. Document what you can safely see.
    3. Schedule the inspection that same day.

    Protect the inside of your home first

    Move furniture, rugs, electronics, and anything valuable out of the wet area. Set a bucket or pan under active drips. If water is near a light fixture, outlet, or ceiling fan, shut off power to that area if you can do it safely.

    Your goal is simple: limit interior damage while you wait for professional eyes on the roof.

    Don’t climb on the roof yourself

    Skip the ladder. A wet roof is dangerous, and even a dry one can be more fragile than it looks after heat, age, or storm damage.

    The catch is that a quick walk up there can make things worse. You can crack tile, loosen shingles, miss the actual entry point, or muddy the documentation if insurance gets involved. A professional inspection is safer and usually more accurate because hidden moisture often requires tools, not guesswork. Certified inspectors use specialized detection methods that a driveway glance cannot match.

    Make the call even if the leak seems small

    A tiny brown ring on the ceiling can still mean wet decking, damp insulation, or failing flashing overhead. Small visible leaks fool people all the time.

    That is one reason leaks stay such a common headache. Nearly 6 million homes report roof leaks nationwide, and a lot of those problems start with a symptom that looked minor at first.

    Step 2: Know the ideal inspection timeline after a leak

    If you want a simple timing rule, use this one: active leak, same day. Recent storm damage, same day or next day. Stain or odor without active dripping, within 24 to 48 hours.

    1. Treat active water as urgent.
    2. Treat stains and musty smells as time-sensitive.
    3. Move even faster if the roof is older or a storm just passed through.

    Schedule immediately for active dripping or storm damage

    If water is entering your home right now, or if the leak started right after a storm, book the inspection immediately. The same goes for missing shingles, displaced tiles, sagging areas, or debris impact.

    In Southwest Florida, this matters even more because roof problems often compound fast between heat, humidity, and repeated rain.

    Schedule within 24 to 48 hours for stains, odors, or intermittent leaks

    A leak that “stopped” still deserves quick attention. Moisture can stay trapped behind paint, inside insulation, or around framing long after the visible drip ends.

    A prompt schedule keeps a manageable problem from turning into mold, rot, or a much larger repair bill.

    Move faster if your roof is older

    An older roof has less margin for error. Materials dry out, sealants shrink, and vulnerable areas around vents or flashing start acting like the weak seams on an old beach umbrella.

    If your roof is pushing 15 years or more, do not give it extra time just because the leak looks modest. Older Florida roofs usually need a quicker decision and closer follow-up. For a broader maintenance rhythm, it helps to know how often Florida roofs should really be checked.

    Expect longer wait times after major storms

    After a regional storm, contractor schedules fill up fast. Early booking matters because being first in line is often the difference between a minor repair this week and temporary damage control for the next two.

    If you suspect wind or storm impact, ask for a visit centered on post-storm roof damage checks rather than a basic estimate.

    Step 3: Check for signs that make the situation more urgent

    Not every leak is a full-blown emergency, but some warning signs should push your inspection to the front of the line.

    1. Walk through the affected area inside.
    2. Look from the ground at the roof exterior.
    3. Escalate quickly if multiple warning signs show up together.

    Interior warning signs you should not ignore

    Watch for expanding ceiling spots, soft drywall, peeling paint, musty odors, attic dampness, visible mold, or water tracking down a wall. If the stain is growing, the problem is active, even if you do not see a steady drip.

    A thorough inspection should start with those clues because they help trace the moisture path indoors before anyone starts guessing outside.

    Exterior signs that often point to roof failure

    From the ground, look for missing shingles, cracked or slipped tiles, bent flashing, debris-packed valleys, heavy granules in gutters, or visible sagging. These signs often point to a roof system problem, not just one random opening.

    Missing materials and sagging matter on their own too. 3.5 million households report missing roofing materials, and that kind of deterioration often travels with leak issues.

    Signs the leak may be spreading beyond one spot

    Water moves. It can enter near a vent, travel along framing, and finally drip several feet away in a hallway or bedroom.

    So if the stain is in one room, do not assume the roof opening is directly above it. That is exactly why a leak-focused inspection matters more than a quick visual estimate.

    Step 4: Choose the right type of roof inspection

    The phrase “free estimate” sounds helpful, but it is not always the same thing as a real leak inspection. You want a visit designed to find the source, document the condition, and explain the repair path.

    1. Ask for a leak-focused inspection.
    2. Confirm what tools and areas are included.
    3. Ask what documentation you will receive afterward.

    Ask for a leak-focused inspection, not just a general estimate

    A general estimate often leads straight to price talk. A leak inspection should begin with symptom tracking, interior evidence, attic review if accessible, and roof-surface assessment aimed at the source of water.

    That is the better way to get useful answers. A strong process should start with the symptom and document the roof, not guess from the driveway.

    Find out whether attic checks and moisture testing are included

    Ask whether the inspection includes attic access, moisture readings, and checks around penetrations like vents, skylights, valleys, and wall intersections. Hidden moisture is where a lot of the real trouble lives.

    Moisture meters and infrared tools can help confirm damp areas your eyes cannot see, which is especially useful when the visible stain is small.

    Ask about photos, documentation, and report turnaround

    You should expect photos, written findings, and a clear explanation of what comes next. For most homes, a written report often arrives within 24 to 72 hours, though deeper scans can take longer.

    If you want a sense of what pricing and scope usually look like, this breakdown of what affects inspection pricing helps set expectations before you book.

    Confirm experience with your roof type

    Tile, shingle, metal, and low-slope roofs leak differently. A contractor who mainly works on shingles may miss the small clues that matter on tile, especially in Florida where underlayment and flashing often tell the real story.

    For local homeowners, a good benchmark is a company that clearly explains its roof inspection process and documents what it finds.

    Step 5: Get your home ready for the inspection

    A little prep makes the appointment smoother and more productive. Less time moving boxes means more time finding the actual problem.

    1. Open up access to affected areas.
    2. Mark where water showed up.
    3. Share the timeline clearly when the inspector arrives.

    Clear access to the attic, garage, and affected rooms

    Move stored boxes away from attic hatches, garage walls, and stained ceiling areas. Make sure the inspector can safely reach access panels and see the areas where you noticed moisture.

    This sounds simple, but it saves time right away.

    Mark where you saw water

    Use painter’s tape or a quick note to mark drip spots, stains, or damp wall areas. If the leak happened during a storm and dried before the appointment, those markers help connect the indoor symptom to the roof trouble area.

    Photos on your phone help here too, especially if the active drip has already stopped.

    Share your timeline and storm history

    Be specific. Mention when the leak started, whether it only happens during heavy wind-driven rain, and if there were any past repairs in the same area.

    A good inspection is part detective work, part roof science. Clear details help narrow the search.

    Step 6: Know what should happen during a professional roof leak inspection

    If the visit feels rushed, vague, or focused only on selling a full replacement, pay attention. A careful inspection has a clear flow.

    1. The inspector should begin inside.
    2. The roof exterior should be checked methodically.
    3. Findings should be documented with next-step recommendations.

    Interior inspection first

    The visit should usually start inside the home. That means checking ceilings, wall areas, attic framing, insulation, and the moisture path around the leak symptom.

    This step matters because the interior often tells the story of where water traveled, even when the entry point is not obvious.

    Exterior roof assessment

    Outside, the inspector should examine shingles or tiles, flashing, vents, valleys, skylights, roof edges, and drainage points. Gutters and downspouts matter too, because backed-up water can worsen leak conditions.

    A quick glance from the ground is not enough.

    Moisture detection and hidden-damage checks

    When needed, tools such as moisture meters or infrared scans help confirm damp sheathing or hidden wet zones. That can reveal damage that has not yet broken through to the ceiling.

    This is where a professional visit earns its keep, honestly. What looks dry on the surface may still be wet underneath.

    Photos, findings, and next-step recommendations

    You should leave with documentation, not just verbal reassurance. The outcome should point to one of a few clear paths: repair, replacement, monitoring, emergency tarping, or insurance documentation support.

    That makes the next decision much easier.

    A roofing inspector in an attic using a moisture meter near wet insulation while another section of the roof is shown outside with flashing, vents, and skylights being examined from a ladder

    Step 7: Use the inspection results to decide on repair vs. replacement

    A leak does not automatically mean you need a new roof. But some leaks are a warning shot that patching the same tired roof again is just spending money slowly.

    1. Look at the scope of damage.
    2. Consider the roof’s age and condition.
    3. Choose the fix that solves the source, not just the symptom.

    When a targeted repair usually makes sense

    A repair usually makes sense when the issue is isolated, such as failed flashing, a limited storm-damaged section, or one problem area on a roof that still has useful life left.

    That is the best-case scenario: fix the cause, protect the home, move on.

    When replacement becomes the smarter move

    Replacement starts making more sense when the roof has widespread wear, repeated leaks, aging materials, soft decking, or multiple failing areas. At some point, patchwork stops being thrift and starts being drag.

    If you’re weighing that call, this guide to choosing between a fix and a full new roof helps sort the money question from the condition question.

    Questions to ask before agreeing to either option

    Ask how long the repair should last, whether matching materials are available, what warranty applies, and whether the recommended work addresses the source of water or only the visible symptom.

    Those answers tell you a lot about the quality of the plan.

    Step 8: Handle insurance the right way after the inspection

    If storm damage may be involved, documentation and timing matter almost as much as the roof condition itself.

    1. Save every photo and report.
    2. Separate storm damage from age-related wear.
    3. Get clear support, not vague promises.

    Save the inspection report, photos, and moisture notes

    Keep the report, inspection photos, moisture readings, and any temporary protection invoices together. Organized records make claim conversations cleaner and faster.

    This also helps if repair scheduling stretches out after a busy storm period.

    Understand the difference between storm damage and wear and tear

    Insurance often treats sudden storm damage differently from long-term aging or deferred maintenance. That distinction can shape whether coverage applies.

    So do not assume every leak is claim-worthy, and do not assume none of it is.

    Ask the contractor how they support claim documentation

    Reasonable help includes inspection photos, scope details, marked damage areas, and written notes. That is useful. Promises of guaranteed claim approval are not.

    If you need the bigger picture, this homeowner guide to sorting out the inspection side of a claim is worth reading before you file anything.

    Step 9: Book the repair quickly and prevent the next leak

    The inspection is the diagnosis, not the cure. Once you know what is wrong, the smart move is to keep the momentum going.

    1. Approve temporary protection if needed.
    2. Schedule permanent repairs quickly.
    3. Plan future inspections before the next leak gets a head start.

    Approve temporary protection if needed

    If repairs cannot happen immediately, temporary protection like tarping or emergency sealing may be the right stopgap. It is not pretty, but it buys time and limits additional water intrusion.

    That is much better than waiting through another rain cycle unprotected.

    Schedule permanent repairs before the next storm cycle

    Delaying repairs after the inspection defeats the point. In Florida, the weather does not give long grace periods.

    If the report says fix it soon, take that literally.

    Plan routine follow-up inspections

    Once this leak is resolved, routine inspections help catch the next weak spot early. Many roofing sources recommend checks every one to two years, and more often after severe weather or on older roofs.

    Common problems and delays that can trip you up

    A lot of roof leak stress comes from hesitation and mixed signals. Most of the common delays sound reasonable at first, but they usually cost time.

    “The leak stopped, so maybe it’s fine”

    A stopped drip only means water is not entering in that exact moment. It does not mean the roof dried out or repaired itself.

    Moisture can linger behind ceilings, in decking, or around flashing long after visible dripping ends.

    “No contractor can come out right away”

    Ask about emergency service, temporary protection, or cancellation openings. Get on the schedule anyway. Even if the full inspection cannot happen that day, early booking puts you in line and may secure faster help.

    “I can’t tell if it’s the roof or something else”

    Leaks near chimneys, windows, HVAC units, or plumbing vents can be tricky. Water can also travel before it appears, which makes the source easy to misread.

    That uncertainty is a reason to inspect promptly, not a reason to wait.

    “I only see a stain, not active water”

    A stain, odor, or bubbling paint still counts as a warning sign. It means water was there, and possibly still is.

    Treat it like smoke from under a door. You do not need to see flames to know something deserves attention.

    What outcome to expect after a prompt inspection

    A good inspection should leave you with clarity, not confusion. Even bad news is easier to handle when you know exactly what you’re dealing with.

    A clearer timeline for repairs

    You should understand whether the issue needs emergency protection, a quick targeted repair, or a bigger replacement conversation. That timeline helps you plan instead of react.

    Better repair or replacement decisions

    Inspection findings keep you from guessing. Instead of jumping to the cheapest patch or the biggest quote, you can choose the option that actually fits the roof’s condition.

    Stronger records for insurance or future resale

    Photos, reports, and documented maintenance help with claims, future buyers, and your own peace of mind. A paper trail is not glamorous, but it pays off.

    Frequently Asked Questions

    How soon should you schedule a roof leak inspection after noticing a leak?

    Schedule it the same day if possible. If the leak is active or started after a storm, aim for same-day or next-day service. If you only see a stain or smell something musty, book within 24 to 48 hours.

    Can you wait if the leak only happens during heavy rain?

    No. Intermittent leaks still mean water is getting in under certain conditions, often wind-driven rain or pooling around flashing or valleys. Waiting usually gives hidden moisture more time to spread.

    How long does a roof leak inspection usually take?

    For a typical single-family home, a leak-focused inspection often takes about 45 to 60 minutes, depending on roof size, pitch, attic access, and whether moisture testing is needed.

    Will a roof leak inspection tell you if you need repair or full replacement?

    That should be one of the main outcomes. A good inspection explains the source of the leak, the overall roof condition, and whether a targeted repair is realistic or replacement makes more financial sense.

    Should you file an insurance claim before the inspection?

    Usually, it makes more sense to get the inspection first so you have evidence, photos, and a clearer idea of whether the damage appears storm-related or more like wear and tear.

    Try this first today

    If you’ve noticed a leak, a ceiling stain, or that damp, musty smell that shows up after rain, make the call now instead of waiting for the next Southwest Florida storm to decide for you. Quick action is the whole trick: protect the inside, document what you see, and schedule the inspection before a small problem gets to grow up.

  • How to Choose the Best Roofing Contractor for an Inspection

    How to Choose the Best Roofing Contractor for an Inspection

    A ceiling stain after a hard Southwest Florida rain can send your mind straight to worst-case scenarios. But the best roofing contractor for an inspection is not just somebody who can get on the roof fast, it is somebody who can tell you, clearly and honestly, whether you need a small repair, a bigger fix, a full replacement, or simply a close eye on things for now.

    Start with what you need from the inspection

    Before you compare companies, get clear on the job itself. You are not buying shingles yet. You are buying an answer.

    That matters because roof problems are rarely as simple as they look from the living room floor. A brown ceiling spot in Fort Myers after a July downpour might come from a cracked tile, failed flashing around a vent, worn sealant, or water that traveled farther than you would expect before showing up indoors. The stain is the symptom. The inspection is supposed to find the cause.

    So the goal is not to hire the loudest company or the one with the slickest truck wrap. The goal is to find a contractor who can inspect thoroughly, explain what was found in plain English, and leave you with a sensible next step.

    What makes the best roofing contractor for an inspection

    The best roofing contractor is usually licensed, insured, experienced with your roof type, easy to reach, and calm when explaining the findings. Bigger is not automatically better. Cheaper is definitely not automatically better.

    Roofing is a huge, crowded industry, and local contractor options are everywhere. That sounds good until you realize quality varies a lot. An accurate inspection depends more on skill and judgment than on brand size.

    Local experience matters more than a flashy sales pitch

    Southwest Florida is hard on roofs. Sun cooks materials year after year. Humidity wears on vulnerable spots. Heavy rain exposes weak flashing and underlayment. Wind turns minor damage into major trouble fast.

    A contractor who works in this climate every day usually spots common failure points quicker and gives better advice about what can wait and what cannot. That is especially true now that Florida wind codes have become a bigger part of replacement decisions after recent storm seasons. Local code knowledge is not a nice extra. It changes the recommendation.

    Strong communication is part of the inspection

    A reliable inspection starts before anybody climbs a ladder. Quick callbacks, clear scheduling windows, direct answers, and a written summary afterward all matter. If communication is messy before the appointment, it rarely gets better once money is involved.

    Homeowners now expect fast follow-up and straightforward pricing, especially when leaks or insurance questions are in play. If you want a deeper look at timing after water shows up inside, this guide on how quickly to get somebody out after a leak helps frame the urgency without panic.

    Repair-versus-replacement judgment is the real test

    This is where the best roofing contractor separates from the average one. A good inspection does not just point at damage. It tells you what that damage means in context.

    Because reroofing and replacement drive a big share of the market, some contractors naturally lean toward the larger job. That does not make every replacement recommendation wrong. It just means the explanation needs to hold up. You want to hear why the issue is fixable, why it is not, how much life is realistically left, and what the risks are if you wait. If you are stuck between those two paths, sorting out the tradeoff between patching and starting fresh can make those conversations much easier to judge.

    A Southwest Florida home with a roofer on a ladder examining cracked roof tiles and flashing near a vent, while a ceiling stain is visible inside an adjacent room, showing the connection between hidden roof damage and an indoor leak

    Credentials to verify before you book anyone

    A roofing inspection is not just a customer service test. It is also a risk test. You are letting somebody evaluate a part of your home that affects insurance, resale, storm protection, and repair costs.

    Florida licensing, insurance, and who is actually doing the work

    Confirm the Florida roofing license. Confirm general liability insurance. Confirm workers’ compensation. And confirm who is actually showing up.

    That last part gets overlooked all the time. Some companies sell the appointment well, then send out somebody with limited experience to do the inspection. In a fragmented industry, verification is not overkill. It is basic homework.

    If you want a local example of what clear inspection credentials look like, this roof inspection page shows the kind of licensing, insurance, and process details worth looking for.

    Reviews, referrals, and local reputation

    Word of mouth still carries a lot of weight, and honestly, it should. Roofing is one of those services where a neighbor’s experience often tells you more than a polished ad ever will. Industry surveys show 74% of homeowners still find contractors through referrals.

    But do not stop there. Pair referrals with online reviews and look for patterns. Missed appointments, slow follow-up, pressure tactics, and vague billing are patterns. So are detailed compliments about honesty, photos, and clear explanations.

    Manufacturer certifications and memberships: nice to have, not the main thing

    Certifications can signal training. Trade memberships can suggest professionalism. Both are good signs.

    But neither one outranks licensing, insurance, local references, and a strong inspection process. A contractor with fewer logos and better documentation is usually the smarter pick.

    Questions to ask before and during the roof inspection

    A few smart questions can tell you a lot, fast. Think of this less like an interview and more like checking the recipe before dinner. You want to know what is actually going into the process.

    What exactly will the inspection include?

    Ask what gets checked. Shingles or tile are only part of it. The inspection should also cover flashing, valleys, vents, soffits, gutters, visible drainage issues, and signs of moisture or damage inside the attic when relevant.

    That is why a “free inspection” can mean very different things from one company to another. Some are real inspections. Some are quick sales visits in disguise. If you want a clearer sense of that difference, it helps to read more about what no-cost roof checkups really include.

    Will you provide photos and a written report?

    You should not have to take roof damage on faith. A good contractor can show cracked tiles, lifted shingles, exposed fasteners, failing sealant, ponding areas, or leak paths with photos and notes.

    Written reports also help if you are talking with an insurer, planning a future replacement, or comparing contractors later. The best roofing contractor makes the invisible visible.

    If you find damage, what are my options?

    Ask for more than one path when possible. Maybe you need a repair now and monitoring after storm season. Maybe a temporary fix buys time for budgeting. Maybe the roof has reached the point where replacement is the honest answer.

    The useful contractor explains tradeoffs. The weak one jumps straight to the biggest invoice.

    How do you handle insurance-related inspections?

    If the issue follows wind or storm damage, ask about photos, documentation, emergency tarping, and how findings are explained for a claim. You want clear evidence and realistic expectations, not grand promises about what insurance will definitely pay.

    For more detail on that process, this breakdown of what matters most during an inspection tied to a claim is worth having in your back pocket.

    Red flags that should make you move on

    Trust your gut here. Roofing problems are stressful enough without adding bad sales behavior to the pile.

    Pressure to sign today or file a claim immediately

    Urgency and pressure are not the same thing. An active leak may need fast action. That is real. But a trustworthy contractor does not corner you into signing on the spot or push every issue into full emergency mode.

    Vague pricing, vague answers, or “we’ll know once we start”

    Some uncertainty is normal before repairs begin. Total vagueness is not.

    If inspection fees, report details, or next-step costs are fuzzy, pay attention. Homeowners increasingly reward transparent pricing for a reason. Clarity usually reflects better systems and fewer surprises.

    No proof of local presence or storm-code knowledge

    After major storms, out-of-town operators show up fast. If a contractor cannot point to a real local footprint, nearby references, or knowledge of Florida wind requirements, move on. Storm work attracts opportunists.

    How to compare roofing contractors without getting overwhelmed

    Keep it simple. Narrow your list to two or three strong options and compare how each one inspected, communicated, and recommended a next step.

    Compare inspection scope, not just the estimate

    One estimate can look cheaper simply because the inspection was lighter. Maybe one contractor checked the attic and documented moisture while another just scanned the roof edge from outside. That is not the same service.

    Compare what was inspected, what was photographed, and how clearly the findings were explained.

    Balance speed, availability, and crew capacity

    Fast matters, especially with leaks and storm concerns. Homeowners often expect work to begin quickly after approval, and many expect an on-site visit within days. But speed without follow-through is just a nice phone call.

    Labor shortages have made scheduling trickier across roofing, so the best roofing contractor is not just available soon. It is somebody with the crew capacity and discipline to actually show up again when the repair or replacement starts.

    Look for a clear next-step plan

    The best inspection leaves you with a roadmap: what is wrong, how urgent it is, what can wait, the rough cost range, and what happens next. That simple.

    If one contractor leaves you calmer and clearer, that usually means something.

    Best contractor fit by roof problem

    Different roof problems call for different strengths. The right fit depends on what is happening at your house right now.

    For an aging roof with no active leak

    Choose a contractor who is good at condition assessment and honest timing. You want a realistic read on remaining life, maintenance needs, and replacement planning, not panic dressed up as advice.

    For storm damage or an insurance claim

    Prioritize fast response, documentation, photos, and familiarity with claim support. A contractor who understands what gets looked at after a storm hits your roof can usually separate real storm damage from older wear more clearly.

    For an active leak or visible interior damage

    Choose somebody who can inspect quickly, trace the leak path, and provide temporary protection if needed. Water often travels before it shows itself indoors, so the ceiling spot is not always directly under the roof failure. That catch surprises a lot of homeowners.

    For a roof that may need replacement soon

    Look for a contractor who can talk through replacement readiness, code-related upgrades, material options, and energy-efficient choices that make sense in Florida heat. Reflective roofing is not hype in this climate. It can be a smart part of the conversation.

    Mistakes that cost homeowners time and money

    A few bad buying habits cause most of the regret.

    Choosing based on the lowest price alone

    A cheap inspection can lead to expensive confusion. Missed damage, weak documentation, or a rushed repair often circles back as another leak and another bill.

    Skipping the paperwork because the contractor “seems nice”

    Friendly matters. Paper matters more. Get written findings, proof of insurance, scope details, and estimates. Nice is great until a disagreement shows up later.

    Waiting too long after small warning signs

    Small stains, missing shingles, cracked tile, and granules in the gutter have a bad habit of getting louder during the next storm cycle. Try one simple thing now: book two or three inspection calls, compare the answers, and notice who makes the problem easier to understand.

    Frequently Asked Questions

    How many roofing contractors should you compare for an inspection?

    Two or three is usually enough. That gives you room to compare communication, inspection scope, and recommendations without turning the process into a full-time job.

    Should you trust a free roof inspection?

    Sometimes yes, sometimes no. The real question is what the inspection includes and whether you get photos, written findings, and clear explanations instead of a sales pitch.

    Is the best roofing contractor always the one with the most reviews?

    Not necessarily. A large number of reviews can help, but local reputation, licensing, documentation quality, and honest repair-versus-replacement judgment matter more.

    Can a roofing contractor help with an insurance claim?

    Yes, but the useful help is documentation, photos, damage explanations, and temporary protection if needed. Be cautious with anybody who promises claim outcomes upfront.

    How fast should a roofing contractor respond after you call?

    For a leak or storm issue, same day is a good sign. For scheduling an inspection, quick follow-up and a clear appointment window matter more than vague promises about being “busy.”

    What if one contractor says repair and another says replace?

    Ask both to show the evidence. Photos, age, material condition, leak history, and code concerns should support the recommendation. The better explanation usually tells you more than the bigger quote.

  • Roof Repair or Replacement? How to Decide

    Roof Repair or Replacement? How to Decide

    A roof problem has a way of turning a normal night into a stressful one, especially when the drip starts over the hallway at 2 a.m. If you’re stuck on the roof repair or replacement question, the right answer usually comes down to three things: how old the roof is, how far the damage goes, and how much risk you take on by waiting.

    Start With the Big Question: Is the Problem Small, or Is the Roof Telling You It’s Done?

    A single leak does not automatically mean your whole roof is finished. But repeated leaks, storm wear, and visible aging across large sections usually mean the issue is bigger than one bad spot. The trick is to look at the roof like a system, not a stain on the ceiling.

    Why “repair vs. replacement” is really a cost-and-risk decision

    This is not just a repair bill versus a replacement bill. It is a short-term savings versus long-term risk decision. Patching an aging roof over and over is usually a money drain, because each small fix buys less time while the chance of interior damage keeps rising.

    A cheap repair feels good on paper. Then the next storm blows through, the same area leaks again, insulation gets wet, and now your “small fix” has dragged drywall, paint, and maybe mold cleanup into the picture. That is the false economy a lot of homeowners get stuck in.

    Why this decision hits differently in Southwest Florida

    Southwest Florida is hard on roofs. Heat bakes materials day after day, humidity hangs around, salt air wears at coastal homes, and hurricane season changes the math fast. Wind-driven rain can get under shingles, around flashing, and into weak spots that looked harmless from the driveway.

    Insurance pressure adds another layer. Older roofs and roofs with visible storm wear can create headaches with claims, underwriting, and renewal terms, so waiting too long can narrow your options.

    When a Roof Repair Makes Sense

    Repairs are the smart move more often than people think. If your roof is still in decent shape overall, a focused repair can solve the problem without pushing you into a major project too soon.

    Localized damage on a roof that still has real life left

    A repair makes sense when the damage is limited and the rest of the roof is performing well. Missing shingles after one storm, a small flashing issue near a chimney or vent, or one leak tied to one clear opening can often be fixed without replacing the full roof.

    That is especially true on newer roofs. If the field of shingles still lies flat, the decking underneath is solid, and the damage is confined to one area, targeted work can buy useful time.

    One-time leaks vs. repeat leaks

    One leak from one source is very different from a leak that keeps coming back. If water is getting in around a vent boot or damaged flashing, that is often repairable. Flashing is the metal material installed around roof penetrations and edges to steer water away. Underlayment is the protective layer beneath the outer roofing material that adds backup water resistance.

    If the same ceiling spot keeps staining after multiple repairs, or leaks show up in different rooms, that points to a broader failure. In that case, the visible drip is probably just the symptom.

    Repairs that protect you while you plan

    Sometimes a full replacement is the right move, but not the right move this week. A temporary repair can help protect your home while you sort out insurance, budget, or contractor scheduling. That can be reasonable, as long as the repair comes with a clear next step.

    If the roof has taken storm damage, start with a proper evaluation instead of guessing from the yard. A damage check after severe weather can help separate cosmetic issues from system-wide problems.

    When Roof Replacement Is the Better Call

    Replacement starts to make more sense when the roof is failing as a whole, not just in one small area. At that point, fixing one section is like patching one worn-out tire on a car with three others about to go.

    Your roof is near the end of its expected lifespan

    Age matters, even if it is not the only factor. The average roof being replaced is just over 19 years old. Asphalt shingles, which cover about 80% of homes, usually last about 20 to 30 years depending on quality and conditions. Metal can run 40 to 80 years. Tile can last much longer.

    In Florida, sun, storms, and moisture can shorten that timeline. A 22-year-old shingle roof that has already been repaired a few times deserves a much harder look than a 10-year-old roof with one torn section.

    Damage is widespread, not isolated

    Replacement is usually the better call when problems show up across the roof system. Curling shingles, cracks, bald spots from granule loss, sagging areas, soft decking, multiple leaks, or damage on several slopes all suggest the roof is wearing out, not just suffering from one defect.

    Interior clues matter too. Recurring ceiling stains, damp insulation in the attic, or musty smells after rain can point to water getting in at more than one location.

    Storm damage changed the whole equation

    Storm damage often looks smaller than it is. A few lifted shingles near the edge may be the part you can see, while loosened seals, damaged underlayment, or compromised fasteners are hiding elsewhere. In Southwest Florida, hurricane-force winds and driven rain can turn a “repair one section” idea into a much bigger conversation.

    That is one reason Florida stays busy year-round with roofing claims and replacement work. In fact, Florida is a major replacement market because hurricane and hail activity keep demand high.

    Repeated repairs are starting to cost more than they save

    Here is a simple rule: if repair costs keep stacking up, stop looking at each invoice by itself. Add the total spent over the last few years, then include the risk of interior damage, the hassle of emergency calls, and the chance that insurance starts asking harder questions.

    If a major repair is getting close to half the cost of a new roof, replacement usually makes more financial sense. Not because replacement is cheap, but because endless patching rarely stays cheap for long.

    A wide view of an aging shingle roof with curled edges, bare patches of lost granules, a few sagging spots, and multiple areas exposed after a storm, with roofers removing old shingles and exposing sections of the roof deck beneath.

    The 5 Things to Check Before You Decide

    Before you call three contractors and get three wildly different opinions, it helps to have a basic framework. These five checks keep the decision grounded.

    Roof age and material

    Start with the install date if you know it. If not, closing documents, permit records, or past invoices may help. Asphalt shingle roofs are the most common and generally have the shortest lifespan of the main Florida options. Metal and tile behave differently and often last much longer, though fasteners, flashings, and underlayment can still age out sooner than the surface material.

    Extent of damage

    Look for the difference between one trouble spot and a pattern. Outside, that can mean missing shingles, loose tiles, exposed nail heads, sagging lines, or wear across multiple sections. Inside, watch for stains, bubbling paint, damp attic insulation, or repeat moisture in the same weather conditions.

    If you are unsure how often inspections make sense in this climate, this guide on Florida roof check timing gives a useful baseline.

    Leak history and repair history

    A roof with one isolated repair on file is not alarming. A roof with a repair history thicker than a takeout menu stack is sending a message. Repeated fixes in the same area usually mean the root problem was never fully solved, or the surrounding materials are failing too.

    Insurance, inspection, and resale impact

    Roof condition affects more than water intrusion. It can affect claims, premiums, underwriting, and a future sale. Older roofs often draw more attention during insurance reviews and buyer inspections. Homes with failing roofs can run into appraisal issues, financing delays, and price cuts during negotiations.

    If you expect an insurance claim to be part of the process, read up on what the inspection side of a claim usually involves before signing anything.

    Budget now vs. total cost later

    National averages help set expectations, but they are not quotes. Verisk put the average repair cost at $4,699 in 2025, while replacement averages vary widely by source, from around $9,500 to more than $17,000. The spread is huge because roof size, material, labor, and code upgrades change everything.

    The point is not to chase the lowest number. It is to decide which option gives you the best value over the next several years.

    What Roof Costs Really Look Like

    Roof pricing can feel all over the place because, honestly, it is. Two houses on the same street can get very different quotes if one has a simple walkable roof and the other has a steep cut-up design with hidden damage under the surface.

    Typical repair and replacement price ranges

    Repairs often land in the low-thousands, but larger repairs can climb quickly. Replacement costs are much broader. RubyHome places the typical replacement range at $5,868 to $13,217 nationally, with premium projects going much higher. Other sources show higher averages, which tells you exactly how much prices can swing.

    That is why online averages are a starting point, not a decision.

    What changes the price in Southwest Florida

    In this region, price moves with roof size, pitch, material, access, permits, disposal, and code-related upgrades. If damaged decking needs replacement, the quote goes up. If storm-readiness features, coastal exposure needs, or upgraded underlayment are part of the job, the quote goes up again.

    Labor and material shifts do not help either. Roofing costs have continued rising, which makes delaying a truly necessary replacement a gamble.

    When spending more actually makes sense

    Spending more can be the smarter move if it buys longer service life, fewer repairs, better storm performance, or easier insurability. A full replacement can also protect resale. For many sellers, a new asphalt roof can support stronger pricing and reduce inspection drama.

    If you are comparing bids and trying to sort fair pricing from fluff, this breakdown of what inspection pricing usually covers can make the early numbers easier to read.

    How to Choose a Roofing Contractor Without Getting Burned

    Once you know whether repair or replacement makes more sense, the hiring decision becomes the next big risk point. A good contractor gives clarity. A bad one gives vague promises, pressure, and paperwork that somehow never answers the real question.

    Questions to ask before you sign anything

    Ask exactly what is being repaired or replaced, what materials are included, who handles permits, what the warranty covers, how cleanup works, how long the job should take, and how hidden damage will be priced if the decking underneath turns out to be bad. Get those answers in writing.

    A reliable inspection should also explain whether your issue is isolated or systemic. If you need a better sense of what separates a trustworthy roofer from a slick salesperson, this guide to screening local roofers carefully is worth the few minutes.

    Red flags that should make you walk away

    Walk away from vague estimates, unusually low bids, high-pressure sales tactics, no local address, no proof of licensing or insurance, or promises that sound polished but oddly thin on detail. Storm-chaser behavior is a problem in Florida for a reason.

    If a contractor says your roof needs immediate replacement but cannot show clear documentation of why, slow down.

    What a solid roof inspection and estimate should include

    A solid inspection should document damage with photos, explain the roof’s overall condition, and spell out whether you are dealing with one failed area or a broader aging problem. A clear estimate should break out labor, materials, permits, disposal, and possible hidden damage terms instead of dropping one mystery number at the bottom of the page.

    For a useful example of what a documented inspection can include, this roof inspection page lays out the kind of written report, photos, and roof-access details that help you make a calmer decision.

    A Simple Way to Make the Call

    At some point, you have to stop circling the question and choose the path that fits the roof you actually have, not the one you wish you had.

    Choose repair if…

    Choose repair if your roof is relatively young, the damage is isolated, the leak is tied to one clear source, and the rest of the roof is still in good condition. A good repair should meaningfully extend the roof’s useful life, not just buy a few nervous months.

    Choose replacement if…

    Choose replacement if the roof is older, wear is widespread, leaks keep returning, storm damage reaches multiple areas, or insurance and resale concerns are starting to creep in. Replacement also makes sense when repair costs keep stacking up without solving the bigger problem.

    Try this next: book one thorough inspection and compare two honest estimates

    Book one thorough inspection, then compare two estimates side by side: one for repair, one for replacement. Seeing both options in plain numbers, with photos and scope details, usually makes the answer much clearer.

    Frequently Asked Questions

    Can one leak mean you need a whole new roof?

    Not always. One leak can come from a small flashing failure, a damaged vent boot, or one missing shingle. If the roof is otherwise sound, repair may be enough. If leaks keep returning or the roof is old and worn across multiple areas, replacement becomes more likely.

    How long should an asphalt shingle roof last in Florida?

    A typical asphalt shingle roof often lasts about 20 to 30 years, but Florida heat, storms, humidity, and salt exposure can shorten that range. Condition matters more than the calendar.

    Is it better to repair or replace a roof after storm damage?

    It depends on how widespread the damage is. A few isolated problems may be repairable. Damage across several slopes, lifted materials, repeat leaks, or hidden water intrusion usually pushes the decision toward replacement.

    Will an old roof affect insurance or selling your home?

    Yes. Older or visibly damaged roofs can affect underwriting, claim handling, buyer inspections, appraisals, and financing. A roof that looks tired can become a negotiation magnet during a sale.

    How many estimates should you get?

    Two or three detailed estimates are usually enough. More than that often creates noise instead of clarity, especially if the scopes are not comparable. What matters is getting clear documentation, not collecting the biggest pile of quotes.

  • Roof Inspections in Florida: How Often You Really Need One

    Roof Inspections in Florida: How Often You Really Need One

    After a hard summer storm in Fort Myers, a faint ceiling stain can turn into a full-blown roof panic by breakfast. The short answer on roof inspection Florida timing is simple: plan on one inspection every year, another after any major storm, and an extra check when your roof is getting older or your insurance company starts paying closer attention.

    A roof inspection is a professional check of your roof’s condition, damage, weak spots, and remaining life. In Florida, that inspection is not just maintenance. It is part storm prep, part insurance defense, and part budget protection.

    How Often You Really Need a Roof Inspection in Florida

    If your roof looks fine from the driveway, that does not mean much in Florida. Sun, humidity, wind, and sudden downpours can wear out roofing materials quietly, and the first visible clue is often a stain inside your house.

    Here’s what you should follow: once a year for normal upkeep, right after any serious storm, and before insurance renewal if your roof is aging. That schedule catches the problems that cost the most when ignored.

    A Florida suburban home viewed from the driveway with an inspector on a ladder examining the roof edge after a recent storm, with scattered palm fronds and damp shingles visible under bright sunlight

    Why Florida Roofs Need More Attention Than Roofs in Other States

    Florida roofs age faster. That is the plain truth. Heat bakes shingles, UV rays dry out sealants, humidity feeds hidden moisture problems, and coastal air speeds up corrosion. A roof in Southwest Florida lives a harder life, kind of like a car left in the sun every day with salt in the air.

    Weather, Wind, and Sun Add Up Fast

    A roof does not need a hurricane to get damaged. Normal afternoons do enough over time. Shingles can curl, tiles can crack, flashing can loosen, and sealant around vents can fail long before you see water indoors.

    Florida also gets hit with relentless exposure. The state sees 2,500 hours of sunlight a year, along with heavy humidity and violent weather swings. That constant stress shortens roof life, especially for asphalt shingles.

    Insurance Pressure Changes the Timeline

    The catch is that your inspection schedule is often driven by insurance, not just condition. Florida premiums jumped hard in recent years, and roof risk is a big reason. Once a roof starts getting older, carriers often want proof that it still has useful life left.

    That gets more serious after about 15 years, when roof age is the leading reason for non-renewal in Florida. If your roof is in that range, waiting for a renewal warning letter is a mistake.

    The Simple Florida Inspection Schedule to Follow

    If you want the easiest rule to remember, use this:

    • Once a year
    • After major storms
    • Before insurance renewal on older roofs
    • Before buying, selling, or major repairs
    • Any time you spot leak signs

    Once a Year for Most Homes

    An annual inspection is the baseline. Even a newer roof should be checked once a year because small issues stay small only if somebody catches them in time.

    Spring is a smart time to do it, before hurricane season and before roofing schedules get packed. A yearly visit also gives you a paper trail, which matters more than most homeowners expect.

    After Any Major Storm or Hurricane

    If a named storm passes through, or your area gets heavy wind, hail, or falling debris, move the inspection up. Damage is often hidden. A shingle can lift and reseal badly. Flashing can bend just enough to leak later. A tile can crack without falling apart.

    If you are dealing with storm concerns, it helps to know what post-storm inspections usually involve before you make calls.

    Before Insurance Renewal on an Aging Roof

    Once your roof is around 10 to 15 years old, inspect it before renewal season. That gives you time to fix a few issues, gather documentation, or discuss remaining life before your carrier asks.

    This matters even more now that insurers are using drones and satellite imagery to review roofs without stepping on your property.

    Before Buying, Selling, or Planning Repairs

    A roof inspection also makes sense before a sale, after a leak, or when you are stuck between patching and replacing. If water has shown up inside, do not wait. A stain is like smoke from a toaster, the problem started before you noticed it.

    If you are chasing down active water intrusion, this guide on how quickly to get a leak checked is worth reading.

    How Roof Age Changes What You Should Do

    Age changes everything in Florida roofing. The same small defect means one thing on a 6-year-old roof and something very different on an 18-year-old roof.

    Roofs Under 10 Years Old

    Stay on the annual schedule, inspect after storms, and keep records. Newer roofs usually need less intervention, but paperwork still matters for future claims and renewals.

    Roofs 10 to 15 Years Old

    This is the watch-it-closely stage. Wear starts showing up faster, and insurance questions become more common. Annual inspections are non-negotiable here.

    Roofs 15+ Years Old

    Older Florida roofs need proactive attention. Full stop. Even if no leak is visible, you need a current assessment, photos, and a realistic conversation about remaining life. Waiting for failure usually turns a manageable decision into an expensive emergency.

    What a Florida Roof Inspection Should Actually Include

    A real inspection is more than a quick glance and a sales pitch. You want condition details, photos, and clear next steps. A solid example of what gets checked can be seen in this overview of Florida roof inspections.

    Exterior Roof Condition

    The exterior review should cover shingles, tile, metal panels, flashing, valleys, vents, ridge caps, soffits, fascia, gutters, and visible storm damage. Flashing deserves extra attention because small mistakes there cause a lot of leaks.

    Interior and Attic Clues

    Good inspections also look inside. Ceiling stains, damp decking, mold risk, poor ventilation, and sagging can all point to roof trouble. Sometimes the attic tells the story before the roof surface does.

    Photos, Notes, and Next Steps

    Photos and a written report matter. If you get insurance questions later, or need repair estimates from multiple contractors, good documentation saves time and arguments.

    Roof Inspection vs. Wind Mitigation vs. 4-Point: What’s the Difference?

    These get mixed up all the time, but they are not the same thing.

    Standard Roof Inspection

    This checks condition, damage, wear, weak areas, and estimated remaining life. It helps with maintenance, repair decisions, and storm follow-up.

    Wind Mitigation Inspection

    This documents storm-resistant features such as roof shape, deck attachment, underlayment, and opening protection. It can save real money. A wind mitigation inspection often costs far less than the annual insurance discount it unlocks.

    4-Point Inspection

    A 4-point inspection covers the roof, electrical, plumbing, and HVAC systems. Florida insurers often require it for older homes, especially around the 20 to 25 year mark.

    Roof Certification

    A roof certification is narrower than a full inspection. It usually states the roof’s estimated remaining life for insurance or real estate purposes.

    Signs You Should Schedule an Inspection Sooner, Not Later

    Some triggers should move your inspection to the top of the list.

    Visible Warning Signs

    Missing shingles, cracked tiles, rusted metal, sagging spots, granules in gutters, ceiling stains, musty smells, and active leaks all deserve prompt attention.

    Less Obvious Triggers

    A neighbor’s roof damage after the same storm, a carrier notice, an aerial review, or simply not having had your roof checked in years are all good reasons to schedule sooner.

    When an Inspection Leads to Repair vs. Replacement

    An inspection is only useful if it helps you make the next decision.

    When a Repair Still Makes Sense

    Repairs make sense when the damage is localized, flashing issues are isolated, or the roof still has solid remaining life. One leak does not always mean full replacement.

    When Replacement Is the Smarter Move

    Replacement is usually the better call when wear is widespread, leaks keep returning, or age and insurance pressure are closing in. Florida’s 25% rule can also change the math after storm damage, because partial repairs may trigger code-driven replacement.

    If you are weighing both paths, it helps to see how contractors compare repair versus full replacement.

    How Inspection Findings Help With Insurance Claims

    Photos, dates, storm notes, and clear damage descriptions give your claim substance. Vague paperwork does not. If the inspection is tied to a claim, stronger documentation can make the difference between a smooth process and a fight.

    How Much a Roof Inspection Costs in Florida

    Inspection cost is usually modest compared with the cost of surprise repairs.

    Typical Price Ranges

    A standard roof inspection in Florida usually runs about $150 to $400. Wind mitigation inspections often cost $75 to $175, and 4-point inspections commonly fall around $100 to $300.

    What Can Change the Price

    Price changes with roof size, material, height, pitch, accessibility, attic access, drone use, and how much insurance documentation you need.

    How to Find a Trustworthy Roof Inspector or Roofing Contractor in Southwest Florida

    Not every inspection offer deserves your trust, especially after storms.

    What to Look For

    Look for Florida licensing, insurance, local experience, clear written reports, and somebody who can explain findings in normal language. Familiarity with code updates and carrier requirements matters too.

    Red Flags to Avoid

    Be wary of pressure tactics, vague promises of huge claims, no written report, or anybody pushing you to sign today. Fast talk is not the same thing as a real inspection.

    Smart Questions to Ask Before You Book

    Ask what the inspection includes, what the report looks like, how quickly you will get it, and whether the findings can support insurance use. This advice on choosing somebody credible for the inspection can help you sort through local options.

    A Practical Roof Inspection Plan You Can Use This Year

    Check your roof’s age. If it has been more than a year since the last inspection, book one. If your roof is over 10 years old, get ahead of renewal season. If you have never done wind mitigation, add that too. One appointment now is a lot easier than dealing with a leak during the next August downpour.

    Frequently Asked Questions

    How often should you get a roof inspection in Florida?

    For most homes, once a year is the right baseline. You should also schedule one after major storms and before insurance renewal if your roof is getting older.

    Do you need a roof inspection after every hurricane?

    If your home experienced strong wind, debris impact, heavy rain, or nearby storm damage, yes. Even when everything looks fine from the ground, hidden damage can shorten the roof’s life.

    Is a roof inspection the same as a 4-point inspection?

    No. A standard roof inspection focuses on the roof alone. A 4-point also reviews electrical, plumbing, and HVAC systems, and it is often required for older homes.

    Can a wind mitigation inspection lower your insurance?

    Yes. If your home has qualifying wind-resistant features, the inspection can lead to discounts, and in many cases it pays for itself quickly.

    How much does a roof inspection cost in Florida?

    Most standard inspections fall around $150 to $400, depending on the home and roof type. Specialized reports like wind mitigation and 4-point inspections are often priced separately.

    What if your insurer says your roof has a problem based on drone photos?

    Get an in-person inspection with photos and a written report as soon as possible. A professional evaluation gives you real documentation to respond with, instead of guessing from an aerial image alone.

  • Storm Damage Roof Repair: What to Check First

    Storm Damage Roof Repair: What to Check First

    Storm damage roof repair usually starts with a small, annoying clue: a brown ceiling stain, a drip near the hallway light, or a few shingles sitting in the yard after a rough night of wind and rain. If that happened to your house in Southwest Florida, the first job is not guessing how bad it is. The first job is checking the right things in the right order, so you can protect your home, document the damage, and figure out if you need a repair or something bigger. Here’s what you’ll get in this guide:
    • What to check first
    • Signs that need fast action
    • Repair vs. replacement basics
    • What to do in 48 hours
    • How insurance usually works
    • How to avoid bad contractors
    Storm damage roof repair means fixing roof damage caused by a specific weather event, usually wind, hail, heavy rain, or falling debris. That can be as small as a few lifted shingles or as serious as soaked decking, failed flashing, and leaks spreading into your attic and ceilings.

    What to Check First After a Storm

    The morning after a storm is when people make expensive mistakes. You see water, panic, and head for the ladder. Don’t. Start simple. Stay off the roof, check for active leaks, look at ceilings and the attic, scan the yard for roofing pieces, and take photos before cleanup. That first pass tells you how urgent the problem is and gives you a cleaner record if insurance gets involved.

    Start Inside Before You Look Up

    Indoor signs show up fast, sometimes before exterior damage is obvious from the driveway. Look for yellow or brown water spots, peeling paint, bubbling drywall, damp insulation, dripping around light fixtures, and that musty smell that shows up when moisture has been sitting for even a short time. In a Fort Myers house after a hard overnight storm, a small stain in a guest bedroom can actually point to roof damage several feet away from where the water appears. Water travels. That’s why ceiling marks matter, even when they seem minor. If you already have an active leak, what to do in the first hours after water gets in can help limit the mess while you wait for a full inspection.

    Check From the Ground, Not From the Roof

    Use binoculars or your phone zoom and walk the perimeter. Look for missing shingles, lifted corners, exposed nail lines, bent flashing, cracked tiles, dented gutters, and fallen branches. Debris piles can tell a story too. If you find shingle tabs or bits of tile in the yard, something happened up top. There’s a good reason to keep your feet on the ground. 86% of roofer fatal injuries are tied to falls, slips, and trips, and trained roofers still treat wet roofs carefully. A storm-damaged roof is not the place for a quick DIY climb.

    The Most Common Signs of Storm Damage Roof Repair Needs

    Some damage is obvious. Some is sneaky. The trick is knowing which signs mean “keep an eye on it” and which mean “call today.”

    Wind Damage

    Wind damage often starts at edges, ridges, and weak attachment points. Watch for shingles that are torn, curled, creased, or completely gone. On tile roofs, check for slipped or displaced pieces. On any roof, loose ridge caps and visible nail lines are bad news. The catch is that wind damage gets worse fast. A shingle that lifted and settled back down may still be compromised. Once the seal breaks, the next storm has an easier time peeling it back.

    Hail and Impact Damage

    Hail is less common than wind in some parts of Southwest Florida, but impact damage still shows up from hard debris, palm fronds, and tree limbs. On shingles, look for bruised spots and granule loss. Granules are the gritty top layer that protects the shingle from sun and weather. If that layer is gone, the shingle ages faster. Also check metal vents, gutters, and flashing for dents. On tile, look for cracks or chipped corners. After any major impact event, hidden damage is possible from the ground up, which is why hail affects millions of properties and keeps repair crews busy long after the storm passes.

    Water Intrusion and Leak Damage

    Leaks leave clues inside and outside: ceiling stains, wet roof decking, soft spots, sagging areas, and failed flashing around vents, skylights, and chimneys. Flashing is the metal that seals joints and openings, and it’s one of the most common leak points after storms. A leak never gets cheaper by waiting. That’s not sales talk. It’s just how water works. It stains ceilings, ruins insulation, softens wood, and turns a repair into a much larger project.

    When a Roof Repair Is Enough and When Replacement Makes More Sense

    This is the question behind almost every storm call. You want a fix that holds, not a patch that buys three months.

    Repair Usually Makes Sense If…

    A repair is often the smart move when damage is isolated to one area, flashing failed at one penetration, or a few shingles or tiles were lost in a single storm event. It also makes more sense when your roof still has real life left in it. A practical rule used across the industry is that repair usually works best when the roof is under about 15 years old and the cost stays well below replacement. If pricing is the big concern, start by comparing the damage scope with local repair cost ranges in Southwest Florida. A normal quote should make sense on paper, not feel like a mystery number.

    Replacement Usually Makes More Sense If…

    Replacement starts to make more sense when the roof is older, leaks keep coming back, decking feels soft, or damage spreads across a large section. Aging roofs take a harder hit in severe weather. In fact, aging roofs sustain 50% more damage during major storms. If your roof is 20 years old, has already been patched a few times, and now took another storm hit, patching can turn into chasing leaks from room to room. At that point, replacement is often the cheaper decision in the long run.

    Roof Material Changes the Decision

    Asphalt shingles are the most common choice in the U.S., and they’re usually the easiest to repair. Tile lasts a long time, but matching older tile can be tricky, especially when color and profile have changed. Metal roofs can hide damage at seams and fasteners even when panels look fine from the ground. Material lifespan matters too. Roof life varies by material, from about 20 to 30 years for many asphalt roofs to much longer for metal and tile. Age plus storm damage tells you more than either one alone.

    What to Do Right Away to Prevent More Damage

    The next 24 to 48 hours matter most. You’re buying time and protecting evidence.

    Use Temporary Protection if Water Is Getting In

    If water is actively entering the house, use buckets, move furniture, pull rugs, and dry wet areas as quickly as possible. Emergency tarping covers an opening to reduce more water intrusion until permanent repair can happen. It is a temporary shield, not a finished fix. Expect emergency work to cost more than planned work. Fast response, weather conditions, and after-hours labor all raise the price.

    Take Photos and Build a Simple Damage Record

    Photograph ceiling stains, attic leaks, wet insulation, shingles in the yard, dents on metal, broken tile, and any fallen limbs. Take wide shots and close-ups. If your phone timestamps images, even better. Add a short note with the storm date, what you noticed first, and any emergency work done. If you end up filing a claim, that record makes the process cleaner. For a step-by-step breakdown, sorting out the paperwork after storm damage helps keep things organized.

    Avoid the Common Mistakes That Make Claims Harder

    Don’t throw away damaged materials right away. Don’t wait weeks to report obvious storm damage. Don’t climb onto a wet roof. And don’t hire the first contractor who appears at your door with a clipboard and a promise.

    How Insurance Claims Usually Work for Storm Damage Roof Repair

    Insurance usually looks for sudden storm damage, not old wear and tear that finally became visible during the storm. That distinction matters a lot.

    What Insurance Usually Looks For

    Most policies are set up to cover direct storm events such as wind, hail, and falling debris, while excluding deterioration from age, poor maintenance, or prior damage. Good photos, weather dates, and a roofer’s inspection report help connect the damage to the storm instead of leaving it open to debate.

    What to Have Ready Before You Call

    Have your storm date, photos, visible damage notes, emergency repair invoices, and any past roof records you can find. Keep it simple. The goal is not building a legal file in your kitchen. The goal is showing what happened, when it happened, and what you did to prevent more damage.

    How to Choose a Trustworthy Local Roofing Contractor

    After a storm, bad contractors move fast. Good ones do too, but in a very different way.

    Green Flags to Look For

    Look for licensing, insurance, local experience, written estimates, clear scope of work, warranty details, and help with inspection photos or claim documentation. A solid contractor explains the damage in normal language. No smoke, no pressure, no dramatic sales pitch. If you want a sharper filter for that search, this guide on spotting a dependable roofing company is worth reading.

    Red Flags to Walk Away From

    Walk away from door-to-door pressure, cash-only deals, vague pricing, no local address, no written contract, and anyone promising to “handle everything” without showing you real documentation. That last one catches a lot of people.

    What Storm Damage Roof Repair Usually Costs

    Storm pricing depends on roof size, material, access, urgency, and whether the damage is isolated or widespread. Steep roofs, tricky access, permit requirements, and code upgrades can all push the total up.

    Typical Repair and Replacement Ranges

    As a planning tool, emergency tarping often falls around $200 to $600. Minor repairs commonly land between $250 and $750. Moderate repairs often run $1,000 to $3,500. Full replacement after storm damage can range from $8,000 to $20,000 or more, while the average roof replacement cost nationally is about $9,526. Those numbers won’t match every house, but they do help you spot a quote that feels wildly off. If you need direct service, you can also review repair options here: roof repair services.

    How to Protect Your Roof Before the Next Storm

    Prevention is boring right up until it saves you thousands. In Southwest Florida, that usually means cleaning gutters, trimming back overhanging limbs, checking flashing, and having older roofs inspected before storm season instead of after it. Regular upkeep really does help. Small tasks like clearing debris and fixing minor problems early can extend roof life and reduce the odds that the next storm turns into an interior leak.

    Try This This Week

    After the next rain, walk the perimeter of your house and take five photos of anything that looks off: a stain, a bent gutter, a shingle on the ground, debris in a valley, a damp soffit. It takes ten minutes, and that small habit can catch a much bigger repair early.

    Frequently Asked Questions

    How soon should you inspect for storm roof damage?

    Check inside and from the ground as soon as it is safe after the storm passes. If you spot leaks, missing materials, or debris impact, schedule a professional inspection quickly.

    Can a few missing shingles cause a leak?

    Yes. A small opening can let wind-driven rain get under surrounding shingles and into the underlayment or decking, especially during the next storm.

    Is storm damage usually covered by homeowners insurance?

    Often yes, if the damage came from a sudden event like wind, hail, or falling debris. Normal aging, wear, and old leaks are usually treated differently.

    How do you know if your roof needs repair or full replacement?

    Look at age, damage spread, leak history, and cost. A newer roof with one damaged section is often repairable. An older roof with widespread damage or recurring leaks usually points toward replacement.

    Should you tarp the roof yourself?

    Not if the roof is wet, steep, or debris-covered. Tarping helps prevent more water intrusion, but safety comes first, and storm-damaged roofs are risky.
  • Roof Repairs Near Me: How to Find the Right Pro

    Roof Repairs Near Me: How to Find the Right Pro

    A brown ceiling spot after a hard Fort Myers afternoon storm can turn a normal day into a scramble. When you search for roof repairs near me, you are not just looking for somebody with a ladder. You are trying to find out what is actually wrong, how serious it is, and who you can trust to fix it without making a stressful week worse.

    Start with the problem in front of you

    Roof trouble usually starts small. A drip near a vent. A shingle in the yard. A stain that was not there last month. The catch is that small signs do not always mean a small problem, especially in Southwest Florida, where wind-driven rain has a way of sneaking into weak spots and spreading farther than you expect.

    That is why the first goal is not buying the biggest job. It is getting a clear diagnosis. You need to know if you are dealing with a simple repair, hidden storm damage, or the beginning of an insurance claim.

    A close view of a homeowner looking up at a ceiling with a dark brown water stain near a light fixture while rainwater drips into a bucket below, with storm-darkened windows visible in the background

    What “roof repairs near me” should really mean

    This search should mean more than closest company, fastest ad, or first person to pick up the phone. It should mean a local roofer who knows the weather, knows the code, and can tell you plainly if your roof needs a fix or a full reset.

    Why local experience matters more in Southwest Florida

    Southwest Florida roofs take a beating. Hurricane season is obvious, but the daily wear matters too: harsh sun, salty air near the coast, heavy rain, and long humid stretches that break down sealants, flashing, and exposed materials faster than many homeowners expect. Even older shingles can fail below hurricane-force winds, which is exactly why local judgment matters.

    A contractor who works in Cape Coral, Fort Myers, and surrounding areas regularly will usually spot Florida-specific problems faster. That includes uplift around edges, cracked tile, worn pipe boots, and leak patterns tied to wind direction, not just the obvious hole.

    When speed matters and when rushing backfires

    If water is actively entering your home, decking looks soft, or part of the roof appears sagged or lifted, speed matters. Get the roof protected first, even if that means emergency tarping. If the issue is less urgent, a day spent checking credentials can save a lot of money later.

    Rushing into the first quote often leads to vague promises, weak repairs, or pressure to replace a roof that still has usable life. Quick action is smart. Panic hiring is not.

    Repair or replacement? How to tell which problem you actually have

    A lot of homeowners search for repair because replacement sounds expensive. Fair enough. But patching the wrong roof is like refilling a tire with a nail still in it. It buys time, not a solution.

    Signs a repair may be enough

    A targeted repair often makes sense when the damage is limited and the rest of the roof is in decent shape. Think a few missing shingles, one damaged tile, a small leak around a vent pipe, or isolated flashing damage where metal pieces direct water away from seams and walls.

    If the roof is otherwise solid, a local fix can be the right move. That is especially true if the contractor shows photos, explains the weak spot, and confirms the surrounding materials still have life left. If you are dealing with an active interior drip, this guide on what to do first when water shows up inside can help you stay ahead of the mess.

    Signs replacement may make more sense

    Replacement starts to make more sense when leaks keep coming back, repairs are scattered across multiple areas, or the roof feels tired everywhere, not just in one spot. Soft decking, widespread granule loss, broken tiles across more than one slope, or years of patchwork are all warning signs.

    If your roof is nearing the end of its expected life, one more repair can turn into throwing good money after bad. That happens a lot with aging asphalt roofs, especially after repeated storm seasons.

    How age and roofing material change the decision

    Material changes everything. Asphalt shingles are still the most common choice in the U.S., used in about 80% of projects, mostly because they are affordable and easy to repair. Tile and metal usually last longer, but they need the right repair method. A cracked tile is not handled like a lifted shingle, and a metal roof leak often comes down to fasteners, seams, or flashing details.

    Age matters too. Many roofs last anywhere from 20 to 50 years depending on material, installation quality, ventilation, and maintenance. In Florida, heat and storms can shorten the practical timeline.

    How to find a roofing contractor you can actually trust

    This is the part that matters most. A good repair starts with a good inspection, and a good inspection starts with a contractor who treats your roof like a diagnosis, not a sales target.

    Check licensing, insurance, and local credentials first

    This step is non-negotiable. Verify state licensing, liability insurance, and workers’ compensation coverage before anything else. If a worker gets hurt or the job goes sideways, missing coverage can become your problem fast.

    Also check that the company actually works in your area. Local presence matters for permits, follow-up, and warranty support. If you want a deeper checklist, this breakdown of how to spot a dependable local roofer is worth reading before you sign anything.

    Look for proof of real local work

    Word of mouth still carries weight. In fact, 74% of homeowners say personal recommendations are their top way to find a roofer. But do not stop there. Look for nearby projects, before-and-after photos, and reviews that mention communication, cleanup, punctuality, and whether the final bill matched the estimate.

    That kind of detail tells you more than a five-star average ever will.

    Pay attention to communication and response time

    Roofing repairs feel urgent, so responsiveness matters. A good contractor should explain what was found, send photos, outline next steps, and give a realistic timeline. Not perfect, just clear.

    That matters even more now because labor shortages and high demand can stretch schedules. Most homeowners expect work to begin within two weeks of accepting a quote, though emergency protection often happens sooner.

    Ask how the inspection is done

    Ask what gets checked. Shingles or tiles, flashing, underlayment, attic moisture, ventilation, and storm damage should all be part of the conversation. Underlayment is the water-shedding layer beneath the outer roofing material, and it matters more than most homeowners realize.

    A real inspection should feel calm and specific. If the conversation jumps straight to a replacement without showing you why, slow down.

    A roofer on a ladder photographing cracked shingles and damaged flashing on a sun-baked roof, with a clipboard, roof tiles, and the edge of an attic vent visible in the scene

    What to ask before you say yes to a quote

    A quote should make the job easier to understand, not murkier.

    What should be included in a roofing repair estimate

    The estimate should spell out the scope of work, materials, labor, cleanup, disposal, permit needs, timeline, warranty, and payment terms. Flashing should be identified if metal transitions or wall connections are involved. Underlayment should be named if any part of the waterproof layer is being replaced.

    If you want to compare numbers in more detail, this page on what repair pricing looks like locally gives useful context before you approve a job.

    How many quotes to get and how to compare them

    Try to get two or three quotes if the roof is stable enough to wait. Compare what is actually being fixed, how long the repair is expected to hold, what materials are being used, and when the company can start.

    The cheapest quote is often cheap because something is missing.

    Red flags that should stop you cold

    Vague estimates, pressure tactics, huge cash deposits, no proof of insurance, no local address, and replacement recommendations with no photo evidence are all bad signs. After major storms, watch for storm chasers who show up fast, disappear faster, and leave warranty problems behind.

    Cost, insurance, and timing: the parts that catch homeowners off guard

    Roofing gets expensive fast, and surprises usually show up in these three areas.

    What roof repairs usually cost

    Repair cost depends on roof type, pitch, access, extent of damage, material matching, and whether emergency tarping is needed. National averages can help with rough expectations, but old online numbers are often stale because prices keep climbing. In a typical year, roofing prices tend to rise 3% to 5%.

    When insurance may help and when it may not

    Insurance may help with sudden storm damage, fallen branches, or wind-related openings. It usually does not help with normal wear, neglected maintenance, or a roof that has simply aged out. Good photos matter. So does fast documentation after a storm. If you are sorting through that process, this guide on handling the paperwork after storm damage can make it less confusing.

    How soon a good contractor should be able to start

    Emergency protection can often happen quickly. Actual repair timing depends on weather, permits, crew availability, and material lead times. Good contractors may book out, especially after hurricanes, but clear scheduling should still be standard.

    Best roofing choices for common Southwest Florida situations

    If your roof is older with one small leak, a repair-first inspection is usually the best fit. Ask for photos and ask whether nearby materials are brittle or failing too. That keeps a contained issue from turning into an oversized sale.

    After storm or hurricane damage, the best fit is a contractor who can tarp fast, document thoroughly, and explain damage clearly for insurance purposes. Speed plus paperwork matters here.

    If your roof is nearing end of life, stop thinking patch by patch and start looking at the bigger picture. Material choice, ventilation, and code upgrades all affect long-term value in a hot, storm-prone climate.

    If your goal is lower upkeep and longer service life, metal or tile may be worth discussing if repair turns into replacement. Higher upfront cost, fewer repeat fixes. Simple tradeoff.

    For direct local repair help, look here.

    Common mistakes that lead to bigger roofing bills

    Waiting too long after you notice a leak

    A small leak can spread into insulation, decking, drywall, and mold. Water rarely stays where it first shows up. Waiting a month can turn a repair into a much larger job.

    Choosing by price alone

    Cheap repairs can skip permit work, better materials, or warranty coverage. Workmanship matters just as much as the product on the truck. Poor installation shortens roof life fast.

    Skipping the paperwork

    Get the estimate in writing. Get photos. Get warranty details. Save storm documentation. Good paperwork protects you if a repair fails or a claim gets questioned later.

    Try this this week: a simple shortlist before you hire

    Pick three local roofers this week and ask the same five things: what is wrong, what gets fixed, how long it should hold, when the job can start, and what the full price includes. The best choice is usually the one that explains your roof clearly, not the one that talks the most.

    Frequently Asked Questions

    How do you know if a roof leak is an emergency?

    If water is actively dripping, ceiling drywall is bulging, or you can see lifted roofing after a storm, treat it as urgent. Get temporary protection in place quickly, then schedule a full inspection.

    Is it better to repair a roof or replace it?

    Repair is better when the damage is isolated and the rest of the roof is still in good shape. Replacement makes more sense when the roof is old, leaking in multiple areas, or showing widespread wear.

    How many roofing quotes should you get?

    Two or three is usually enough. That gives you a fair sense of price, scope, and communication without dragging the process out too long.

    Will homeowners insurance cover roof repairs?

    Insurance often covers sudden storm damage, but not normal wear and tear. Photos, inspection notes, and quick reporting make a big difference.

    How fast should a roofer respond after a storm?

    Emergency tarping or damage assessment should happen as soon as possible. Permanent repairs may take longer depending on demand, permits, materials, and weather.

  • Best Roofing Contractor: How to Spot a Reliable One

    Best Roofing Contractor: How to Spot a Reliable One

    Finding the best roofing contractor usually starts with a bad moment: a brown ceiling stain after a hard Fort Myers storm, shingles in the yard, or that sinking feeling when a small leak shows up again. In Southwest Florida, the right choice is rarely the loudest ad or the cheapest number. It is the contractor that shows proof, explains the job clearly, and fixes the problem without turning your roof into a second headache.

    What “Best Roofing Contractor” Really Means in Southwest Florida

    In this part of Florida, reliability matters more than polish. Heat cooks roofing materials year after year, summer storms test every seam, and hurricane season turns small weaknesses into expensive damage fast. Add insurance paperwork to the mix, and a roofing project can feel like juggling too many things at once. The best roofing contractor is the one that stays solid when the situation is messy. That means clear inspections, honest recommendations, documented estimates, and follow-through. It also means local knowledge. A roof in Cape Coral or Naples deals with sun, wind, salt air, and sudden rain in a way that contractors from outside the area may not fully respect. That matters because this is a crowded market. There are 109,000 businesses in the U.S. roofing industry, so choosing well is less about finding a unicorn and more about filtering out the risky options.

    Start With the Big Decision: Repair or Full Replacement?

    Before comparing companies, get clear on the job itself. Plenty of homeowners start calling roofers before knowing whether the issue needs a repair or a full replacement. That uncertainty is normal.

    Signs a Repair May Be Enough

    A repair often makes sense when the problem is limited and easy to isolate. Maybe a few shingles blew off in one area. Maybe flashing around a vent or chimney has failed. Maybe one leak started after a specific storm and the rest of the roof still looks healthy. If the damage is contained, your roof is not near the end of its life, and the decking underneath is still sound, a targeted fix can buy you time without overspending. A good contractor should say that plainly. In fact, if you are dealing with an active drip or stain, it helps to understand what to do first when water gets in before the damage spreads indoors.

    Signs It’s Time to Replace the Roof

    Replacement becomes the smarter call when problems are stacking up. Repeated leaks in different rooms, widespread storm damage, soft spots, sagging lines, worn underlayment, or repairs that keep returning are strong clues. Patching the same roof again and again is like putting air in the same tire every week. At some point, the pattern is the answer. Southwest Florida weather speeds up wear, especially on older asphalt shingle roofs. Shingles still dominate residential homes, with nearly 69% of homeowners reporting shingles on their current roof, but metal is gaining attention because it handles heat and storm exposure well. If your roof is older and storm-beaten, replacement may be the more honest and cheaper long-term choice.

    Why a Trustworthy Contractor Won’t Push the Biggest Job

    Here’s the thing: you can learn a lot from the first recommendation. A reliable contractor does not automatically steer you toward the highest invoice. Instead, the inspection should be careful, photo-documented, and easy to understand. You should hear where the damage is, what caused it, and why repair or replacement makes sense. That kind of explanation is a trust signal. Sales language is easy. A calm, documented recommendation is much harder to fake.

    The Non-Negotiables Every Reliable Roofing Contractor Should Have

    Some things are not optional. You should confirm them before talking materials, colors, or price.

    Florida Licensing, Insurance, and Local Presence

    Start with licensing and insurance. You want proper Florida licensing, current general liability coverage, and workers’ compensation coverage. If paperwork is delayed, vague, or “coming later,” that is your answer. Local presence matters too. After major storms, outside crews often flood the area, knock doors, collect deposits, and disappear when problems show up. A real local office, a working local phone number, and a visible history in Southwest Florida make a difference when warranty service or follow-up is needed months later.

    Experience With Storm Damage and Insurance Claims

    Storm work is its own category. More than 22% of replacements come from storm-related damage, so experience here is not a nice bonus. It is part of the job in this region. A solid contractor should know how to photograph damage, document affected areas, and keep the scope organized for insurance review. That does not mean handing over control of your claim. It means you are working with somebody who understands the process and can support it. If your project involves weather damage, it helps to review how the claims process usually unfolds after a storm so nothing catches you off guard.

    Safety Practices and Trained Crews

    Roofing is dangerous work. Contractors that talk openly about fall protection, crew training, and jobsite procedures usually run better in every other area too. Safety is not filler on a brochure. It is a sign of discipline. Training matters because crews are hard to find and keep right now. About 85% of contractors report skilled labor shortages, which makes stable, trained teams even more valuable. If a company cannot explain who will be on your roof and how the site is managed, keep moving.

    How to Read Reviews, References, and Reputation Without Getting Fooled

    Most people look at star ratings first. That is fine, but it is not enough.

    What Good Reviews Actually Look Like

    Useful reviews mention details. Look for comments about communication, showing up when promised, handling permits, protecting landscaping, cleaning nails, and following through after payment. “Great job” is nice, but it does not tell you much. Patterns matter more than one glowing review. Check Google, BBB, and neighborhood recommendations. Reputation still drives this industry, with 74% of homeowners finding contractors through word of mouth. That tells you something simple: people remember roofers that make life easier, and people also remember the ones that don’t.

    Ask for Recent Local References

    Ask for a few recent jobs near you, ideally in places like Punta Gorda, Cape Coral, or Naples. Focus on projects that match your situation. If you need a storm repair, ask for storm repair references. If your home has shingles, tile, or metal, ask for that exact type of work. Recent matters more than ancient. A company may have done excellent work five years ago and changed crews, managers, or standards since then.

    Watch for Red Flags in Reputation

    Be cautious if you see lots of vague five-star reviews posted within a short window, unresolved complaint patterns, no physical address, or a business name that seems to keep changing. Pressure tactics are another big one. If the message is “sign today or lose the deal,” slow down. That same caution applies after a storm. If you are sorting through damage, start with what to check on your roof after severe weather so you can compare contractor opinions against something concrete.

    Compare Estimates Like a Pro, Not Just by Price

    The cheapest quote is often the most expensive mistake. That is not a slogan. It is how hidden costs show up later.

    What a Detailed Roofing Estimate Should Include

    A trustworthy estimate should spell out the scope of work, which is just the exact list of what gets done. That includes tear-off, materials, underlayment, flashing, ventilation, decking repair if needed, permits, cleanup, dumpster costs, timeline, payment schedule, and warranty terms. If the estimate is thin, vague, or mostly verbal, you are not comparing apples to apples. You are guessing.

    Transparent Pricing vs. Suspiciously Low Bids

    Transparent pricing builds trust because you can see what you are paying for. Homeowners respond to that. About 65% are more likely to contact a roofer that shows upfront pricing information. Lowball bids often leave out items that later return as change orders, rotten decking, upgraded underlayment, permit fees, or flashing work. A fair price with clear detail beats a cheap mystery every time.

    Questions to Ask Before You Sign

    Ask who supervises the project day to day. Ask when work can realistically start. Ask what happens if damaged decking is found once the old roof comes off. Ask who pulls permits and how weather delays will be communicated. Also ask how payments are structured. Reasonable deposits are normal. Full payment upfront is not. You are not being difficult by asking for straight answers. You are buying a major exterior system for your home. A kitchen table covered with three different roofing estimate printouts, a clipboard, a calculator, a tape measure, and samples of shingles and metal roofing panels arranged side by side, with a homeowner comparing the documents and pointing at line items while reviewing the options

    Materials, Warranties, and Timeline: The Details That Tell You a Lot

    This is where a contractor’s real professionalism shows up. If explanations get slippery here, pay attention.

    Choosing the Right Roofing Material for Your Home

    Asphalt shingles are common because they cost less upfront and work on many homes. Metal roofing costs more, but it can be a smart fit in Southwest Florida because it handles heat, rain, and wind exposure well. Tile has strong curb appeal and durability, but it is heavier, pricier, and not right for every structure. The best recommendation should fit your house, your budget, and your long-term plans. It should not just reflect what is easiest to install.

    Workmanship Warranty vs. Manufacturer Warranty

    These are not the same thing. The manufacturer warranty covers defects in the roofing product itself. The workmanship warranty covers installation mistakes made during the job. You want both, in writing, with clear terms. A great shingle installed badly can still fail. A careful contractor will explain that without turning it into jargon soup.

    Realistic Start Dates and Completion Timelines

    Fast response matters, especially when water is getting in. Still, promises that sound too good can be a warning sign. Homeowners usually expect work to start within two weeks, and 88% of contractors say they meet that window, but permits, weather, and material availability can shift the schedule. A reliable contractor gives you a realistic timeline, not a fantasy one. Clear updates matter just as much as speed.

    Common Mistakes That Cost Homeowners Money and Stress

    Bad roofing decisions usually come from rushing, not from ignorance.

    Choosing Based on Price Alone

    A low price can feel like relief, especially after storm damage or an insurance surprise. The catch is that weak bids often skip labor quality, material quality, or the little things that stop leaks later. Flashing, ventilation, cleanup, and decking checks are not extras. They are part of the roof doing its job.

    Skipping the Paperwork

    If it is not written down, it is not protected. You want a written contract, proof of insurance, permit responsibility, product details, payment schedule, and warranty terms before work starts. Paperwork is what saves you when memories suddenly get fuzzy. For repair projects, it also helps to know what typically affects the price of fixing a roof in this area, because clear expectations make weak estimates easier to spot.

    Falling for Storm-Chaser Pressure

    Door-knocking crews after severe weather are common in Florida. Some are legitimate. Plenty are not. The trick is simple: urgency is used to keep you from checking anything. If somebody wants a signature before you verify licenses, insurance, references, and local history, step back.

    A Simple Shortlist: How to Choose the Best Roofing Contractor for Your Home

    Keep it simple. Narrow your list to two or three local contractors with real licensing, insurance, and recent Southwest Florida references. Ask each one the same questions. Compare the scope of work line by line, not just the total. Look at how clearly each contractor explains repair versus replacement, materials, warranty coverage, and schedule. Then trust the one that feels steady, documented, and honest. Not flashy. Not pushy. Just clear. Try one thing this week: pull together three local estimates and check every license and insurance document before making the next call.

    Frequently Asked Questions

    How many roofing estimates should you get?

    Three is a good number. That gives you enough range to spot a lowball bid, a padded bid, and the contractor that explains the work clearly.

    Should a roofing contractor inspect the attic too?

    Sometimes, yes. If leaks, ventilation issues, or decking concerns are involved, attic signs can help confirm what is happening above the roof line.

    Is it normal for a roofer to ask for a deposit?

    Yes, a reasonable deposit is normal. Full payment before materials arrive or work begins is not.

    How long should a roofing estimate take to receive?

    For most residential jobs, you should expect a written estimate fairly quickly after inspection. Fast matters, but accuracy matters more than a rushed one-page quote.

    Can you trust a contractor that only communicates by text?

    Texting is fine for updates, photos, and scheduling. It should not replace a written estimate, contract, warranty details, and clear answers to your questions.

    What is the biggest sign a roofing contractor is reliable?

    Consistency. Clear communication, proof of licensing and insurance, detailed estimates, realistic timelines, and recent local references all point in the same direction. That is what reliability looks like in real life.
  • Roof Insurance Claim: How to File After Storm Damage

    Roof Insurance Claim: How to File After Storm Damage

    A roof insurance claim gets stressful fast, especially when water starts showing up in the living room two hours after a Southwest Florida storm rolls through. The good news is that the process is manageable if you move in the right order, document everything, and avoid the people who promise a “free roof” before anybody has even looked at your policy.

    What you’ll need before you start

    Before you file anything, gather the basics in one place: your declarations page, the storm date, photos, notes about leaks or ceiling stains, and contact details for a licensed local roofer. That small bit of prep saves a lot of scrambling later. If you already noticed active leaking, write down where it showed up and when. “Drip over the sofa at 8:30 p.m. after Tuesday’s storm” is far more useful than “roof leaked at some point.” Keep a folder on your phone or computer for every photo, receipt, estimate, and email from the start.

    Step 1: Make the home safe and stop more damage

    Your first job is protecting the house without erasing the evidence. Insurance expects you to take reasonable steps to prevent more loss, not sit back and let water ruin drywall, flooring, and furniture.

    Tarp exposed areas if water is getting in

    If water is entering, use buckets, move belongings out of the drip path, and place a tarp over exposed sections if it can be done safely from the ground or by an emergency service. Temporary mitigation means temporary. Do not start full roof repairs before the claim is reviewed unless you have no other safe option. If the leak is active and you need quick guidance on containing it inside the house, this breakdown of what to do when water starts coming through helps you avoid making the mess worse.

    Take photos and video before anything changes

    Take clear, time-stamped photos of the roof from the ground, plus gutters, soffit, fascia, screens, attic spots, ceiling stains, and any debris in the yard. Get wide shots first, then closer ones. A clean set of photos is one of the strongest parts of a roof insurance claim, especially now that stricter documentation requirements are becoming more common.

    Save receipts for emergency expenses

    Save every receipt for tarps, emergency dry-out, ceiling protection, or service calls. Those costs may be reimbursable if your policy covers reasonable mitigation. Even a $40 tarp receipt matters if it shows you acted quickly and responsibly. A storm-damaged house exterior with a blue tarp stretched over part of the roof, buckets placed under a ceiling leak inside the living room, wet drywall stains on the ceiling, and a homeowner taking clear photos of the roofline from the yard while debris lies scattered near the driveway

    Step 2: Check whether the damage looks claim-worthy

    Not every roofing problem belongs in an insurance file. Insurance usually covers sudden storm damage, not a roof simply reaching the end of its life.

    Look for signs of wind, hail, or storm-related roof damage

    Look for missing shingles, lifted tabs, cracked or displaced tiles, dented metal vents, granules collecting in gutters, fresh leaks after a named storm, or branches that hit the roof. If the damage appeared right after a storm, that timing matters. If you need a clearer picture of the early warning signs, this guide to what to inspect after a storm hits your roof is worth a quick read.

    Know what insurance usually does not cover

    Most policies do not cover old age, neglect, slow seepage, prior damage, or bad installation. That line matters a lot in Florida, where carriers often push back on older roofs. A worn roof is not a claim by itself, and normal wear and tear is one of the most common denial reasons. ACV means actual cash value, which pays replacement cost minus depreciation. RCV means replacement cost value, which pays based on what replacement costs today, subject to your deductible and policy terms. Same roof, very different payout.

    Pay attention to roof age and your deductible

    If your roof is 15 to 20 years old, expect extra scrutiny. Many Florida carriers use age thresholds in that range, and older roofs are more likely to be depreciated or denied. Also check your deductible before filing. A hurricane deductible can be a percentage of dwelling coverage, not a flat number, so the out-of-pocket amount can be much higher than expected. With deductibles having risen 22% in 2025, this is not a minor detail.

    Step 3: Get an inspection from a trustworthy local roofing contractor

    A pre-claim inspection can save you from opening a weak claim and getting nowhere. It also gives you a documented baseline before the adjuster arrives.

    Choose a licensed and insured Southwest Florida roofer

    Check for an active license, insurance, a real local address, and recent reviews in places like Fort Myers, Cape Coral, or Punta Gorda. Local matters. Follow-up matters too, especially if code questions or supplemental paperwork come up later. If you want a sharper filter for choosing the right company, this article on spotting a roofer you can actually trust helps.

    Ask for a storm damage inspection and written findings

    Ask for photos, marked damage areas, and a written opinion on repair versus replacement. If the contractor uses digital measurement reports, even better. Those reports are widely accepted and can help reduce estimate disputes, with over 95% of major carriers accepting digital measurements.

    Watch for claim scams and high-pressure sales tactics

    Be wary of anybody offering to waive your deductible, asking you to sign over benefits right away, or promising insurance will buy you a new roof before the inspection happens. A good contractor documents damage and explains options. A bad one tries to script the whole claim for you.

    Step 4: Review your homeowners policy before you file

    Ten minutes with your policy can save you from a nasty surprise.

    Check covered perils, exclusions, and claim deadlines

    Look for wind, hail, hurricane damage, falling debris, and resulting interior leaks. Then look just as carefully at exclusions and deadlines. Some policies are stricter than you would expect, and some carriers expect claims within a limited time after the storm. Filing promptly matters because waiting too long can weaken the connection between the storm and the damage.

    Find your settlement type: RCV vs. ACV

    If your policy is RCV, the payout is based on current replacement cost. If it is ACV, depreciation comes off the top. On an older roof, that difference can feel like trying to fill a bathtub with the drain open. Always check this before you assume insurance will cover most of the work.

    Understand your deductible and code upgrade coverage

    Check whether you have a hurricane deductible, a separate wind deductible, and ordinance or law coverage for code-required upgrades. In Florida, code can affect underlayment, fastening, decking, and more. That can be the difference between a modest repair and a much larger project.

    Step 5: File the roof insurance claim with strong documentation

    Now file the claim in a way that tells a clean, factual story from day one.

    Report the claim promptly

    Use the carrier’s phone line, app, or portal. Have your policy number, date of loss, cause of damage, leak notes, and mitigation steps ready. Keep it simple: storm date, visible damage, interior leak, temporary protection installed.

    Submit photos, inspection notes, and a simple damage timeline

    Send your photos, contractor findings, and a short timeline. For example: storm on Tuesday evening, ceiling leak noticed that night, photos taken Wednesday morning, tarp installed Wednesday afternoon. Short and clear beats long and emotional every time.

    Keep a claim file with every email, estimate, and receipt

    Store your claim number, adjuster name, inspection date, receipts, and every email in one folder. This part feels boring, but honestly, it is what keeps the process from turning into a second job. If you already want a ballpark on the numbers you may be comparing later, it helps to review typical repair pricing in Southwest Florida.

    Step 6: Prepare for the adjuster inspection

    This visit can shape the outcome, so do not wing it.

    Have your roofer present if possible

    If possible, have your contractor there during the inspection. A roofer can point out lifted shingles, flashing damage, bruising, underlayment issues, or soft decking that may not stand out from the driveway. That extra set of trained eyes often helps keep damage from being overlooked.

    Share evidence without overselling the damage

    Hand over your photos, written findings, and timeline calmly. Stick to facts. Where the leak showed up, when you noticed it, what you did to protect the house. The trick is being organized, not dramatic.

    Ask what happens next and when to expect a decision

    Before the adjuster leaves, ask what documents are still needed, whether another inspection is likely, and when you should expect a decision. Many claims move quickly, with a decision in 1 to 10 days, but timelines vary after major storms.  

    Step 7: Review the settlement offer and decide on repair or replacement

    Do not glance at the number and move on. Read the estimate.

    Compare the scope of work line by line

    Check measurements, tear-off, underlayment, flashing, drip edge, permit fees, dump fees, and code items. Digital measurements are common now, but the estimate still has to match your actual roof.

    Know when a supplement or dispute makes sense

    If something is missing, ask for a revised scope, supplement, or reinspection. Missing flashing, code items, decking damage, or permit costs can change the payout a lot. Sometimes the first estimate is just incomplete, not final.

    Choose repair or replacement based on age, damage, and cost

    If your roof is older, has widespread wind damage, or has been leaking in multiple areas, replacement is often the smarter long-game move. Patchwork can look cheaper today and cost more six months from now. For direct repair options and local scheduling, use https://sancarlosroofing.com/roof-repair.

    Troubleshooting common roof insurance claim problems

    Problems happen. The key is having a next move instead of freezing up.

    Your claim was denied because of wear and tear

    Read the denial letter line by line and compare it to the contractor’s report. If your roofer documented storm-created damage and the insurer labeled it age alone, gather stronger photos, storm-date evidence, and a more detailed written opinion. If needed, ask for a reinspection or talk with a public adjuster.

    The payout seems too low

    Low payouts often come from depreciation, missing line items, or excluded code upgrades. Ask for clarification in writing and compare the insurer’s scope to your roofer’s scope, item by item.

    The insurer approved repair, but your roofer recommends replacement

    Focus on documentation, not opinions. If repair will violate code, fail to address widespread damage, or leave you with an unmatchable roof system, get that in writing and submit it back for review.

    A contractor wants you to sign right away

    Slow down. Read the contract, check cancellation terms, and avoid open-ended agreements. Fast is fine after a storm. Rushed is not.

    What to expect after approval and what to do this week

    After approval, you may receive an initial payment first and a later payment once work starts or finishes, especially on RCV policies. Then comes scheduling, materials, permits, final invoices, and claim closeout. This week, pull out your policy and book a local inspection if your roof took a hit in the last storm. That one move makes every next step easier.

    Frequently Asked Questions

    How long do you have to file a roof insurance claim?

    It depends on your policy and carrier, but sooner is better. Waiting can weaken proof that the storm caused the damage and may push you past a filing deadline.

    Can you file a claim for an old roof?

    Yes, if a covered storm caused sudden damage. No, if the problem is just age, wear, or long-term deterioration.

    Should you call a roofer or the insurance company first?

    A licensed local roofer first is often the better move. A pre-claim inspection helps you understand whether the damage is claim-worthy before you open a file.

    Can your insurance company force you to use a specific contractor?

    No. Your insurer may suggest companies, but you can choose your own roofing contractor.

    What if the adjuster misses damage?

    Ask for a reinspection or supplement and submit better documentation, including photos, written findings, and missing line items from your contractor’s estimate.