Selling your Florida home means getting everything in order for potential buyers, and your roof plays a big role in that process. A well-maintained roof not only protects against everyday elements, it also reassures buyers that you have taken good care of your property. Going through a thorough Florida roof inspection checklist helps you spot issues before they become deal-breakers.
You want to ensure your roof meets local safety requirements and keeps home inspectors happy. In Florida, the climate can be unpredictable with heavy rains, blazing sun, and periodic hurricanes. Whether you are dealing with aging shingles, minor leaks, or bigger structural concerns, having a solid inspection process sets you on the right track. It also helps you demonstrate that your roof meets state standards and has the remaining lifespan buyers expect.
Below, you will find a structured guide to reviewing your roof condition, handling essential paperwork, and scheduling professional help. The tips here focus on common trouble spots—like shingles, flashing, and underlayment, that often come up during buyer walkthroughs. By following this Florida roof inspection checklist well in advance, you can showcase a roof that stands up to scrutiny and gives buyers peace of mind.
Start with roof age and materials
Your first step is to figure out how old your roof is and confirm the type of materials used. Different roofing materials have distinct lifespans, and buyers typically look at remaining years to gauge whether a replacement is around the corner.
• Asphalt shingles usually last around 15 to 20 years.\ • Clay or concrete tiles can last anywhere from 25 to 50 years depending on quality.\ • Metal roofing offers a lifespan of 40 years or more, especially if properly maintained.
If your roof is older than 10 or 15 years, schedule a yearly checkup to keep tabs on any deterioration. This habit reassures prospective buyers who might be apprehensive about older roofs. You can also explore buyer concerns florida roofing for a closer look at why age is a talking point during negotiations.
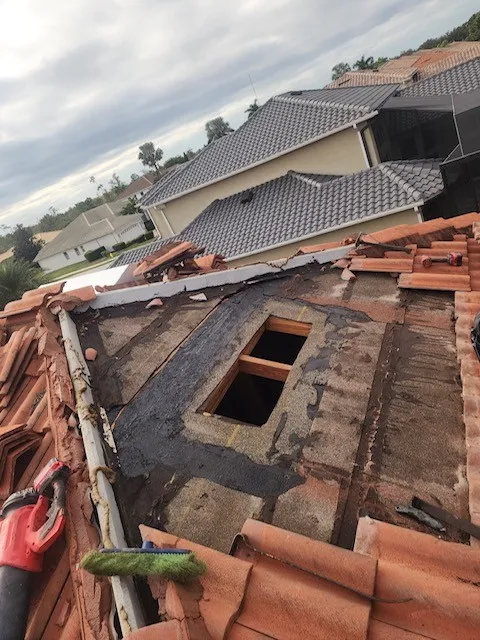
Look for common red flags
A key part of any home inspection is spotting telltale signs of damage. As you prepare to sell, you want no hidden surprises that come up in a buyer’s report. Use your checklist to zero in on these red flags:
Missing or loose shingles
Worn or cracked flashing around vents and chimneys
Soft or sagging roof areas indicating possible deck damage
Clogged gutters causing water to pool at the roof edge
Discoloration or stains on ceilings indoor, hinting at leaks
Minor issues might be resolved with simple repairs, such as replacing a few shingles or refastening flashing. Larger signs of trouble, like significant deck rot or major water intrusion, may require a professional opinion. If you are navigating these concerns, see our roof inspection for Florida homebuyers resource to understand buyer expectations during roof checks.
Check the attic and ventilation
Buyers will often ask about attic ventilation and insulation. Proper airflow prevents excess heat buildup and discourages moisture, both of which can damage roofing structures. Go up to your attic and take note of musty smells or damp insulation, as these can point to leaks or insufficient ventilation.
You will want to address these problems before you list the home, because prospective buyers are likely to notice them. A musty attic could mean mold risk, while damp insulation can cause energy inefficiency. Regular maintenance, like adjusting vents or installing additional attic fans, can prove you have taken the necessary steps to keep your roof system sound and your indoor air healthy.
Gather important documentation
Even if your roof is in great shape, you need paperwork to back that up. Buyers often request documentation on past repairs, warranties, and insurance claims. Having these details organized saves you from scrambling later and demonstrates that you have been proactive about your roof’s condition.
• Past repair or replacement invoices\ • Warranty information for shingles or tile\ • Records of insurance claims for storm damage or leaks\ • Any code compliance documents tied to your roof
When you can show a consistent history of professional checks or repairs, it reassures buyers that they are not stepping into hidden problems. If you still have questions on what your inspector might look for, our home inspection roof checklist Florida offers more guidance on typical red flags.
Confirm Florida code requirements
Florida’s building regulations are among the strictest in the nation due to severe weather risks. Double-check that your roof is up to current standards by reviewing the Florida Building Code. For more detailed information, consult the Florida Department of Business & Professional Regulation. Even if your roof predates the latest code updates, you can still demonstrate that any improvements followed best practices for wind and water resistance.
Buyers from out of state may not be familiar with Florida’s code emphasis on hurricane preparedness. Explaining your compliance efforts, such as improved flashing, peel-and-stick underlayment, or reinforced decking, can make your listing that much more attractive. These upgrades also help justify any higher asking price if you have invested in a robust, storm-ready roof system.
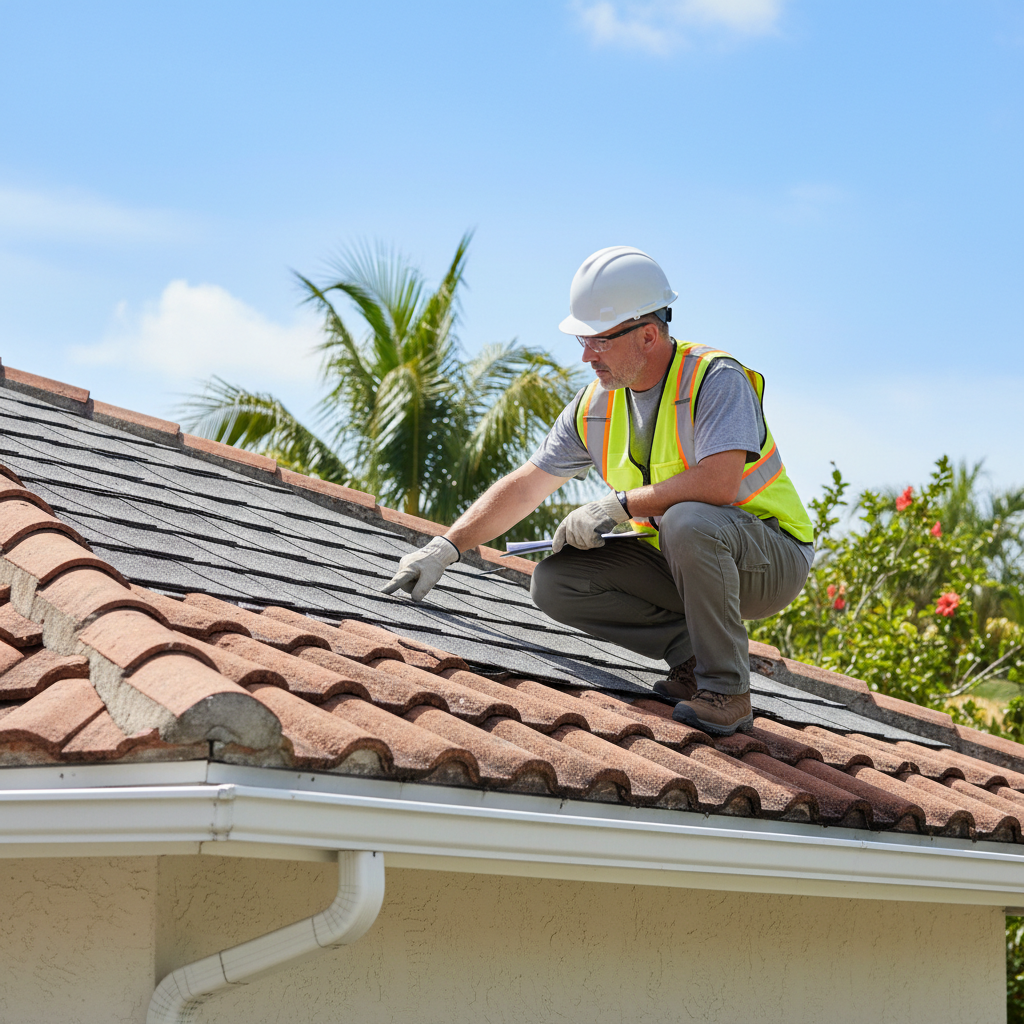
Consider a professional inspection
Doing a personal review is helpful, but a certified inspection report carries more weight with buyers. Professional inspectors can spot subtle issues you might miss, like small hail damage or early signs of flashing corrosion. While you can easily check your shingles from the ground, crawlers or drones might be needed for steeper roof sections.
Most professional inspections in Florida cost between $150 and $350, which is a small price to pay if it helps you avoid a deal falling through. A formal statement confirming your roof’s solid condition can also streamline buyer negotiations. If you need guidance on scheduling an expert check or want to learn about typical inspection procedures, visit San Carlos Roofing to see what an experienced team can do to ensure your roof is market-ready.
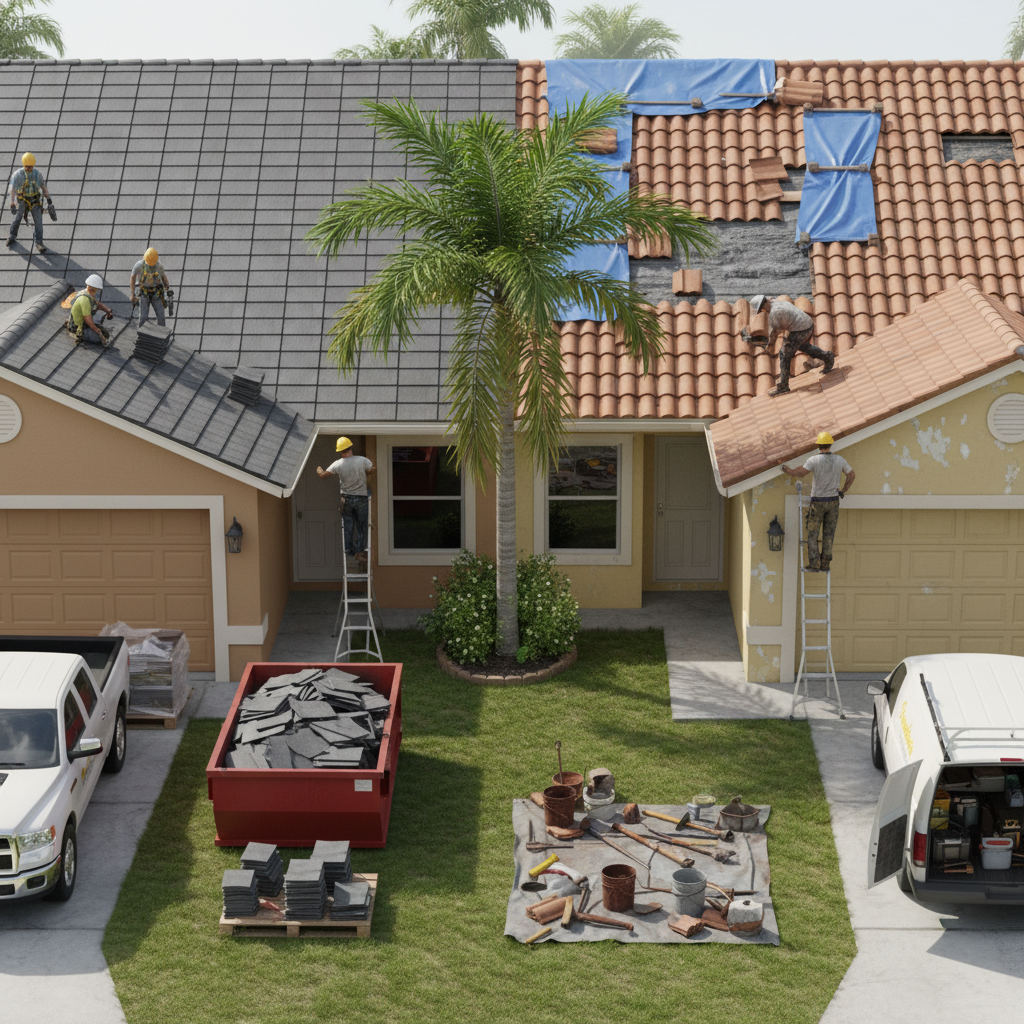
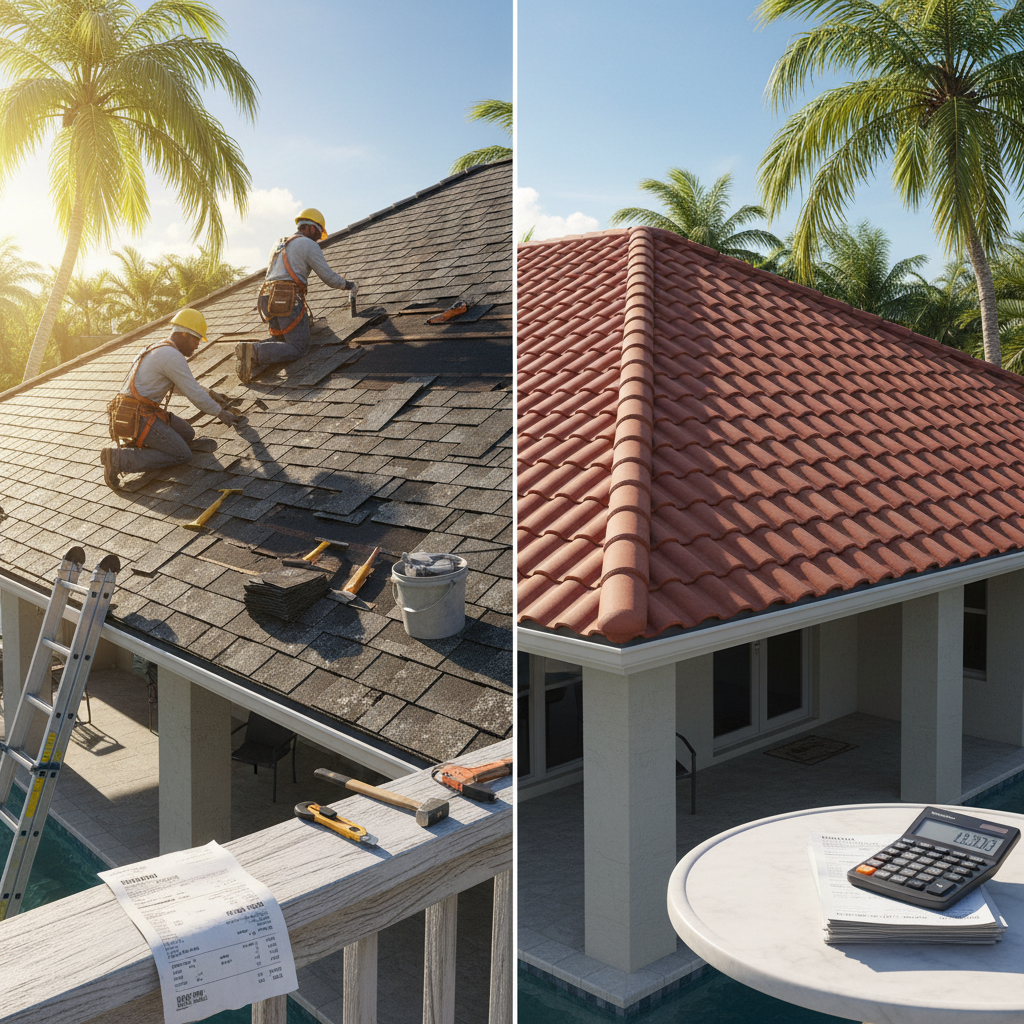
Make repairs or replacements promptly
After you have a professional opinion, decide whether repairs or a full roof replacement is necessary. Buyers tend to shy away from properties that need substantial work, especially if major roof defects appear in their own inspection. Fixing issues beforehand can instill confidence, reduce buyer requests for concessions, and help you market your home more effectively.
One strategy is to compare repair quotes versus total replacement costs. If you own a tile roof nearing 25 or 30 years, or if an older asphalt roof shows repeated leaks, a new installation might deliver a better return on investment. This choice also removes last-minute complications and enhances your property’s curb appeal. If you are unsure whether to do minor fixes or a total overhaul, browse our Florida roof maintenance before selling page for tips on balancing cost and value.
Understand buyer concerns
Home shoppers in Florida worry about wind-resistant construction, hurricane readiness, and insurance requirements. Many insurers request a roof inspection once a property reaches 10 or 15 years of age, so providing a current report can simplify your buyer’s approval process. If you ignore these concerns, you may attract fewer serious offers, and your home could sit on the market longer.
When buyers see that you have thoroughly handled your Florida roof inspection checklist, they feel more comfortable finalizing the deal. You also reduce the odds of intense negotiations over repair credits or last-minute cancellations. For more insights on what buyers typically stress over, visit buyer concerns florida roofing and prepare answers in advance.
Plan for hurricane season
Even if you are selling outside the summer months, show prospective buyers you have taken Florida’s extreme weather to heart. High wind gusts and driving rain can expose weak points, so highlight any added reinforcements your roof has. This may include hurricane straps, extra fasteners in the decking, sealed secondary water barriers, or updated flashing.
• Clear your gutters and downspouts of leaves and debris.\ • Trim back trees or vegetation that could damage the roof during storms.\ • Check around vent pipes for gaps or cracks that let in water.
Potential buyers will appreciate knowing the roof is capable of standing up to an unpredictable climate. If they see evidence of your hurricane prep, they’ll understand the home is ready to handle Florida’s weather challenges.
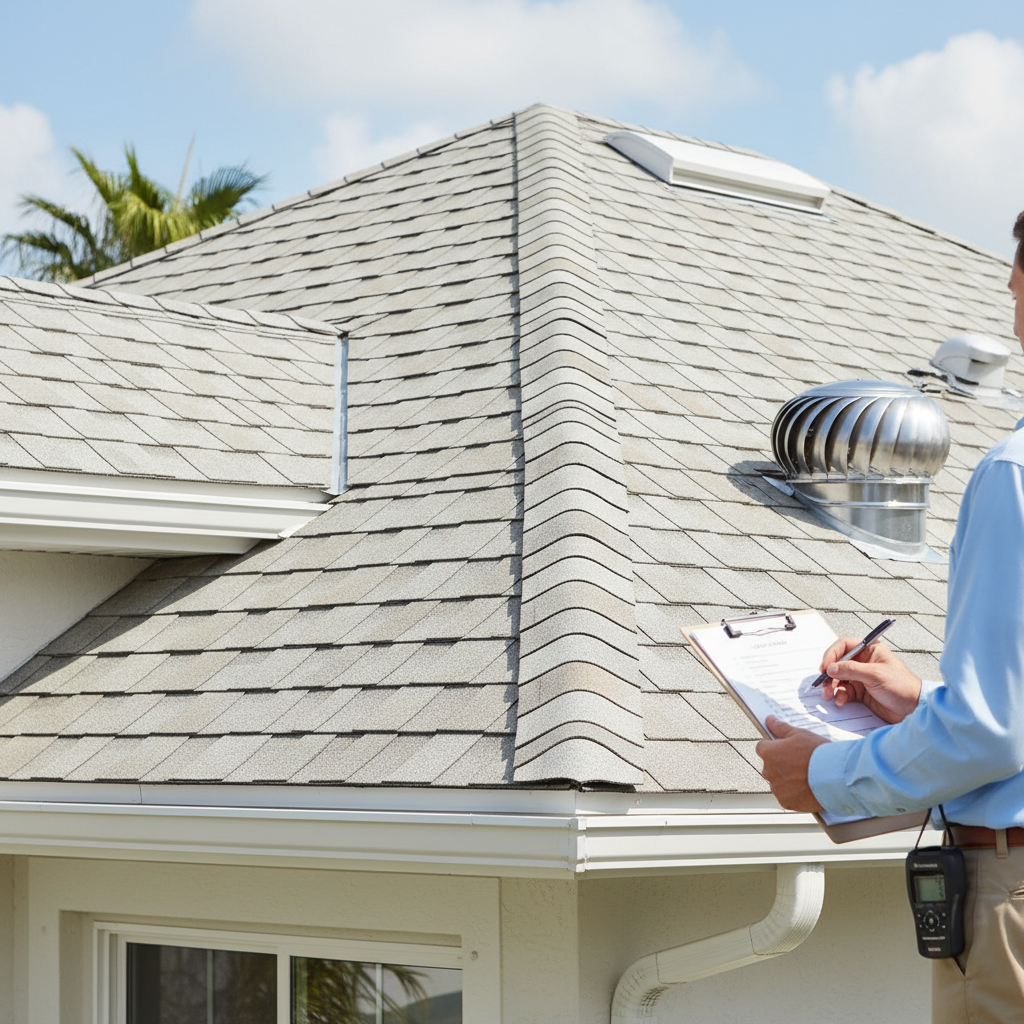
Anticipate inspection day
Once you receive an offer, your buyer’s inspection will likely mirror what you have already accomplished. The inspector checks everything from overall roof structure to smaller components, paying close attention to leaks, rotted sheathing, or insufficient fasteners in high-risk zones. If you took the time to address these points in advance, the buyer’s final inspection should go more smoothly.
Make the experience convenient for you and the inspector. Clear the driveway, remove debris from around the house, and have your attic accessible for thorough review. If a buyer or their inspector sees you have responsibly prepared, it shows your commitment to an honest and efficient transaction.
Consider roof condition’s effect on insurance
Florida insurance providers can be particularly cautious when insuring older roofs or homes located in high-wind regions. By documenting all your pre-sale roof inspections, you help buyers with their own coverage research. The smoother their insurance process goes, the easier your property is to sell.
You can outline how you proactively maintained your roof each year, replaced outdated materials before issues emerged, and complied with Florida’s codes. That record of diligence reduces the likelihood that a buyer’s insurance company will surprise them with high premiums or require specific repairs. You will earn trust for being an attentive homeowner, which can give you an edge if your neighborhood has multiple listings.
Share your findings with buyers
Be transparent about your inspection results. Show would-be buyers any photos, videos, or formal reports that highlight your roof’s condition. Openness about minor faults or upcoming maintenance intervals helps you build credibility. Buyers do not like surprises that surface after their own inspector arrives, so staying upfront often smooths negotiations.
Additionally, if you decided to pay for fixes or replacements, keep those receipts. Home shoppers appreciate evidence that you made the effort to resolve concerns before placing the house on the market. If you mention any warranties or ongoing maintenance plans, prospective buyers will see that they are stepping into a well-cared-for home.
Stay compliant with Florida’s unique codes
Florida’s High Velocity Hurricane Zones (HVHZ) have extra requirements for fasteners and underlayment. Even if you do not live in Broward or Miami-Dade County, it is helpful to apply similar standards for a more resilient roof. Consider stronger nails, sealed roof decks, and other add-ons that align with Florida Building Code guidelines.
Buyers, especially those new to the region, often worry about storms. If they spot that extra investment in hurricane-grade materials or techniques, it can tip the scales in your favor. Local building authorities frequently update regulations, so check with professionals or verified resources to ensure that your improvements meet current code requirements.
Florida roof inspection checklist in action
It is helpful to have a succinct review method you can follow, step by step. Below is a quick reference to guide your efforts:
Determine roof age and note materials.
Inspect shingles or tiles for cracks, curling, or missing pieces.
Check flashing and roof penetrations for rust or gaps.
Look for sagging roof sections or soft decking.
Clear gutters and downspouts of debris.
Examine attic for leaks, moisture, or ventilation issues.
Collect repair records, warranties, and insurance claims.
Verify compliance with Florida code requirements.
Arrange a professional roof inspection for a second opinion.
Tackle repairs or replacements promptly.
Highlight upgrades or hurricane protections.
Keep all paperwork accessible for buyer review.
Following these steps ensures you address critical elements that matter in a Florida real estate transaction. If you are unsure how to approach certain repairs, consider contacting a local professional for guidance. You might also check out home inspection roof checklist florida for deeper insight into the typical evaluation process.
Skylights, chimneys, and other special elements
If your Florida home has features like skylights or a chimney, devote extra attention to them during your inspection. Skylights can leak if their seals degrade, and chimney flashing often deteriorates faster than you expect in Florida’s humid, storm-prone climate. An inspector will examine these elements closely, so check whether protective coatings or caulking need an update.
Well-maintained skylights can be a selling perk since they bring in natural light. But if you ignore possible water intrusion or warping around these openings, buyers might worry about hidden rot. A quick repair for small cracks or sealant issues can keep one tricky problem at bay and impress potential owners with your attention to detail.
Communicate with your real estate agent
Let your agent know you are completing a dedicated Florida roof inspection checklist. Agents often field buyer questions about structural integrity, storm readiness, and code compliance. If your agent can confidently talk about the steps you have taken, everyone feels more comfortable.
Agents may also suggest including a copy of your inspector’s findings in your home’s listing packet or among the disclosures. This approach shows you are transparent about the roof’s condition, which can attract serious buyers. If they see that you have all your documentation in order, it makes your property more appealing and reduces uncertainty on both sides.
Prepare for negotiations
Even after you have done your due diligence, buyers might still have concerns. They could request a price reduction, ask for repairs before closing, or look for a credit toward a future roof replacement. If you have a comprehensive Florida roof inspection checklist already completed, you can negotiate from a position of strength.
Explain the repairs you have made, discuss your roof’s expected lifespan, and share estimates you collected. Having multiple quotes or long-term warranties on hand can make it clear that you have not simply patched problem areas, but that you have thoroughly addressed the home’s roofing needs. This evidence-based approach often helps smooth out any last-minute haggling.
Gain buyer confidence
A well-documented, carefully maintained roof signals that you have cared for your home. Buyers in Florida often place extra weight on roof conditions because of the region’s weather extremes. By demonstrating that you have addressed repairs, updated to meet code, and stayed vigilant about potential storm hazards, you reduce the fear factor for potential buyers.
You might also encourage prospective buyers to bring their own inspector if they have lingering questions. By welcoming professional scrutiny, you reinforce the idea that your roof stands up to close examination. If you want even more tips on ensuring that your property meets and exceeds buyer expectations, you can consult florida roof maintenance before selling.
Key takeaways
Start your prep by determining roof age, material condition, and possible red flags.
Keep documentation of past repairs, insurance claims, and compliance certifications.
Double-check you meet Florida Building Code requirements.
Consider hiring a professional inspector for a thorough report that inspires buyer trust.
Address necessary fixes promptly to strengthen your negotiating position.
Showcase your diligence in protecting against Florida’s tough weather.
Completing a well-rounded Florida roof inspection checklist is one of the most effective ways to finalize a smooth sale. Prospective buyers will appreciate your attention to detail, and you can avoid the stress of unexpected roof issues popping up at closing. By walking through the steps laid out in this guide, you will have the confidence of a seller who knows their home is ready for the market.
Natural disasters, salty coastal air, and year-round sunshine make southwestern Florida a unique place to live, but they can also take a toll on your roof. If you’re juggling frequent repairs, rising insurance premiums, or simply wondering whether to invest in a full replacement, a clear southwest florida roofing costs comparison can help you make an informed decision. Below, you’ll find detailed insights into the factors that affect costs, how to prioritize repairs versus replacement, and what to consider when budgeting for a long-term roofing solution.
Understanding the southwestern Florida roofing cost factors
When you look at roof expenses in southwestern Florida, you’ll notice pricing can swing widely. One neighbor might pay around $12,000 for a modest asphalt shingle setup, while someone down the street invests $35,000 or more in a premium tile system with reinforced underlayment. Why the disparity? It comes down to factors such as material choice, roof size, and the shape or angle of your roof.
In this region, labor also plays a substantial role. Skilled roofing crews are in high demand, especially after storm seasons when the pace of repairs intensifies. Depending on your home’s geometry, a roofer may have to invest extra time on safety gear or specialized equipment, pushing the cost upward. When you add those elements together, it’s easy to see why it’s so important to dig into the specifics of your own home before you commit to any major roofing project.
Common cost drivers to keep in mind
Roof size and pitch. Larger roofs or steeply pitched designs generally require more labor.
Material selection. Asphalt shingles, metal, and tile each have different price ranges as well as durability levels.
Complexity. Skylights, multiple ridges, dormers, or other intricate features add labor hours.
Code compliance. Stringent building codes and hurricane protection measures may raise the overall quote.
Additional repairs. Rot or water damage underneath shingles often needs to be fixed before new materials go on top.
Costs may vary, but one constant remains: If your roof is compromised, addressing the issue sooner rather than later saves money in the long run.
Why ongoing repairs might cost more
It’s easy to keep pushing “just one more repair,” especially if each individual fix seems minor at the time. However, southwestern Florida’s weather can accelerate wear on older or patched-up roofs, forcing you to shell out money again and again.
Imagine dealing with a few missing shingles after every high-wind event, or discovering that a small leak has turned into hidden mold behind your walls. These ongoing headaches don’t just inflate your home maintenance bills, they also erode the comfort and safety you expect from your living space. Over time, frequent fixes add up to a surprising total that might have been enough to upgrade your entire roof in the first place.
Balancing immediate and future costs
If you’re aiming to avoid large lump-sum expenses, you might assume small repairs will keep you afloat. Yet each service call includes labor fees, materials, and sometimes unforeseen complications. You’ll be consistently pulling out your checkbook without enjoying the peace of mind that a newer roof can offer. When you weigh your regular outlays against the price of a full update, a complete replacement often emerges as the more budget-friendly strategy over a decade or two.
When a replacement becomes more cost-effective
There’s a tipping point when repairs outlive their usefulness. If your roof is near the end of its typical life expectancy—often around 15 to 20 years for basic asphalt—and you find yourself calling a contractor every storm season, it’s likely time for a new installation. A fresh roof not only fortifies your home against hurricanes and heavy rains, but it can also cut your insurance premiums and potentially boost your property’s value.
In southwestern Florida, many homeowners decide to move from standard shingles to heavier-duty materials like tile or metal because they see how quickly climate extremes can degrade cheaper roofing. Doing so requires a larger initial investment, yet the extended lifespan may justify the higher price tag. Plus, you’ll spare yourself the cycle of frequent fixes that chip away at your monthly budget.
Signs your roof may need replacing
Water damage or stains on your ceilings or walls.
More than two or three significant leaks in a single year.
Shingles with curling edges, bald patches, or persistent discoloration.
Noticeable sagging along the roof’s surface.
Mold or mildew growth in your attic or around vents.
A thorough roof inspection is the ideal way to confirm whether your structure is simply in need of one more patch—or if it’s time to invest in something brand new.
Material choices and price differences
When you begin your southwest florida roofing costs comparison, it helps to break down each material’s average cost, typical lifespan, and other pros or cons. Below is a general overview that captures the most common options you might find:
Roofing material
Approx. cost per sq. ft.
Typical lifespan
Asphalt shingles
$6–$9
15–20 years
Metal (standing seam)
$14–$25
40–70 years
Concrete/clay tile
$11–$22
30–50 years
Asphalt shingles remain the most budget-friendly choice, making them popular among homeowners looking for quicker installations. Tiles require more skilled labor but deliver durability and a distinctive Mediterranean-inspired appearance beloved in Florida subdivisions. Metal roofing has grown more common in recent years, especially for those seeking longevity and energy efficiency—just be aware of the higher upfront cost.
What to consider when choosing materials
Current resale value: Premium materials like tile can add curb appeal.
Weight: Tile might require extra reinforcement in older homes.
Energy efficiency: Metal roofs often reflect heat more effectively, lowering utility bills.
Maintenance: Asphalt shingles are easier to replace in sections if damage occurs.
Aesthetic preferences: If your homeowners association has rules on roof style, you’ll need to meet them.
The labor factor in southwestern Florida
Whether you choose cost-effective shingles or go for a long-lasting metal system, you’ll notice a significant portion of the budget goes toward labor, often 40–60% or more. The main reason is that skilled roofing professionals must work in demanding conditions: High heat, intense sun, and the potential for unexpected tropical weather mean your crew’s day is rarely straightforward.
In addition, southwestern Florida sees cyclical labor shortages after hurricanes or major storm events because many homeowners rush to secure repairs at once. Due to high demand, you may find that labor fees spike during these times. Plus, if your roof belongs to a multi-story home, or you’ve got intricate pitches and dormers, installers need additional time (and sometimes specialized gear) to do the job safely.
Minimizing labor costs
Schedule your project off-peak, if possible before or after storm season.
Keep your attic accessible so inspectors can assess underlying structures more easily.
Remove items like satellite dishes or holiday lights in advance, saving workers time.
By handling minor preparations on your own, you may shave a bit off the overall quote. The result is a more efficient project start to finish.
Minimizing storm-related roofing expenses
In southwestern Florida, storm readiness isn’t optional. High winds can peel shingles off in minutes, while intense rain seeps through even tiny cracks. If you’re committed to addressing frequent repairs once and for all, it’s worth factoring in how a full replacement might prevent recurring storm damage.
Newer roofs typically come with enhanced hurricane-resistant fasteners and improved underlayment that strengthens your home’s defenses. In other words, you’re investing in a safety net. Even if a historic hurricane doesn’t come calling, smaller storms become less stressful when you know your roof is up to code, fully sealed, and reinforced against leaks.
Reinforcement techniques to ask about
Stronger attachment methods like ring-shank nails or hurricane clips.
Waterproof underlayment membranes to repel wind-driven rain.
Engineered ridges and vents for better airflow, reducing moisture buildup.
Bringing your roof up to modern standards could also yield more favorable homeowner’s insurance rates, which is another way you gain a return on your investment.
Estimating your budget and exploring financing
Once you’ve decided to replace rather than patch, you must still consider how to cover the cost. Between materials and labor, even the most economical replacement can set you back a five-figure sum. That’s why many Florida homeowners search for solutions like home equity loans, personal lines of credit, or special roofing finance plans to manage the expense.
You can begin by examining your current roof expenses. If you’re shelling out hundreds of dollars each quarter on repairs, funneling that money into a fixed monthly payment for a new roof may feel more predictable. Plus, you get the added assurance of a warranty. Before making any final decision, gather detailed quotes and compare them side by side. Look for itemized breakdowns so you know exactly what you’re paying for.
Consider a professional estimate
If you’re not sure where to start, look into a southwest florida roof replacement estimate. A reputable contractor can measure your roof, check its current condition, and let you know if hidden damage is lurking under your existing materials. This consultation also helps you understand how financing options might stack up against paying out of pocket.
Balancing short-term savings with long-term value
Staying on top of repairs might deliver short-term relief. However, when you view the five-to-ten-year outlook, the recurring maintenance bills, patch jobs, and energy inefficiencies become more apparent. Especially in southwestern Florida, you’ll see how quickly the elements can transform a minor soft spot into a major headache.
Budget-conscious homeowners sometimes wonder if the jump to a durable roofing material like metal is truly worth the premium. While metal roofs might cost double or triple the price of an asphalt shingle installation, you’re paying for decades of peace of mind. If you plan to keep your house for the foreseeable future, that extra investment often pays for itself in durability, fewer repairs, and possible insurance discounts.
Weigh ongoing maintenance vs. replacement
A helpful approach is to compare your current roofing expenditures to the long-term fees of a new installation. Make a quick monthly breakdown:
Are you frequently spending more than $100 or $200 a month patching leaks?
Do you expect more repairs next year, especially if a severe storm hits?
Have you had to refinance insurance coverage because your roof is older?
Whether your roof is brand new or you’ve been adding shingles every year, a professional assessment provides an impartial look at its structural fitness. Experts can also spot signs of deeper water intrusion, inadequate ventilation, or warped decking that might not be visible from the driveway.
If the contractor determines it’s time to move forward, you can explore a range of affordable roof replacement southwest florida options that might fit your property and budget. Remember: it’s crucial to choose a licensed, insured roofing crew with a reputation for quality workmanship. This helps ensure you’re not sidelined by future issues that result from subpar installation.
Questions to ask your roofing professional
How many roofs have you completed in my neighborhood or area?
Can you provide references who had similar roofing materials installed?
Are you familiar with wind mitigation requirements and local building code updates?
What is the warranty on labor and materials?
A great contractor will give you thorough answers and outline the next steps, so you can decide your best approach.
Why trust a dedicated roof replacement resource
Resisting the pull of constant repairs often boils down to peace of mind. Even if your roof has a little life left, regularly scheduling repairs can be stressful. By choosing to replace your roof, you simplify your maintenance logistics and reduce the risk of discovering a leak at the worst possible time—like during hurricane season.
If you’d like to learn more about the entire replacement process, including timelines, modern material options, and code requirements, consider visiting this helpful resource:\ Roof Replacement from San Carlos Roofing
This information can complement the professional opinions you receive locally, giving you extra clarity before you make a final call.
Planning your installation timeline
While roofing work can happen year-round in Florida, you’ll want to strategize around both your budget and the calendar. Sparing yourself a mid-hurricane-season installation is always a plus. If you can plan the replacement during milder months, your roofing crew will typically have smoother scheduling availability and may offer more flexible pricing.
Before your replacement starts
Clear the driveway for material deliveries and a disposal dumpster.
Remove valuable belongings from your attic in case of dust or debris.
Let neighbors know work will be happening—roofing can be noisy.
Secure any pets, especially if they’re sensitive to loud sounds or strangers on site.
By making these preparations, you’ll help the job run safely and efficiently, saving you time and possibly money.
How to get the best value
Securing the best overall value on your new roof doesn’t necessarily mean going for the cheapest materials. Instead, think about the marriage of quality, durability, and reasonable pricing. You might consider a mid-range asphalt shingle with upgraded underlayment, or even a cost-conscious metal roof option if longevity is your top concern.
As you gather quotes, take note of the additional charges—for example, the cost of replacing old flashing, vents, or deck boards. These details influence the final price but often make the difference between a roof that works well for five years and one that lasts much longer. If you suspect your current structure is severely compromised, you can reference a dedicated roof replacement cost southwest florida resource to get a ballpark figure. Enter discussions armed with that knowledge and be transparent about your budget from the start.
Careful negotiation tips
Compare at least three detailed estimates and check each contractor’s credentials.
Ask whether the quote includes permit fees, warranties, and any clean-up services.
Discuss possible payment schedules in advance to prevent unexpected charges.
Being proactive keeps everyone on the same page. It’s how you avoid misunderstandings and ensure that your chosen contractor focuses on delivering top-tier results.
Move forward with confidence
You don’t have to navigate southwestern Florida’s unpredictable weather with an unreliable roof overhead. Repeated patch jobs might feel comforting one day at a time, but they can quickly strain your finances and create long-term problems for your home’s structural integrity. When you weigh all the variables—from labor costs and material expenses to the intangible relief of a leak-free future—it’s often clear that a full roof update is not just a cost, but an investment.
Choosing a reputable local installer, planning ahead for storm season, and selecting a material that suits your household’s long-term needs can shield you from the stress of frequent fixes. By taking the time to research your options, ask the right questions, and map out your finances, you’ll be well-prepared to make a smart decision that pays off for years to come.
If you’re ready to dive deeper, be sure to explore Roof Replacement from San Carlos Roofing for a comprehensive look at what a new system might entail. You can also check out a southwest florida roof replacement estimate for your own property, so you know exactly where you stand. When it comes to a southwest florida roofing costs comparison, the surprising truth is often that replacement may protect both your home and your budget better than ongoing, unpredictable repairs.
Natural disasters, relentless humidity, and stringent insurance requirements make a “home inspection roof checklist Florida” homeowners can trust more than just a nice-to-have—it is an absolute necessity. If you are getting ready to sell your house or simply want peace of mind, understanding what buyers and inspectors look for in your roof safeguards your investment and helps you avoid last-minute surprises. By catching small issues now, you can spare yourself costly repairs and lengthy negotiations down the road.
Understanding Why Florida Roofs Need Special Care
Roofs in the Sunshine State face a host of challenges that can shorten their lifespan. High winds, torrential rains, and occasionally brutal hurricanes can damage shingles, flashing, and even the underlying structure. In addition, Florida’s year-round humidity accelerates wear and tear, fostering mold and other moisture problems.
Because of these unique climate factors, buyers often raise buyer concerns Florida roofing as one of the top deal-breakers during a real estate transaction. If your roof shows any sign of damage, lenders and insurers may insist on repairs or replacements before finalizing a loan or policy. Staying on top of inspections gives you an advantage whether you’re selling now or anticipating a future move.
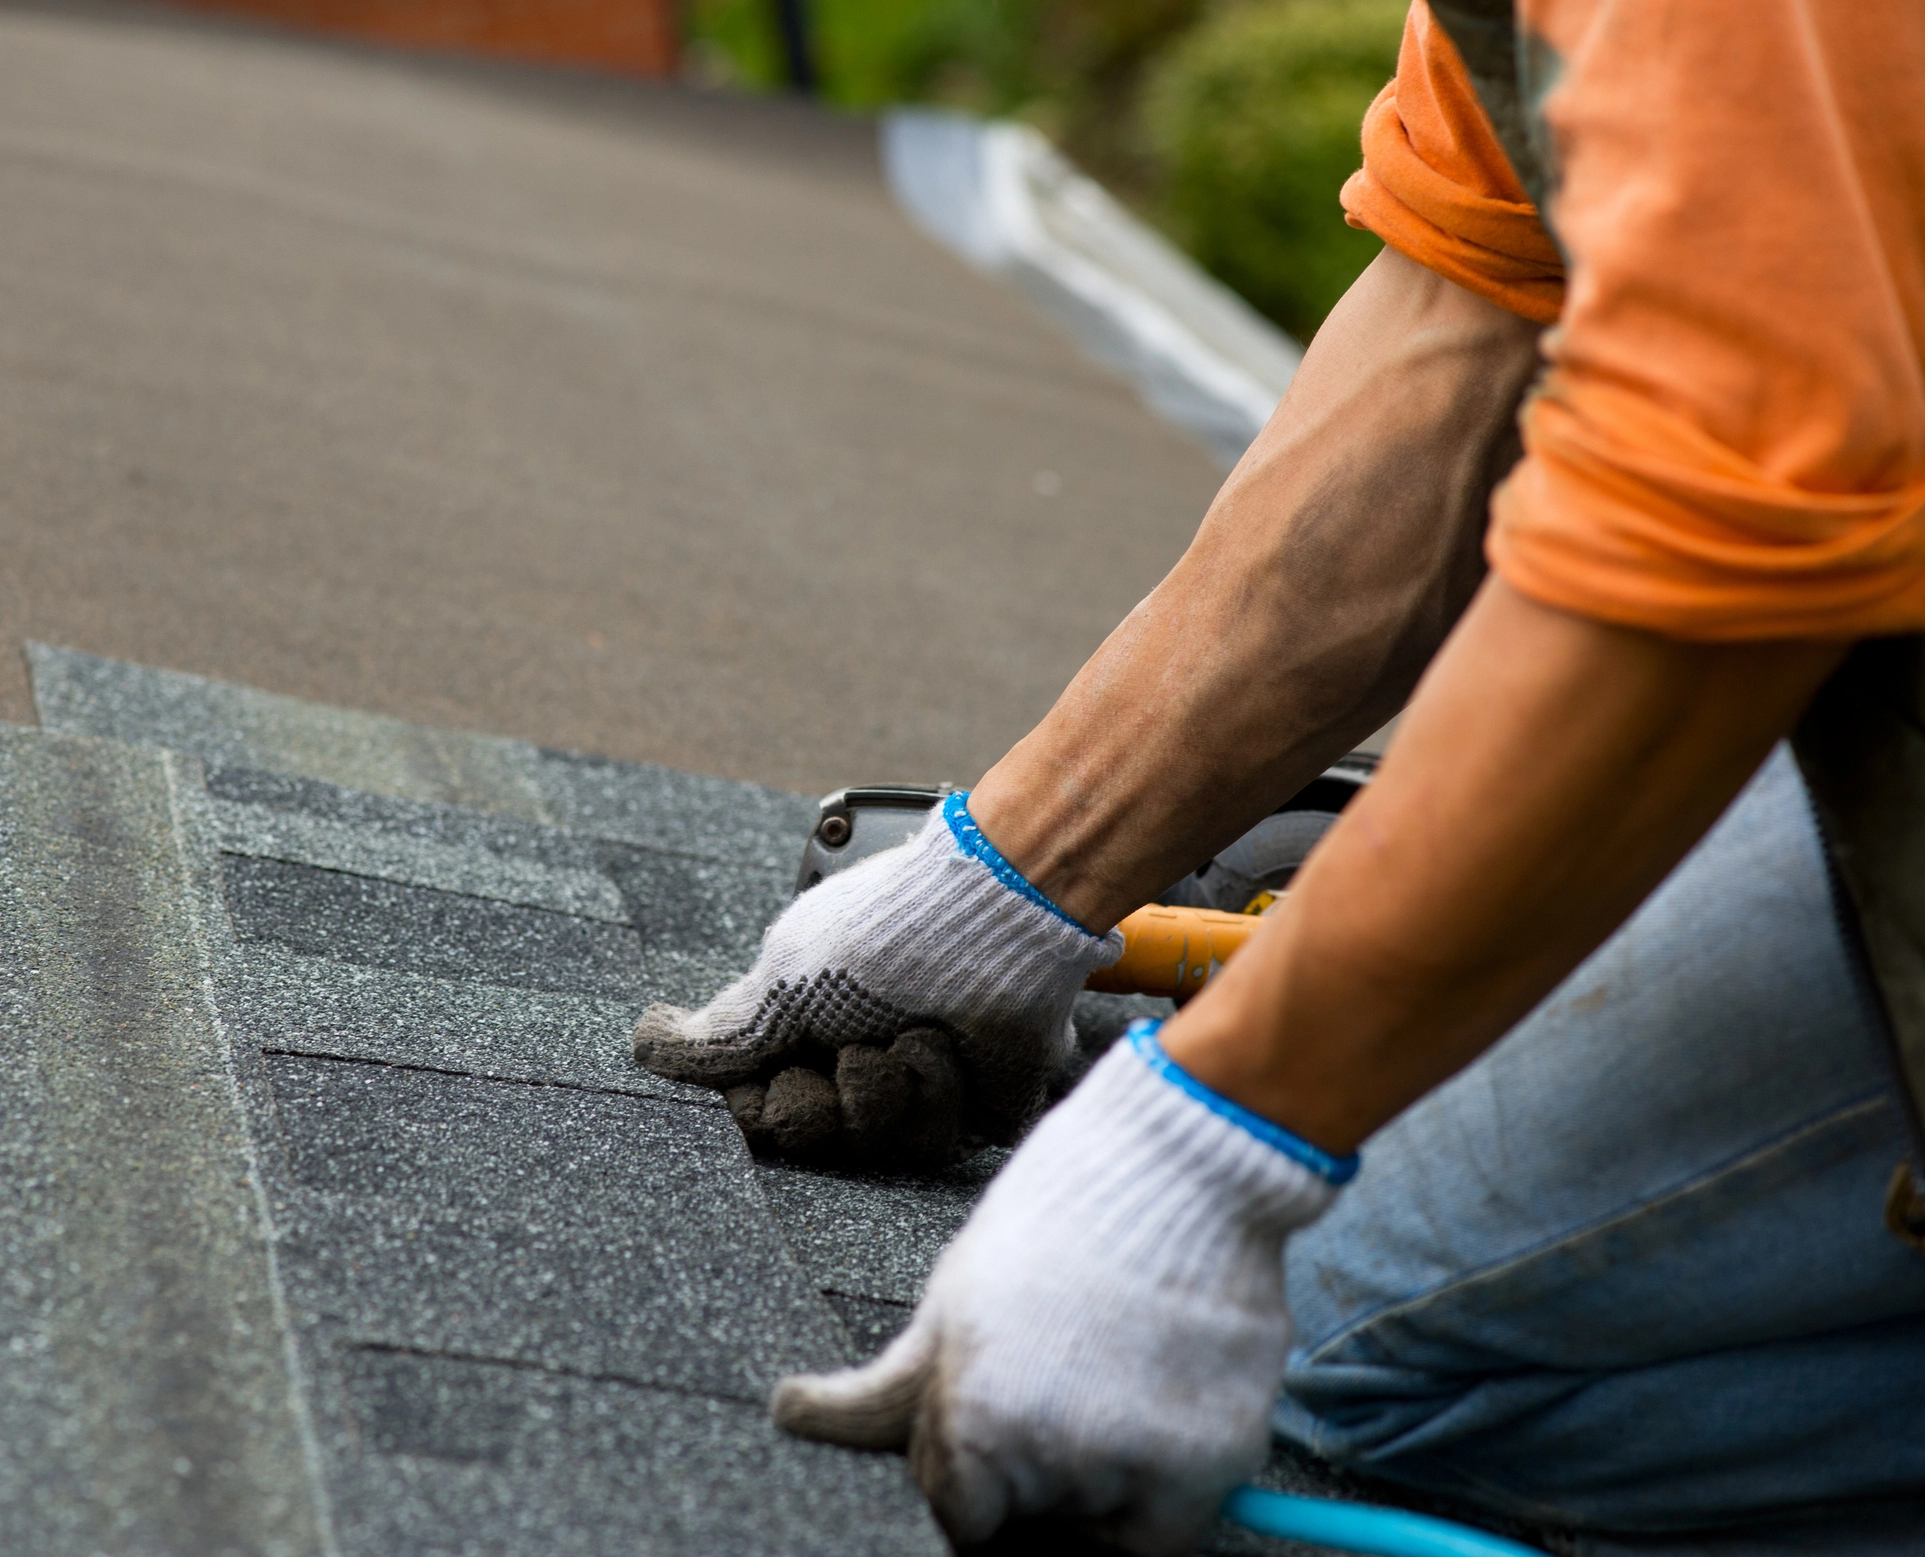
Checklist Step 1: Inspect Shingles and Roof Materials
A thorough roof inspection in Florida always starts on the outside. You want to look for any sign of visible damage or inconsistent wear.
Scan for missing or curling shingles. High winds can loosen or rip off shingles, making your home vulnerable to water infiltration. Even a few missing shingles can lead to expensive leaks.
Check edges and corners. Shingle uplift often occurs along the roof edges where wind pressure is greatest. If you notice raised corners, it may be time to call a professional.
Look at granule loss. Excessive granule loss can reveal an aging or weakened shingle. Small bald patches may indicate leaks in the near future.
When these issues line up—like missing shingles and obvious cracking—you risk multi-layer damage that could worsen with Florida’s stormy weather. As you evaluate the materials, note any odd color patches or uneven surfaces. These can be early signs of deeper problems.
Checklist Step 2: Evaluate Flashing and Sealants
Flashing is that thin metal strip around vents, chimneys, and skylights that keeps water out of the cracks where different surfaces meet. In Florida, where frequent rain is the norm, any compromised flashing invites moisture and eventually rot.
Look for rust or corrosion. Galvanized steel flashing typically withstands weathering well, but corrosion can turn into leaks quickly.
Inspect sealants. Sealants around joints and seams can crack, especially given Florida’s strong UV exposure. If you see splits or gaps, water can sneak in when the next storm hits.
Do not forget to check if flashing is still snug against the surface. Poorly secured flashing might shift in storms, leaving joints open for costly water damage.
Checklist Step 3: Check Gutters and Drainage
When Florida’s afternoon thunderstorm drops inches of rain in a matter of minutes, gutters and downspouts must perform flawlessly. Clogged or loose gutters will pool water near roof edges or cause it to spill over walls, leading to leaks and mold.
Inspect the gutter channels for leaves, twigs, or other debris. Also confirm that each downspout directs water away from your home’s foundation. Anytime you notice water backing up or not draining properly, it is time to clear those gutters immediately. This simple maintenance step wards off rotting eaves and peeling window frames, both of which can complicate insurance inspections.
Checklist Step 4: Look Inside Your Attic or Crawlspace
Often, the first sign of roof trouble appears above your head, not on top of your shingles. Head to the attic on a sunny day and look for beams of light poking through. Even a tiny ray of sunshine can mean a potential leak point.
Examine insulation for dampness, as excessive moisture is a surefire indicator that water is infiltrating somewhere above. If you notice any mold spots or musty smells, there could be ventilation problems. Address these quickly because Florida’s warm, humid climate accelerates mold growth faster than in drier regions.
Checklist Step 5: Watch For Mold and Moisture
Florida’s climate is notoriously hospitable to mold. Once it takes hold, it can spread quickly and compromise not just your roof, but also your indoor air quality. Keep these tips in mind:
Check for discoloration. Dark or greenish patches on your roof’s surface often point to algae or mold buildup.
Perform regular cleanings. A gentle wash with a cleaning solution can remove surface mold. However, if mold has penetrated the underlayment, you may need professional services.
Rule out poor ventilation. Without adequate airflow, heat and humidity collect in your attic and feed mold growth behind your walls or roofing materials.
Mold may not stop at your roof. It can creep into the attic or interior walls, affecting structural integrity and even your family’s health. The best way to prevent this is by conducting periodic checks and improving attic ventilation where needed.
A Quick Reference Table
Here is a concise look at main components you will inspect:
Roof Component
What to Check
Why It Matters
Shingles
Missing, curling, uplift
Prevent water intrusion, maintain home value
Flashing
Rust, loose seams
Avoid hidden leaks around vents and skylights
Gutters
Debris, water flow
Combat mold, protect siding and foundation
Attic
Light penetration, dampness
Detect leaks early, prevent large-scale damage
Mold/Moisture
Surface stains, odor
Ensure healthy air quality and structural safety
Use this table for quick reminders, and keep track of any emerging issues as storms pass through.
What If You Find Damage?
If you discover concerning signs—like extensive mold, broken shingles, or sagging areas—do not let the problem linger. You can read more about roof inspection for Florida homebuyers to see why buyers might request big repairs or a roof replacement as a prerequisite for closing the deal. In some cases, you might also want to investigate solutions highlighted in our Florida roof maintenance before selling guide so that you are ready when prospective buyers schedule their own inspections.
A professional roofer can identify the root cause of any trouble spots. Whether it is damage from a recent storm or older wear and tear, you want to address it before listing your home. Even if you are not planning to sell, an expert opinion helps you establish a long-term maintenance plan so your roof does not suddenly fail during Florida’s next rainy season.
Schedule a Professional Assessment
When your inspection yields potential red flags, it is best to get confirmation from a licensed roofing contractor. A professional assessment lays out exactly what may be wrong and how to fix it. If you are thinking of selling, it gives you the upper hand to negotiate confidently with buyers.
You can learn more about professional roof inspections at San Carlos Roofing. While a do-it-yourself approach covers the basics, a certified expert can spot subtle structural issues or code compliance problems that might go unnoticed until a later stage.
Stay Proactive For Long-Term Savings
Finally, do not wait until your roof starts leaking to take action. Florida’s constant heat and frequent storms mean even minor wear can rapidly escalate into big problems. Keep annual or semi-annual checks and be especially vigilant after major storms. You will protect your home’s value, attract more confident buyers, and maintain a safer, drier living environment.
For a deeper dive, you can reference our Florida roof inspection checklist for everything you need to keep your roof in top shape. Regular attention to small repairs keeps you from needing a major overhaul later, saving you time, money, and hassle.
Remember, a strong roof is a top priority for any Florida homeowner—especially if you anticipate selling or dealing with insurance companies. By addressing potential issues early and following a reliable home inspection roof checklist Florida residents trust, you will avoid costly surprises and keep your home looking (and feeling) secure.
Understanding roof maintenance vs replacement cost
Keeping a sturdy roof over your head in Southwest Florida can bring peace of mind, especially with the region’s unique weather conditions and potential for storms. You want to weigh whether consistent maintenance or a full replacement is the better financial and practical decision. By examining the costs, benefits, and warning signs of each option, you can keep your home protected without overspending.
In this guide, you’ll learn about the typical expenses tied to each approach, the specific factors that affect pricing in Southwest Florida, and tips on how to determine when it makes sense to keep repairing your existing roof versus getting a brand-new one.
Why roof maintenance matters
Regular roof maintenance aims to catch small issues early before they escalate into costly damage. You usually check for worn or loose shingles, cracked flashing, or minor water leaks. According to a 2024 Forbes Home report, most homeowners spend under $1,500 on standard roof repairs when problems are discovered quickly. This can be a relief if you’re dealing with a few missing shingles or leaky spots around your chimney.
Proactively scheduling roof tune-ups also helps preserve energy efficiency. Any unwanted gaps or loose materials can lead to cooled indoor air escaping, inching your utility bills upward. By maintaining your roof regularly, you avoid more serious problems, like mold growth or structural damage, and reduce the risk of having to tackle a major renovation without warning.
When replacement is the smarter choice
Even with regular checkups, every roof has an expiration date. After a certain point, pouring money into repeated fixes may not be the most cost-effective route. Angi estimates a full roof replacement can range from $8,000 to $20,000 or more, which is a significant investment. However, if you’ve been chipping away at repair bills for years, a comprehensive replacement might ultimately save you money by eliminating constant upkeep.
Many homeowners in Southwest Florida also face damage from tropical storms and hurricanes. Heavy winds can strip protective granules or lift shingles out of position, allowing moisture to creep in. Once that moisture compromises the underlying materials, a simple repair might not cut it. Ultimately, you want a solid shield over your home that won’t buckle under the next strong gust of wind.
Telltale signs your roof needs more than upkeep
Some roof symptoms point to a need for a more thorough overhaul rather than another patch job. The FORTIFIED program highlights some red flags that should prompt you to consider a full replacement sooner rather than later:
Persistent leaks that reappear after multiple repairs
Curled or severely cracked shingles across large sections
Moss or algae growth that breaks down roofing materials
Missing granules that expose the underlayer to water damage
Additionally, Nationwide notes that a typical roof can last anywhere from 25 to 50 years based on material quality and proper maintenance. If your system is approaching the end of that life range or you notice interior water stains, it’s wise to compare replacement quotes instead of continually paying for short-lived fixes.
Short-term costs vs long-term value
When you weigh roof maintenance vs replacement cost, it’s tempting to choose repair simply because it’s cheaper at the moment. But consider whether those repair bills are starting to add up. Small fixes are budget-friendly only if they truly extend your roof’s lifespan.
Repeated patches on an aging or storm-battered roof can mask deeper issues that lead to structural complications. You might end up paying for the same problem again and again. Over time, those incremental costs might surpass the price of installing a new roof. By replacing a deteriorating roof, you lock in a fresh warranty period and potentially boost your home’s energy efficiency.
Specific considerations in Southwest Florida
In Southwest Florida, you contend with moisture-rich air, high heat, and seasonal storms. These factors can weaken your roof materials faster than in milder climates. You might see rust on metal fasteners, warped or bubbling shingles, and seeping leaks around roof valleys after heavy rainfall. These symptoms suggest a larger underlying issue that a single patch may not fix.
For a detailed look at local costs, check out our southwest Florida roofing costs comparison. You’ll find insights on factors like permitting requirements, material expenses, and how the area’s weather can influence pricing. If you’re weighing a roof upgrade but aren’t sure what you’ll pay, head over to roof replacement cost southwest Florida for more specialized guidance.
Making an informed decision
You don’t have to figure everything out on your own. Start by scheduling a professional roof inspection. An expert will look beyond surface-level wear and tear, evaluate the interior structures, and let you know if you’re a strong candidate for an affordable repair or a more extensive overhaul. If you want a ballpark figure for installing a new roof in Southwest Florida, consider reaching out for a southwest Florida roof replacement estimate.
Sometimes, a repair truly is all you need for a younger roof with isolated damage. Other times, large patches of compromised shingles make a new installation the clear winner. By balancing immediate savings against long-term benefits, you’ll make a choice that supports your budget as well as your home’s overall value.
Exploring affordable options
Worried that a full replacement sounds expensive? Fortunately, material advances and competitive labor pricing have made fresh installations more accessible. Replacing your shingles in one go might qualify you for certain insurance discounts or improved coverage. Plus, sealing vulnerabilities in your roof can lower energy usage by maintaining a stable indoor temperature.
If you’re comparing quotes, give yourself enough time to assess different warranties and roofing styles. It might be tempting to choose the cheapest contractor but look for proven experience installing roofs that can handle the Southwest Florida climate. You could also review affordable roof replacement southwest Florida to see cost-effective solutions without sacrificing quality.
Your next step
For a deeper understanding of roof replacement, you can explore the resources at San Carlos Roofing. Southwest Florida’s shifting temperatures and storm-prone seasons require a resilient roofing system, and it’s best to partner with local professionals who understand the area’s unique demands.
Whether you decide on ongoing repairs or you’re ready to commit to a new installation, the key is making a thoughtful, well-informed choice. By weighing the immediate and future impacts on your home, finances, and peace of mind, you’ll be on your way to a solid and dependable roof that shields you from the elements for years to come.
If you live in Southwest Florida, you know firsthand how sporadic and extreme the weather can be. From daily thunderstorms to powerful hurricanes, your home’s roof endures plenty of stress every year. That’s why metal roof durability in Florida climate has become such a hot topic. Metal systems are designed for wind, water, and sun resilience, giving you much-needed peace of mind whenever storm clouds roll in.
Metal roofing has grown in popularity because it’s formidable against wind gusts that might topple other materials. Many metal roofs can handle speeds exceeding 140 mph, which is crucial when coastal storms intensify. Even inland, sudden temperature shifts can damage less durable roofing. By contrast, metal roofs expand and contract far more reliably than traditional shingles or tiles, meaning they maintain a tighter seal over your home.
In fact, many metal roofing systems in Florida can last well beyond 40 years, with some reaching 70 years depending on the type of metal. [1] These roofs often outlive asphalt shingles, which usually need replacement after 15 to 20 years.
Choose The Right Materials
Your decision to install a metal roof in Southwest Florida begins with selecting the material that best matches your conditions. Metal roofing comes in steel, aluminum, copper, or stone-coated steel. Each offers a slight variation in appearance, weight, and resistance to salt air or hurricanes.
If you live near the coast, you may want a corrosion-resistant metal, such as galvanized steel or aluminum. Salty sea breezes can gradually eat away at weaker metals, which is why choosing a metal specifically rated for coastal climates is critical. [2] For inland homeowners, traditional steel options usually hold up well, provided they have coatings designed to reduce rust.
Stone-coated steel, like Tilcor stone-coated galvalume, offers protection against dings from flying debris during storms. [3] It also mimics the look of classic tile, which can be a draw if you favor more traditional roof aesthetics but still want an extra layer of durability. Be sure to explore your options with a contractor who understands Florida’s climate, so you can be certain you’re getting the right match for your region.
Install with proven methods
High-performing materials aren’t enough if they’re not installed with precision. In a place like Southwest Florida, reliable installation matters just as much as the product itself. Standing seam metal roofs, for example, feature concealed fasteners and interlocking panels that help them remain tightly attached when punishing winds strike. [3] These seamless designs reduce the chance of water intrusion, a common challenge when wind-driven rain whips against your roof.
Finding skilled, experienced roofing professionals is crucial, because errors during installation can lead to leaks, premature rust, and even roof failure during severe storms. [3] Look for experts who understand how Florida heat affects metal expansion and contraction patterns. Even the best roofing panels can warp or lift away if they’re fastened improperly.
If you’re scouting for installation services, you might also want to look into metal roof installation southwest Florida. Working with a local team ensures that your project uses the best practices for Florida’s wind zones, humidity, and punishing sun. You can also check out reputable companies that handle roof replacements in the region, such as San Carlos Roofing, to get a better sense of your roofing options.
Combat rust and corrosion
Florida’s steamy summers and abundant rainfall can push your metal roof to its limit. Rust tends to develop when water collects or remains on metal surfaces, especially if protective coatings wear down. Coastal locations see an even faster pace of corrosion when salt air is involved. [2] However, you don’t have to resign yourself to rust. Routine checks and a few best practices can do wonders for corrosion control:
Choose rust-resistant metal from the start
Apply or renew protective coatings that shield the metal
Clear debris, including branches and leaves, from the roof so moisture can drain
Inspect roof fasteners and sealants to ensure they’re secure
Many roofing experts recommend investigating screw-down panels vs. standing seam. Screw-down fasteners might be more exposed to the elements, so you’ll need to replace or retighten them about every 20 years to ward off leaks or rust. [4] Still, following a consistent maintenance schedule can solve a lot of these issues, making these metal roofs perfectly viable for Florida conditions.
Maintain your roof regularly
Metal roof durability in Florida climate depends on how proactive you are with maintenance. You can’t always avoid nasty storms or keep debris from blowing around, but you can control how fast you respond to trouble spots.
Most professionals suggest you inspect your roof at least twice a year. [5] One look should happen before hurricane season to identify any vulnerabilities that might worsen when wind and rain intensify. The other inspection can follow a major storm or at the end of the rainy season. If you see visible dents, corrosion, or loose fasteners, schedule repairs promptly to prevent small problems from growing.
Similarly, be sure to clear away mold or algae, as Florida’s humidity can encourage growth if water sits for too long. Whenever you notice stubborn stains, break them down early with non-toxic and non-abrasive cleaners specifically designed for metal roofs. Keeping your metal panels clean and removing leaves or branches from drainage areas will reduce the risk of rust or rot setting in.
To learn more about ongoing upkeep, you can explore metal roof maintenance southwest Florida. Staying on top of routine checks could extend the life of your metal roof to 30, 40, or even 50 years. [4]
Improve energy efficiency
Sun, humidity, and high temperatures are part of everyday life in Florida, which means your roof can directly affect your energy bills. Metal roofing typically reflects a greater portion of solar radiation than asphalt shingles, helping prevent heat from seeping into your living spaces. You might even notice your indoor temperature feeling more comfortable, reducing the load on your air conditioner.
For newer metal panels, modern coatings can add an extra layer of insulation. By choosing high-quality reflective paint, your roof maintains a cooler surface and stands up better to UV rays. Some homeowners report savings on energy bills because their AC cycles less frequently. If you’re curious how metal roofing can help you save money in Florida’s heat, check out energy efficiency metal roofs Florida.
These efficiency perks can be especially noticeable if you invest in a lighter-toned or reflective metal panel. The bright surface deflects a greater amount of sunlight, while darker metal roofs can still perform well with the right protective coatings. Either choice is likely to be more efficient than many traditional roofing materials in the Florida sun.
Factor in cost vs. value
It’s no secret that metal roofs carry a higher initial price tag than asphalt shingles. In Florida, you might pay anywhere from $8 to $14 per square foot, while shingles can cost as little as $3 to $5 per square foot. However, that up-front cost should be balanced against how often you’d need to replace conventional shingles. A metal roof might outlast three shingle roofs, making it a more efficient long-term investment if you plan on staying in your home for decades.
You also want to consider hurricane readiness. Each new storm season can lead to unexpected repair expenses if your roof isn’t up to the task. Metal roofs offer greater wind resistance, lowering your chance of incurring heavy damage from a severe storm. Over time, that reliability could save you thousands on repair fees.
In addition, Florida’s building codes prioritize wind resistance in high-velocity hurricane zones, which means you’ll likely invest more in any roofing you install. Because metal roofing is engineered to comply with strict code standards, you can view your installation costs as strategic protection. While you might pay more initially, you get a stronger, longer-lasting roof that defends your property against everything from daily downpours to hurricane-force gusts.
Make your final decision
Choosing to invest in a metal roof for your Southwest Florida home is more than just a style preference. It’s about safeguarding your property year after year in an environment known for intense sun, heavy rainfall, and hurricane threats. If you want a system that stands up against debris, strong winds, and repeated pounding by tropical storms, metal can be a worthwhile choice. [5]
Still, make sure you’re fully prepared. Research local codes, talk with trustworthy contractors, and weigh your options for materials, coatings, and design. Each of these factors can influence how your roof performs. If you’re curious about broader benefits of metal systems, consider checking out metal roofing benefits Florida homes. Once everything lines up, you’ll have a robust roof that keeps you safer during storms and supports lower energy bills over time.
Before setting your plan in motion, remember that regular maintenance will ensure your investment pays off. By addressing any small signs of damage promptly and scheduling routine inspections, you can enjoy the longevity and reliability that metal roofing promises.
Table: Quick metal roofing facts and tips
Factor
Consideration
Lifespan
Often 40–70 years in Florida, depending on metal type
Wind resistance
Many systems rated above 140 mph
Coastal environment
Aluminum or galvanized steel recommended for rust prevention
Maintenance frequency
Biannual inspections plus after major storms
Potential energy savings
Metal roofing reflects heat and may reduce cooling costs
Installation priority
Hire experienced roofers to prevent leaks or panel warping
Keep these factors in mind as you plan your roofing project. Small details, like the type of fastener or your roof’s pitch, can have a major impact on how well your metal roof performs.
Key takeaways
• Swiftly changing weather in Florida demands a stable, wind-resistant roof • Metal roofing can handle high winds, heavy rain, and frequent heat blasts • Routine upkeep—like biannual inspections and simple cleaning—helps extend lifespan • Proper installation is as important as material choice for long-lasting results • While initial costs can be higher, you may save money over the long run
Whether your priority is storm defense, energy efficiency, or longevity, metal roofs have proven to be a smart investment in the Sunshine State. If you’re ready to proceed with your project, look into companies experienced in roof replacement or “metal roof installation southwest Florida” to ensure a job done right. By choosing a durable material and staying on top of maintenance, you give yourself a roof that can withstand Florida’s extremes for decades to come.
If you live in Florida, you understand how relentless the local weather can be. From high humidity and soaring summer temperatures to hurricane-force winds and driving rain, your roof must handle serious stress each year. Traditional shingle roofs may work for a while, but they tend to wear out faster in Florida’s conditions. That’s why metal roofing benefits Florida homes in a powerful way. You gain a roof that’s built to withstand storms, reflect heat, and last for decades, helping you avoid frequent repairs or replacements.
At first glance, you might wonder if metal is truly worth it. After all, your main concerns probably revolve around cost, aesthetics, and performance. Yet when you weigh the long-term advantages, from energy savings to fire resistance, the choice often becomes clear. Metal roofs have proven their value in Florida, consistently outlasting asphalt shingles and offering superior strength against hurricanes. If you’ve been thinking about upgrading, here’s what you should know before making your final decision.
Understand Florida’s roofing challenges
Florida’s climate puts unique demands on any roofing material you choose. The combination of hot sun, high humidity, and near-annual tropical storms creates a perfect storm of wear and tear.
You’ve likely seen how quickly shingles can degrade under harsh UV rays. The constant moisture can also lead to mold or algae growth, weakening the roof’s structural integrity over time. And during hurricane season, heavy gusts can peel shingles away, leaving your home vulnerable to leaks.
In this environment, metal roofing stands out for how well it repels moisture and endures punishing winds. According to a 2025 report, many metal roofs in Florida can withstand wind speeds up to 140 mph or more [1], far exceeding building code requirements. These durable panels also do an excellent job of shedding rainwater quickly, which helps protect underlying layers from rot or mold.
If you’re new to learning about metal roofs, consider reading more about metal roof durability florida climate. You’ll get a sense of how well different types of metal panels stand up to Florida’s toughest weather conditions.
Explore durability benefits
When you imagine metal, you might worry about rust or dents. In reality, modern roofing panels come treated with protective coatings to resist corrosion and reduce the risk of damage. These coatings help ensure your roof holds up even in salty coastal regions.
Multiple sources show metal roofs in Florida can last anywhere between 30 to 50 years, depending on the material and installation quality [2]. By contrast, asphalt shingles often need to be replaced in 15 to 20 years, especially after enduring several storm seasons. If you’ve experienced repeated damage with traditional shingles, a metal roof can be a more permanent solution.
You also gain extra protection from flying debris. High-grade metal panels are less likely to tear, crack, or lose granules in harsh conditions. When a roof is properly fastened, its interlocking patterns form tight seams that keep you safe from sudden leaks or water intrusion. And if you’ve ever had to call for emergency repairs right before or right after a major storm, you know how valuable that level of durability can be.
Maximize energy efficiency
One of the biggest perks of metal roofing benefits Florida homes is its reflective surface. Instead of absorbing the sun’s rays, many metal roofs bounce light and heat away from your living space. That means your attic stays cooler, so your air conditioning system doesn’t have to work as hard.
Studies indicate that metal roofing lowers cooling costs by up to 25% [3]. Florida’s relentless sun can make your energy bills skyrocket, so every bit of cooling efficiency helps. Some metal roofing products boast specialized coatings for enhanced solar reflectivity, allowing them to better deflect heat in the summer.
You can think of your roof as an investment in long-term comfort. While you enjoy a cooler home, you’ll likely trim your utility bills, too. Over the life of your roof, those ongoing cost savings add up. Plus, improved insulation can help even during milder weather, keeping indoor temperatures steadier year-round. If you want a deeper look into these cooling advantages, consider reviewing energy efficiency metal roofs Florida.
Evaluate costs and value
Any roof upgrade is a significant financial decision. Metal roofing might carry a higher upfront price tag than basic shingle options, but the long-term value generally evens things out. By lasting longer and helping cut energy bills, metal surfaces can pay for themselves over time, especially in Florida’s harsh environment.
Below is a simple comparison table to illustrate typical roofing costs and lifespans in Florida:
While you might pay more for metal upfront, you can break even in as few as 12 to 15 years once you factor in lower maintenance demands and better energy savings [4]. This is especially important if you’re planning to stay in your home for a long time. Even if you decide to sell one day, you’re likely to fetch a higher resale value and enjoy broader buyer interest when your home has a roof known for longevity.
If you face repeated roof-related issues and are assessing the best step forward, you may also explore a comprehensive roof replacement to fully upgrade your structure. When done right, the overall improvement in durability and energy efficiency can dramatically increase your home’s overall worth.
Select designs for appeal
Metal roofing isn’t just a practical solution; it can also look fantastic. Florida homeowners have a range of styles, textures, and colors at their disposal, from vibrant tropical shades to subdued neutrals. You’ll discover that modern metal roofing can mimic the look of shingles, tiles, or even clay roofs [5].
Because curb appeal drives a lot of your home’s value, you want a roof that fits the local style. Coastal homes sometimes opt for aluminum or standing seam roofs in bolder hues, while suburban homes might go for metal shingles or slate-look panels for a more traditional feel.
It’s also not uncommon in Florida to select patterns that fit the region’s Mediterranean influences. The right color can help highlight architectural details, making your home stand out in the neighborhood. More importantly, you don’t have to compromise on strength or efficiency to get an attractive design.
If you’d like guidance on selecting or installing a panel style that suits your property, you may want to look into metal roof installation southwest Florida. This resource breaks down the specific approvals and best practices that keep your new roof compliant with local building codes.
Maintain your metal roof
While metal roofs require significantly less upkeep than asphalt shingles, you’ll still need a few regular habits to ensure maximum longevity. Thankfully, most of this maintenance is quick and hassle-free compared to what you’d face with other materials.
• Inspect annually for any dents or chips in the surface coating. • Clear away branches and debris that may build up along seams. • Rinse off salt and grime if you’re near the coast. • Schedule a professional inspection if you spot rust or loose fasteners.
The natural moisture resistance of metal roofing, combined with protective finishes, means algae, moss, and mold growth are rarely an issue in Florida’s damp environment [5]. Even so, you need to be vigilant about standing water in case of gutter clogs or pooling after intense storms. Keeping a watchful eye will help you avoid rust or corrosion.
If you’d like more detailed guidelines, metal roof maintenance southwest Florida offers helpful insights specific to this region’s climate. Before hurricane season, a quick inspection can be the difference between sleeping soundly and worrying about roof damage when the next storm hits.
Begin your roofing upgrade
Ultimately, choosing metal roofing can transform your Florida home into a fortress against storms and a more energy-efficient living space. Over the years, you’ll waste less money on repairs while enjoying a cooler interior. The variety of styles lets you match your aesthetic preferences, ensuring you don’t have to sacrifice curb appeal for durability.
You’ll also feel more secure when the next hurricane arrives, knowing you’ve invested in a material specifically designed to handle Florida’s climate extremes. Because metal panels often come with lengthy warranties, some lasting multiple decades, you can relax knowing your roof is built to endure. In many cases, you’ll also see a boost in property value if you ever decide to sell.
As you plan your next steps, focus on finding a qualified contractor with experience installing metal roofing in Florida. Proper installation is critical for ensuring those interlocking panels and seams protect your home for the long haul. Be sure to check local regulations and confirm that your prospective roofer fully understands county building codes. This attention to detail could make all the difference once hurricane season rolls around again.
If you’re still on the fence, think about how much you stand to gain. Fewer repair headaches, better energy savings, and a good-looking roof you won’t have to replace in a decade can all be worth the extra investment. The peace of mind you get from knowing your roof can handle fierce storms year after year is something many Florida homeowners find priceless.
In the end, focus on what truly matters to you: a safe, comfortable home for your family. By choosing metal roofing, you’re taking a proactive step toward protecting your biggest asset from the region’s unique weather threats. Be sure to review local resources, weigh different metal products, and speak to professionals who can answer your questions. With the right approach, you’ll discover that metal roofing benefits Florida homes in ways you won’t want to ignore.
Florida is paradise on most days. The sun is bright, the breezes warm, and afternoon clouds march in like clockwork. That same beauty is also what makes Florida roofs work harder than almost anywhere else in the country. Heat swells materials. Humidity lingers. Storms shove rain sideways. Salt and coastal winds accelerate wear. If you are seeing new stains on the ceiling or a tile that looks a little out of place, you are probably right to wonder if a leak is starting. Catching it early can save thousands and protect the air you breathe.
In this guide written for Southwest Florida homeowners, you will learn the Florida specific leak clues that are easy to miss, why they happen, and the smart moments to bring in a professional. We will reference a few trusted resources such as the Florida Building Code, the UF IFAS Extension, and the Insurance Institute for Business and Home Safety, so you can cross check the details as you go. And if you need a local hand, the team at San Carlos Roofing has helped neighbors through just about every roof scenario the Gulf Coast can throw at a house.
Why Florida roofs leak differently
Homes in Southwest Florida face a unique mix of stressors. The roof must tolerate long seasons of high ultraviolet exposure, day to night thermal swings, high humidity that rarely lets materials dry completely, and frequent episodes of wind driven rain. Older roofs were built to a different era of standards. Newer roofs typically follow the stricter guidance of the Florida Building Code, which keeps evolving after each major storm season. The result is a neighborhood where two houses on the same block can age very differently.
Heat, UV, and humidity team up
UV breaks down asphalt binders in shingles and dries out sealants around flashing. Metal can expand and contract until fasteners loosen. Tile roofs that look perfect from the street may have underlayment that has become brittle from years of radiant heat. Humidity then slows the drying of any small intrusion, which is why tiny seepage can become a stain that seems to bloom overnight. In the attic the air can be warmer then expected even late in the evening, which keeps moisture active for longer.
Storm seasons and wind driven rain
Rain in Florida rarely falls straight down. Wind pushes water under laps, up against ridges, and into any small gap that would be harmless on a calmer day. Soffits can inhale mist. Ridge vents can briefly admit water if baffles are worn. A tropical system raises the water table and saturates walls which can hide leak paths that only wake up in big weather. IBHS research on roof performance, summarized by the Insurance Institute for Business and Home Safety, shows that controlling edges, fasteners, and sealed seams has an outsized effect on how a roof fights that wind driven water.
Common construction details in Florida homes
Many Florida houses pair stucco walls with tile or shingle roofs and feature plenty of penetrations. Think solar pool heaters, plumbing stacks, skylights, satellite mounts, and range vents. Each of those points is a potential water entry if flashing is thin, cracked, or lifted. In tile assemblies, the tile is often not the waterproof layer. The underlayment is. Once that hidden layer is compromised, water can travel several feet before it appears, which is why stains sometimes seem to be nowhere near the source. UF experts at the UF IFAS Extension often note that moisture intrusion follows the path of least resistance inside wall and ceiling cavities, which confuses the eye.
The early warning signs you can spot from the street
You do not need to climb a ladder to catch many Florida specific leak clues. A slow walk around the home after a rainy afternoon can reveal more than you might expect. Keep your eyes on edges, transitions, and anything that looks out of alignment.
Loose or slipped tiles after a storm
Clay and concrete tiles can ride up slightly when wind pries at an edge. From the ground they look like a tooth that is just a little high. One or two slipped tiles can open a channel for water to reach the underlayment, especially during an afternoon squall. If you see a pattern of misalignment that was not there last season, note it and consider a checkup.
Shingles with bald spots or glitter in the gutters
Asphalt shingles shed protective granules as they age. In Florida sun this can accelerate. Bald patches on south facing slopes matter because the exposed asphalt softens and cracks more easily which invites seepage at each nail. You might also notice sand like granules collecting at downspout outlets after a big rain. That is the roof telling you its armor is thinning.
Sun blisters and heat ripples
UV and heat can cause blisters that look like small bubbles on shingle surfaces. Tile and metal can show subtle rippling around fasteners or seams. These are not purely cosmetic in this climate. The blisters pop, the ripples grow, and water finds the low spot.
Sagging along a ridge or between trusses
A wavy ridge line or a shallow sag between rafters can indicate prolonged wetting or compromised decking. It does not always mean structural failure, but in a high humidity environment the wood can lose stiffness faster than in drier states. Sagging paired with interior stains deserves prompt attention. If you see it, it is wise to speak with local roof repair experts before the next storm cycle.
Flashing that looks dull, lifted, or streaked
Step flashing at stucco wall intersections and counter flashing at chimneys are prime Florida leak locations. Salt air and heat fatigue the metal, and movement cracks the sealant line where metal meets stucco. Look for shadow lines that suggest the metal has lifted or rusty streaks that were not there last season.
The indoor clues that Florida homeowners should never ignore
While exterior checks are helpful, the clear story often starts inside. Humidity drives mold growth and hidden dampness, so interior signs show up quickly here.
New ceiling stains that change shape after rain
A perfect ring stain is a classic, yet in Florida you may see cloudy blotches that ebb and grow depending on the afternoon shower pattern. That is because the moisture can evaporate during hot, sunny mornings and reappear after a 3 pm downpour. If the stain looks different today than yesterday, a leak is active.
Paint that peels or bubbles near exterior walls
In stucco homes, water can ride behind the lath or at the flashing line then appear as bubbling paint near the ceiling corner or beneath a window header. The source might be roof to wall flashing rather than a window leak. It is a tricky one. Many people repaint twice before realizing the roof detail is to blame.
A faint earthy odor in closets and hallways
Florida’s moisture rich air lets small leaks build a musty smell quickly. If a closet that backs up to a bathroom or exterior wall starts to smell earthy, check the ceiling plane for ghosted stains. Mold can spread fast in closed spaces with poor air movement.
Attic checks that reveal wet insulation or daylight
If it is safe, a quick attic peek after a storm can be revealing. Insulation that clumps or shines means it is wet. Decking that looks dark around nail heads suggests seepage at the fasteners on shingle systems. Daylight alongside a vent pipe or at a ridge opening is a red flag for wind driven rain entry. Keep in mind that attics get very hot in Florida. Limit time, work with a partner, and step only on the joists.
A simple towel test you can do without tools
Place a light colored towel beneath a suspect spot in the attic or on the top shelf of a closet. After the next rain, check for new dots. It is not scientific, but it helps confirm an active leak while you arrange a professional inspection.
Why small leaks escalate faster in Florida
Moisture that lingers inside a wall cavity or beneath a tile roof warms quickly during the day. Warmth accelerates microbial growth. That means a small intrusion can affect indoor air quality in days rather than weeks. Saturated insulation loses R value which keeps the house warmer and makes the AC work longer. Longer cycles add to your bill and keep the attic humid. It is a feedback loop you want to break quickly. Guidance from university building science programs like the UF IFAS Extension consistently points out that controlling moisture at the source is the first and most effective step.
When a quick call is smarter than another DIY check
You do not need to wait until water drips from a light fixture. In Florida, certain combinations of symptoms mean it is time to pick up the phone.
Call right away if you see any of these clusters
Ceiling stains that change shape coupled with a wavy ridge line. Musty odor with peeling paint at a roof to wall intersection. Slipped tiles along the windward edge after a storm. Granules piling at downspouts plus blisters on sun facing slopes. Any of those pairs justify a professional look before the next front rolls through.
Why licensed local pros matter here
A Florida licensed roofer understands local wind ratings, fastening schedules, and sealant systems that survive UV. They also know how to work with tile underlayment and stucco transitions which are common failure points. If you are in Lee or Collier County and want an inspection that focuses on long term performance, reach out to San Carlos Roofing for options and timing that fit your schedule.
Florida specific leak signs in depth
Florida roofs do not fail in one dramatic moment as often as people think. Most leaks begin with tiny tells. The clues below are especially common from Naples to Cape Coral and they tend to show up after hot seasons and wind driven rain. A quick scan after an afternoon storm can catch many of them before they turn into stains and soft spots.
Valleys that hold leaves and sand
Roof valleys collect everything. On tile and shingle systems in Southwest Florida, fine sand, leaves, and flower petals can settle in the valley trough. When the next downpour arrives, water rides over that debris and slips beneath shingle laps or between tile edges. If you notice dark streaks or a damp line running exactly along a valley after rain, that is a strong sign the valley underlayment is being challenged. A gentle, safe cleaning by a pro and fresh valley flashing can stop a future leak before it starts.
Stucco to roof transitions that look hairline cracked
Where stucco walls meet the roof plane, step flashing and counter flashing must be tight. Heat and house movement can crack the thin sealant line at that junction. The cracks look harmless and are often hairline, yet wind driven rain can push water behind the stucco finish and straight to the sheathing. If paint is peeling just below that intersection inside your room, the culprit may be the roof to wall detail rather than the window. Guidance from university building experts often notes that moisture will find the path of least resistance inside cavities, which makes these lines more important than they look.
Skylights that fog, sweat, or leave faint trails
Skylights in Florida get blasted by sun and pelted by afternoon rain. Their weep holes can clog with dust, and the flashing kits can dry out at the corners. Fog between panes suggests a failed seal, while faint coffee colored trails below the skylight opening usually point to flashing rather than the glass. If you see a damp halo on the drywall only after rain, assume the flashing system needs attention soon.
Chimney chases and missing crickets
Many Florida homes use framed stucco chimney chases. If the up slope side does not have a small diversion ridge called a cricket, water can pool and creep under the flashing. Look for a smudge or algae line just above the chase on the roof surface. If present, that is water lingering where it should run free. Adding a cricket and renewing the flashing often restores a dry ceiling below.
Plumbing boots and HVAC penetrations cooked by sun
Rubber plumbing boots harden and crack faster in Florida UV. The crack usually starts on the sun facing side where you cannot see it from the yard. AC lines and bath fans often exit through the roof with hoods that rely on a thin bead of sealant under the flange. When that bead dries or lifts, wind driven rain can back up and enter at the nail line. If you find fresh stains near bathrooms or hallways, check these penetrations first.
Solar pool panels, satellite mounts, and extra fastener holes
Pool heating panels and satellite dishes are common on Florida roofs. Each bracket is a potential entry if fasteners missed a rafter or an old mount was removed without proper repair. You might not see anything from the ground, yet a slow drip inside after a storm can be the result of a single unsealed screw. A careful inspection by a licensed roofer will find and correct these small but stubborn sources.
Low slope and flat sections that pond after showers
Ponding water is a classic Florida issue on patio covers and additions with low slope roofing. Even a shallow dinner plate of water that lingers two days after rain is a red flag. Extended ponding ages the surface, opens seams, and slowly loads the deck. If the area is near a wall, look for damp stucco inside a room at the same height as the roof. Addressing drainage with tapered insulation and clearing scuppers keeps these sections dry.
Soffit intake that inhales rain
Soffit vents are there to let your attic breathe. In strong gusts, they can inhale mist and rain if baffles are missing or the vents are damaged. The result can be water stains on the exterior soffit panel and damp insulation at the eaves. If you see water spotting on soffits near corners after a storm, ask an expert to check for missing baffles and damaged vent screens. The fix is simple and prevents repeat wetting.
Granules at the downspout paired with shiny shingle patches
After a heavy shower, look at the ground near your downspouts. If you see sparkly granules, then look up for shiny or smooth patches on south facing shingle slopes. That combination means the protective mineral layer is wearing thin. Thin spots soften in heat, crack under foot traffic, and admit water at the nails. This early warning lets you plan repairs before a leak appears inside.
A quick pro tip from field inspectors
When a stain shows up on a ceiling, use painter tape to mark its edges and write the date. Check after each rain and note any changes. If the stain grows only after storms, you are likely dealing with a roof or flashing issue. If it grows during dry weather, look for HVAC condensation or plumbing first.
For a visual checklist of Florida roof trouble spots, it is helpful to compare with regional examples from professionals who focus on our climate. This homeowner guide on how to identify common roof problems outlines many of the signs you can confirm from the ground and in the attic.
Roof leak or something else
Not every ceiling spot comes from above the shingles. In Florida, air conditioners work hard and plumbing often runs through attics or chase walls. Sorting roof leaks from lookalikes saves time and money.
Air conditioning condensation that mimics a roof leak
Attic air handlers and horizontal duct runs sweat when insulation is thin or the condensate drain clogs. Drips collect on the outside of ducts and fall onto drywall. The stain often appears far from the unit because water travels along framing members. If a spot grows on hot cloudless days while the AC is running hard, suspect condensation first. A qualified HVAC tech can clear the drain and wrap the duct where needed.
Plumbing pinholes and loose fittings
Copper lines in older homes can develop pinholes. PEX fittings can loosen at bends in hot attics. These leaks are slow and constant, rather than tied to rain. If the stain keeps expanding through a dry spell, shut off fixtures one by one to isolate the line. A moisture meter can also help confirm whether the area is staying wet regardless of weather.
Bathroom fans and dryer vents that drip after cool nights
Bath fan ducts routed through the attic can collect condensation that drains back toward the fan box. Dryer vents that terminate in the attic by mistake will pump moist air into the space and create widespread dampness. If you hear a drip near a fan after a cool morning, improved duct insulation and proper venting are the fix.
Tells that point to the roof as the real source
The stain grows within hours after rain and then stabilizes on sunny days.
You find damp insulation directly above the stain and dry insulation a few feet away.
Daylight shows around a vent pipe or along the ridge when viewed from the attic.
Water marks are aligned with a valley, skylight, or roof to wall intersection.
When wind driven rain is in the forecast, knowing how roofs behave under gust loads helps. The research community at Florida International University has shown how uplift and lateral rain can exploit even tiny gaps at edges and penetrations. Their work makes it clear that sealing edges and fastening correctly are two of the biggest allies you have against leaks.
For homeowners who want a reference on what inspectors look for, the American Society of Home Inspectors publishes standards and guidance that highlight roof and flashing checks. The language can feel technical, yet it shows why small details matter as much as the big ones.
If your area is under an active advisory, local preparedness information at FloridaDisaster.org can help you time inspections and quick protective steps between storms.
When to seek repairs versus a full replacement
Every roof ages, but not every aging roof needs to go right now. In Florida the line between a smart repair and a wise replacement depends on concentration of problems, the age of the waterproofing layers, and how quickly issues are repeating. Here is a practical way to decide.
Situations that fit a well-planned repair
A few slipped tiles along one edge following a storm with no visible underlayment damage.
Hairline cracking at a single roof to wall intersection where sealant and step flashing can be renewed.
One or two plumbing boots with UV cracking but solid surrounding shingles or tiles.
A skylight with worn flashing but a sound deck and no widespread stains.
In these cases, targeted repairs restore the water barrier and buy years of service. Timely repair is also a key way to protect indoor air quality and the integrity of the deck. If you want the work handled by a crew that knows our local materials and weather, explore roof repair services as a starting point for comparing scopes and checklists, then choose a licensed local contractor you trust.
Warning signs that point to a replacement path
Widespread shingle granule loss and brittle tabs on multiple slopes.
Underlayment beneath tile that tears easily and shows sun exposure through gaps.
Repeated leaks returning in new spots after each heavy rain even after recent patching.
Deck sagging or soft spots when walked by a professional, especially near valleys and eaves.
A roof near the end of its expected service life in our climate with multiple active concerns.
Tile systems often fail at the underlayment first. From the street the tiles can look perfect while the hidden waterproof layer has aged out. Once that layer is brittle, new leaks are likely to pop up in different spots no matter how carefully you repair today. Shingle systems often give themselves away with wide areas of smooth, dark asphalt where granules once lived, plus nail heads that shine where sealants have failed. When these patterns show up across the roof, a full plan is the smarter long term move.
If your home checks several of the boxes above, it is time to discuss a thoughtful plan for roof replacement that brings your home up to current best practices. A well designed replacement can include improved underlayment, upgraded flashing at stucco transitions, and better attic ventilation to reduce heat and moisture loads.
Age and exposure matter more in Florida
Service life estimates you read for roofs are usually based on milder climates. Coastal sun, humidity, and salt shorten those figures. A shingle roof that might last longer up north can age faster here, especially on south and west faces. Tile lasts a long time visually, yet its underlayment is the real clock. If your tile roof is older and you are seeing the first interior stains, it is wise to check the underlayment before another storm season arrives. I reccomend an inspection even if the exterior appears tidy.
Risk, insurance, and code considerations
Repairs can be quick and cost effective, yet repeated spot fixes can add up and may not address aging layers that sit just below the surface. A planned replacement improves water resistance in a way that can reduce future disruption. It also gives you a chance to align with current fastening and flashing practices that have emerged from storm research. When you meet with a roofer, ask how the proposed repair or replacement will handle edges, valleys, and roof to wall details where most Florida leaks start.
If you are building an addition or considering a major remodel, tackling the roof as a system with modern materials is often the best move. Coordinating underlayment, flashing, and ventilation at the design stage avoids compromises later. You can explore the approach and materials used for durable builds on the local new construction roofing page to set expectations for what a resilient assembly looks like.
Material choices that help in our climate
Cool color tile, reflective shingles, and high performance underlayments reduce heat gain and slow aging. For an overview on reflectivity and performance ratings, the Cool Roof Rating Council explains how roofs reflect and emit heat. While energy is a bonus, the real win here is that lower temperatures help sealants and membranes last longer in Florida sun.
A quick checklist to prepare for your decision
List every symptom you have noticed with dates and photos.
Note whether each spot grows after rain, dry weather, or AC usage.
Ask a licensed roofer to check valleys, penetrations, and roof to wall intersections first.
Request a repair scope and a replacement scope so you can compare outcomes and service life.
Confirm that all work will include attention to attic airflow and moisture control, since both affect long term durability here.
If you have been tracking stains and odors, and the pattern points to roof related moisture, getting on a roofer’s schedule before the next busy storm stretch is the safe play. Florida’s weather rewards early action, and small fixes today often prevent bigger jobs tomorrow.
A step by step Florida roof leak inspection you can do this weekend
You do not need specialized tools to catch early leak clues. You do need patience, a phone camera, and a plan that respects Florida heat and sudden rain. Here is a homeowner friendly routine that fits a Saturday morning and helps you speak clearly with a roofer afterward.
Step 1. Walk the exterior slowly after a rain
Move around the home at ground level. Look up along eaves, valleys, and any place the roof meets a wall. Note anything new since last season. Take photos from the same spots so you can compare later. If you see pooled water on low slope sections or patio roofs that remains a day after showers, mark those locations.
What to note in Florida light
Dark streaks or algae lines that trace a valley or stop at flashing.
Slipped tiles near edges that face the usual wind direction.
Shiny smooth shingle patches on south or west slopes that hint at granule loss. The Asphalt Roofing Manufacturers Association explains why granules matter for weathering and UV protection. See their homeowner resources at the Asphalt Roofing Manufacturers Association.
Step 2. Check gutters, downspouts, and ground splash areas
Granules at downspouts tell you shingles are aging fast. Overflow marks on fascia suggest gutters are clogged or undersized for Florida cloudbursts. If you see staining beneath a gutter corner, the leak may be at the end cap rather than the roof above. Clean gutters safely or schedule help if heights are not your thing.
Quick tip
Place a light colored tray under each downspout before a storm. After the rain, look for sand like granules in the trays. If present, photograph and save for your roofer.
Step 3. Peek at soffits and vents
Look for water spotting on soffit panels near corners. A damp fan or gable vent can mean wind driven rain is entering and dripping back. Missing baffles or screens are common and very fixable. Mark these with painters tape so you can show a pro later.
Step 4. Inspect from the attic during cooler hours
Enter only if it is safe. Bring a flashlight, a mask, and a partner who stays below. Focus on the following.
Dark rings around nails that suggest seepage at fasteners.
Damp insulation directly above a stain and dry insulation a few feet away.
Daylight peeking at ridge vents or around plumbing stacks.
Wet sheathing near roof to wall intersections.
If you discover moisture or a musty odor, remember that mold can affect indoor air quality. For a health focused overview that helps you decide when to clean and when to call a pro, review the guidance from the American Lung Association.
Step 5. Perform a gentle water test only if needed
If the weather is dry and you are trying to confirm a suspect spot, you can run a garden hose gently on a small section of the roof while a partner watches the attic. Limit the test to a few minutes at a time and start low on the slope. Never blast water upward against shingles or tiles. Stop immediately if water appears inside. Photograph the result, then call a roofer for a controlled repair.
Step 6. Create a simple log
Write the date, weather, and any changes you noticed. Add photos. This log turns into a powerful tool if you need warranty support or are preparing a repair plan.
Exact moments to call for help during storm season
Florida weather can change in hours. Some signs are mild annoyances. Others need fast action so a small leak does not become a ceiling repair.
Call today if you see any of the following clusters
A ceiling stain that grows within the same day as a storm along with a wavy ridge line.
A musty odor plus peeling paint at a roof to wall intersection.
Slipped tiles or missing shingles after a named system or strong line of thunderstorms.
Ponding water that lingers longer than two days on any flat or low slope area.
A soft spot in the roof deck discovered by a professional, especially near valleys.
For urgent situations where you need temporary protection until the weather clears, the American Red Cross hurricane safety guidance lists practical steps to stabilize a home and keep your family safe while you arrange professional repairs.
If you suspect structural stress
Sagging, cracking sounds during high winds, or doors that suddenly stick after a storm deserve immediate attention. South Florida contractors highlight red flags for deck or truss problems in this overview of signs your South Florida roof could collapse. If any of those patterns match your home, leave the area below the sag, do not enter the attic, and call a licensed roofer at once.
Florida specific warning signs that escalate quickly
Local roofers stress that sunlight and humidity turn tiny problems into bigger ones quickly. A concise checklist from Stay Dry Roofing FL calls out warped shingles, damaged flashing, moss on exterior walls, and rising energy bills as early indicators that the roof system is compromised. If your power usage ticked up but your routine did not, that may be a roof and insulation story rather than HVAC alone.
Simple maintenance that actually works in our climate
You can extend the life of your roof by focusing on small tasks that pay off in heat, humidity, and wind. These methods are boring, which is exactly why they work.
Keep valleys and drains free of debris
Valleys and internal drains are the first lines of defense during downpours. Clear leaves and seed pods before the rainy season. If your home collects oak leaves and palm fronds, increase the frequency in late spring. Where access is unsafe, hire a service and ask them to photograph before and after so you can verify results.
Two small habits
Inspect valley lines visually after the first big summer storm.
Schedule a quick clean if streaks or damp lines appear exactly along the trough.
Trim trees that touch or overhang the roof
Branches that brush tile or shingle surfaces scuff protective layers and drop organic litter that holds moisture. Keep limbs clear of the roof plane and allow air to move freely. This also cuts down on ant and rodent highways into soffits. It sounds obvious, yet it saves more roofs than you might think.
Renew sealant at roof to wall transitions
Sealant lines at step flashing and stucco transitions crack with movement and heat. Renewing the sealant with a product compatible with your materials prevents wind blown rain from sneaking behind the cladding. A licensed roofer can confirm the correct sealant for your assembly. DIY sealant in the wrong place can trap water rather than exclude it.
Verify attic ventilation and insulation
A balanced attic keeps temperatures and moisture in check. Adequate intake at soffits and clear exhaust at ridges prevent heat buildup that cooks underlayments and dries out sealants. Good insulation helps stabilize indoor conditions and reduces condensation on ducts. For moisture control principles that apply to every home, see the plain language overview from the Building Performance Association.
Confirm that bathroom and dryer vents terminate outdoors
Bath fans and dryers should never exhaust into attics. In our climate that mistake produces persistent dampness and molds quickly. If you discover a loose duct or an attic termination, have it corrected right away.
After every strong storm, run a mini checklist
Walk the exterior and photograph anything new.
Look for lifted tiles, missing shingles, and bent or missing ridge pieces.
Check ceilings and top of closets for new halos or drip marks.
Open the attic briefly to confirm dry insulation near penetrations.
Update your log with anything new so patterns are easy to see.
For a Florida focused list of homeowner leak checks and field photos that help you compare what you are seeing, this guide on how to detect a roof leak can be a quick reference while you gather notes.
Timelines and costs, what to expect in Southwest Florida
Every home and roof system is unique, so treat the figures below as planning ranges rather than promises. Weather, access, material type, and the extent of hidden damage all influence schedules and pricing.
Typical timelines
Visual inspection by a licensed roofer usually takes one to two hours. You will often receive findings the same day along with photos.
Emergency tarping to control active leaks is commonly handled the same day if crews are available.
Small repairs such as replacing a few slipped tiles, resealing a single roof to wall transition, or installing new plumbing boots often fit into a single visit.
Larger repairs that involve underlayment replacement in a valley or around a skylight may take one to two days depending on deck condition and weather.
Full shingle replacements are commonly completed in one to three days once permits and materials are ready. Tile replacements take longer because of underlayment work and tile handling.
During peak storm periods, schedules fill fast. Booking early when you first see signs gives you better options and prevents rush decisions that can cost more later.
Cost factors that Florida homeowners should watch
Location of the leak. Valleys, roof to wall intersections, and penetrations are more labor intensive.
Roof material and pitch. Tile repairs cost more than shingle due to handling and underlayment complexity.
Access and height. Multi story homes require more setup and safety time.
Extent of hidden damage. Wet decking or compromised trusses increase both time and materials.
Scope bundling. Tackling several small issues in one scheduled visit can lower per item cost.
A careful inspection that documents conditions with photos and a clear scope is the best way to avoid surprises. If a quote lacks detail, ask for a breakdown by task so you can compare apples to apples. If you are unsure which items are needs versus nice to haves, a reputable local roofer will explain priorities in plain language. If the explanation is fuzzy, ask again. Clarity now avoids misunderstandings later.
Florida roof leak FAQs
How do I tell a roof leak from HVAC condensation
If a stain grows on hot sunny days while your air conditioner is running hard, start with the AC. If the stain changes shape right after rain, the roof is more likely. The pattern over time is the clue.
Can I wait until the end of hurricane season to repair a small leak
That is risky. Heat and humidity can turn a small intrusion into a mold problem quickly. Early repairs protect both your roof and your indoor air. For family health considerations related to moisture and mold, the American Lung Association offers practical tips on when to seek professional help.
My tile roof looks perfect from the street, why do I still have leaks
Tile is the sun shield. The hidden underlayment is the waterproof layer. Once the underlayment ages out, water can travel beneath beautiful tiles and appear far from the source.
Are roof stains on exterior stucco always from the roof
Not always, though many are. Roof to wall flashing is a common culprit. Window leaks and stucco cracks can also contribute. A licensed roofer and a qualified exterior contractor can work together to trace the path.
Is it safe to walk on my roof to inspect it
Tile can crack underfoot and shingle granules can be slippery. In Florida heat, surfaces get very hot. It is safer to stay on the ground and in the attic. Leave roof walking to trained crews with the right shoes and safety gear.
What is the best time of year in Southwest Florida for a replacement
Cooler months offer comfort for crews and usually fewer afternoon downpours, which can help with scheduling. That said, a well managed crew can complete quality work any month. The best time is the month before a small leak becomes a big one.
Will a new roof help my energy bills
Often yes. Reflective shingles and cool color tile reduce heat gain. Better underlayment and sealed transitions lower attic temperatures. For general preparedness and energy wise home steps that help during storm season, review community resources like the American Red Cross hurricane safety.
How long should a Florida inspection take and what should it include
Plan on one to two hours. A thorough inspection includes photos, a look at valleys and penetrations, checks of roof to wall flashing, and a peek at the attic for fastener marks and wet insulation. You should leave with a clear set of next steps and a timeline.
From worry to plan, your next best step
If you have a stain that changes after rain, a faint musty odor in a hallway, or a line of slipped tiles after last week’s squall, you are not imagining it. Florida makes tiny roof problems grow faster than in most places. You now have a checklist, a log template, and a clear sense of when to call for help. The final move is simple. Reach out to a trusted local roofer, share your notes and photos, and ask for a focused inspection that prioritizes long term performance. The team at San Carlos Roofing has spent decades repairing and replacing roofs in Southwest Florida weather, which means they have seen your exact pattern many times before. A short visit now can save drywall, flooring, and a lot of stress later.
If you are still unsure, open your log and add one line today. The habit of recording what you see is a quiet superpower. It turns worry into a plan, and a plan into a dry, calm home. And that is the goal, right.
Roof replacement is a substantial investment, with costs varying based on multiple factors. Comprehending these factors can aid homeowners in better budgeting. Here, San Carlos Roofing shows how we dissect the main components that affect the pricing of roof replacement and offer a basic cost guide. San Carlos Roofing does not perform “overlays” for re-roofing projects as we believe it harms the integrity of the roofing system.
Roof Size and Slope
Square Footage: The dimensions of your roof play a crucial role in determining its cost. Roofing contractors generally charge by the square foot or by the “square,” which is equivalent to 100 square feet. A larger roof necessitates more materials and labor, which in turn raises the total expense.
Slope and Complexity: Working on steeper roofs can be more difficult and often necessitates extra safety precautions, which can result in increased labor expenses. Additionally, intricate roof designs featuring numerous angles, peaks, and valleys may raise the overall cost owing to the extra time and expertise required.
Roofing Material
Asphalt Shingles: Asphalt shingles are a prevalent and economical choice for roofing, typically priced between $100 to $400 per square. They are available in various grades, with the cost increasing for higher-quality selections. For more detailed information on roofing materials and their costs, resources such as The Spruce and Forbes offer comprehensive guides.
Metal Roofing: More durable and energy-efficient, metal roofs cost between $300 and $1,200 per square, depending on the type of metal used (aluminum, steel, copper).
Tile Roofing: Clay or concrete tiles are durable and aesthetically pleasing but come at a higher cost, ranging from $600 to $1,500 per square.
Labor Costs
Location: Labor costs vary significantly based on your geographic location. Urban areas or regions with a high cost of living generally have higher labor rates than rural areas.
Experience and Skill: The reputation and experience level of the roofing contractor also influence labor costs. A well-established contractor with a proven track record may charge more for their expertise.
Roof Removal and Disposal
Tear-Off vs. Overlay: If your new roof is being installed over an existing one (overlay), it’s generally cheaper. However, if the old roof needs to be torn off, expect additional costs for labor and disposal fees. Tear-off costs can range from $1 to $5 per square foot.
Disposal Fees: Removing and disposing of old roofing materials incurs disposal fees, which vary depending on the type and volume of material.
Roof Underlayment and Accessories
Underlayment: A protective layer beneath the roofing material, underlayment options include basic felt or more expensive synthetic materials, adding $0.50 to $3 per square foot.
Flashing and Ventilation: Replacing or installing new flashing, vents, and other roof accessories can increase costs by $200 to $500 or more, depending on the complexity.
Permits and Inspections
Building Permits: Many areas require permits for roof replacement, with fees ranging from $50 to $500. This cost depends on your location and the scope of the project.
Inspections: Some local regulations require post-installation inspections, which may add a small cost, typically around $100 to $300.
General Pricing Guide Based on the factors above, the cost of a roof replacement can vary widely:
Three-Dimensional Asphalt Shingles: for an average home size – $10,000 to $20,000
Metal Roofing: $18,000 to $25,000
Tile Roof: $20,000 to $30,000
The expense of replacing a roof varies based on several factors, such as the roof’s size and intricacy, the materials selected, and the local labor costs. Although it represents a significant investment, comprehending these factors can aid in effective budgeting and selecting the most suitable options for your residence and finances. It is advisable to secure several estimates from trustworthy contractors and confirm that all expenses are explicitly detailed prior to initiating the roofing work. Start your search with San Carlos Roofing.
Living in Southwest Florida means sunny beaches, warm winters, and, yeah, hurricanes. When those storms roll in, your roof takes the brunt of it. Winds howl, rain pounds, and stuff flies through the air like it’s auditioning for a disaster movie. But here’s the thing. You don’t have to just cross your fingers and hope your roof holds up. San Carlos Roofing offers some smart hacks, so you can toughen it up to face whatever Mother Nature throws your way. Let’s dig into some practical, no-nonsense ways to get your roof hurricane-ready.
First off, check your shingles. Loose ones are a problem. They flap around in high winds and peel off like old stickers. Grab a ladder, climb up, and look for anything curling, cracked, or missing. If you spot trouble, don’t wait. Replace them. Use roofing cement to glue down the shaky ones. It’s cheap, quick, and beats losing half your roof in a storm. A buddy of mine ignored a few loose shingles once. Next hurricane, his attic turned into a swimming pool.
Next, think about your roof straps. These metal bands tie your roof to the walls. Older homes down here might not have them, or they’re rusted out. Hurricanes love picking up weak roofs and tossing them like frisbees. Get a pro to inspect yours. If they’re missing or shot, add some. It’s not a weekend DIY job, but it’s worth every penny when the wind starts screaming.
Gutters matter too. Clogged ones are a sneaky enemy. Water backs up, seeps under shingles, and rots everything. Before storm season, scoop out the leaves and gunk. Takes maybe an hour. Do it. I learned this the hard way when my overflowing gutters dumped water straight into my living room. Not fun. Oh, and while you’re at it, make sure they’re screwed tight to the house. Loose gutters flop around and bang up your roofline.
Now, let’s talk trees. Those big oaks and palms look great until a hurricane snaps a branch and sends it crashing through your roof. Trim them back. Keep limbs at least ten feet from the house. Hire someone if you’ve got tall ones, it’s safer. Last year, my neighbor’s untrimmed tree took out his skylight. Glass everywhere. What a mess.
Ventilation’s another biggie. Roof vents, like the turbine ones that spin, can turn into wind catchers. A strong gust rips them off, and suddenly you’ve got a hole letting rain pour in. Swap them for low-profile vents. They’re flatter, tougher, and don’t budge as easy. Costs a little more upfront, but beats patching a soggy ceiling later.
Ever thought about impact-resistant shingles? They’re built to take a beating from flying debris. Regular shingles crack when a branch or a random lawn chair slams into them. The impact ones shrug it off. They’re pricier, sure, but if you’re in a spot like Naples or Fort Myers where storms hit hard, they’re a game-changer. Plus, some insurance companies cut you a break on premiums if you’ve got them.
Metal roofs are worth a look too. They’re not just for barns anymore. Down here, folks are switching to them because they stand up to wind like champs. A good metal roof can handle 140-mile-per-hour gusts. That’s Category 4 territory. Installation’s not cheap, and it can be a bit noisier, but with the right underlayment or acoustic insulation panels it’s not too loud when it rains. More importantly, you’ll sleep better knowing your roof’s not going anywhere.
Don’t skip the flashing. That’s the metal strips around chimneys, vents, and skylights. If it’s loose or cracked, water sneaks in fast. Check it every year. Grab some caulk and seal any gaps you find. Takes ten minutes. I forgot to do this once, and a little leak turned into a big headache after a storm.
Here’s a hack most folks miss. Strap down your roof trusses. Inside your attic, those wooden beams hold everything together. Metal straps or clips can lock them to the frame of the house. It’s like giving your roof a seatbelt. San Carlos Roofing can knock this out in a day. Costs a few hundred bucks, but it’s a solid move for hurricane prep.
Windows get all the attention during storms, but your roof’s the real MVP. Board up the glass if you want, but a blown-off roof wrecks the whole house. Water, wind, mold, you name it. So, focus here first..
Let’s talk sealants. Roof leaks start small. A tiny gap lets water drip in, and before you know it, your insulation’s soaked. Hit the hardware store for some roofing sealant. Brush it over seams, nail heads, anywhere stuff might creep through. It dries fast and holds tight. I do this every spring, and it’s saved me more than once.
What about skylights? They’re cool until a hurricane turns them into a weak spot. Older ones shatter easy. If yours are ancient, replace them with impact-resistant versions. They’re thicker and can take a hit. If that’s not in the budget, at least tape them up with heavy-duty stuff before a storm. Better than nothing.
One last trick. Clear your yard. Lawn furniture, grills, kids’ toys, they all turn into missiles in 100-mile-per-hour winds. Anything that smacks your roof can punch a hole. Drag it inside or tie it down. My old patio chair once flew into the neighbor’s shingles. Oops. Lucky it didn’t hit mine.
Southwest Florida hurricanes don’t mess around. You’ve seen the news, roofs peeled back, homes gutted. But with some elbow grease and a few bucks, you can fight back. Start small. Check your shingles, clean those gutters, trim the trees. Then, if you’ve got the cash, go bigger, straps, metal roofing, the works. It’s not about outsmarting the storm. It’s about outlasting it.
Why Hurricane-Proofing Your Roof Pays Off
Let’s wrap this up with a little extra motivation. You’re not just nailing down shingles or slapping on roof straps for fun. There’s real payoff here, especially in Southwest Florida where storms hit hard and fast. Hurricane roof prep isn’t just about surviving the next big blow, it’s about saving cash, stress, and your sanity down the road.
Picture this. A storm’s brewing off the Gulf, and you’ve already got impact-resistant shingles locked in. While your neighbor’s scrambling to tarp a busted roof, you’re kicking back, knowing debris won’t turn your ceiling into Swiss cheese. Those shingles don’t just block branches, they cut repair bills. Insurance folks love them too. Some companies shave a chunk off your premium when you upgrade. That’s money back in your pocket every year, not just when the wind howls.
Then there’s the peace of mind. Roof straps and sealed flashing mean you’re not lying awake wondering if your roof’s about to peel off. Hurricanes are loud enough without that worry rattling around your head. A solid roof keeps the rain out, the mold away, and your home standing. No rushing to find a contractor in the chaos after a storm. You’ve already got it handled.
Oh, and resale value? Buyers down here know hurricanes are part of the deal. A house with a beefed-up roof, think metal roofing or strapped trusses, stands out. They’ll pay extra for a place that’s ready to ride out the season. It’s not just a fix; it’s an investment.
So, yeah, it takes some work. Maybe a little cash upfront. But hurricane roof prep, impact-resistant shingles, and roof straps aren’t just hacks, they’re your ticket to less hassle and more security. Next time the weather guy starts waving his arms about a Category 3, or worse, you’ll be the one smirking instead of sweating.
Summer in Southwest Florida is no joke. The sun beats down hard, rain rolls in fast, and storms? They can come out of nowhere. Your roof has a big job. It takes the hit so your home stays safe and dry. But if you haven’t checked on it lately, summer might bring more than just heat. It could bring leaks, mold, and stress you don’t need.
Here’s how to get ahead of it all. San Carlos Roofing offers these few simple steps that can save you money later and help your roof last a whole lot longer.
You don’t have to climb up there. Just step back and take a look. Do the shingles look even? Are there any that are curled or missing? Do you see dark patches or streaks? These can all be signs of damage.
Also, check for sagging. If the roofline isn’t straight, that’s not good. It could mean trouble under the surface. If something seems off, don’t ignore it. Make a note and plan to have someone take a closer look.
Clean Out the Gutters
It’s boring, but it matters. When your gutters are full of leaves or muck, water can’t flow the right way. Instead, it backs up under your roof. That’s when leaks start.
Southwest Florida gets a ton of rain in the summer. Your gutters need to be ready for it. Clean them out now and check that the downspouts point away from the house. If you see cracks or sagging in the gutters, fix them before storm season kicks in.
Look for Signs of Water Damage
Check your ceilings. Look in the attic. Any stains, peeling paint, or soft spots could mean there’s a leak. Even if it seems small now, it’ll only get worse once the summer rains hit.
It’s not always easy to spot water damage. Sometimes the signs show up slow. A musty smell in the attic can be a clue. So can warped wood or insulation that feels damp.
If you find anything, call a pro. The longer you wait, the more expensive the fix can get.
Check the Roof Vents
Your roof needs to breathe. Vents let hot air escape from the attic. That helps keep your house cooler and stops moisture from building up inside.
When vents are blocked, it gets stuffy. And hot. That trapped heat can mess with your shingles. It can also raise your electric bill fast.
So take a peek. Are the vents covered in leaves or bird nests? Is the screen torn? Clean them out and make sure air can move freely.
Trim Nearby Trees
Overhanging limbs might look nice, but they’re bad news during storm season. Branches can fall on the roof or scrape against shingles when the wind picks up. Even small limbs can break loose in a summer storm.
Cut back anything that hangs too close. While you’re at it, check for trees that lean or look weak. Strong storms and soggy ground can make them fall over without much warning.
Get a Professional Roof Inspection
Even if your roof looks fine, a pro can catch stuff you might miss. They’ll check for weak spots, loose nails, cracked flashing, and soft areas where water can sneak in.
In Southwest Florida, it’s a good idea to get an inspection every year, especially before hurricane season. A licensed roofer knows what to look for and can tell you if repairs are needed.
Plus, catching problems early often means smaller bills. Waiting until something breaks? That’s when it gets pricey.
Got a few missing shingles? A small drip in the attic? Fix it now. Little issues turn big fast when storms roll through.
Summer rain doesn’t give your roof a break. It pours. Over and over. Even a tiny crack can let water in if it gets hit hard enough or long enough.
Don’t wait for it to fail. If you already see something that needs fixing, handle it before the season gets wild.
Consider Upgrades if Your Roof Is Old
If your roof is over 15 years old and you’ve had a few issues already, it might be time to think about replacement. It’s not the cheapest fix, but it might be the smartest one.
New roofing materials are tougher. Some reflect heat better. Others hold up stronger in wind. In Florida, that matters.
And here’s something else to think about. Insurance companies in Florida look at your roof’s age. If it’s too old, they might raise your rate—or drop you.
Stay on Top of Roof Maintenance
It doesn’t take much to keep your roof in good shape. Just a few simple checks every season, and quick repairs when needed.
Clean the gutters. Trim the trees. Look for signs of wear. And when in doubt, ask someone who knows what to look for.
Your roof is one of the biggest parts of your home. Treat it like it matters, because it does. If any of these things seem a bit overwhelming give San Carlos Roofing a call. We have a team that specializes in helping locals get ready for the soon to be on us storm season.
Why Regular Roof Maintenance Pays Off in Southwest Florida
Taking care of your roof isn’t just about avoiding big repairs. It’s about protecting your whole home. With affordable roof maintenance in Southwest Florida, you can avoid major damage, lower your energy costs, and stay ready for hurricane season without breaking the bank.
Quick roof checkups and simple storm prep tips can make a huge difference when summer hits. By acting early, you avoid the last-minute scramble and expensive emergency repairs that often follow heavy rain and wind. Plus, a well-maintained roof can boost your home’s value and help keep your insurance rates in check.
If you want peace of mind this summer, don’t wait until it’s too late. Plan ahead, make smart fixes, and enjoy knowing your roof is ready for whatever the season brings.